So, you’ve finally worked your way up to smoking a brisket on your Big Green Egg? The smoked brisket is one of the most difficult challenges in barbeque, but it’s totally worth the effort. Big Green Eggs are one of the most amazing insulated grills on the market, which means you can smoke brisket year-round. However, slow smoking a brisket on your BGE is the simple part; what separates the pros from the weekend warriors is preparation. I wanted to find out how to cook competition style brisket on a Big Green Egg, so I did some research and went deep into the world of Eggheads to find out.
1. Choose Your Brisket
Buying the right brisket is probably the most important step in the brisket smoke. If you select poor quality meat, all the techniques in the world won’t save it. The key to buying a good brisket lies in the marbling, the fatty striations in meat. When meat cooks, the marbling melts and makes the meat more flavorful and juicy.
If you are cooking for a crowd, defiantly buy the highest quality you can afford. If you must buy the cheaper meat, at least know what to look for. Buy a brisket with fat under the flat if possible because this part of the brisket can dry out easily. Most of the fat cap will come off, but you want to keep a thin layer of fat on top.
2. Trim Your Brisket
Trim most of the fat off the brisket, but leave a thin layer on top. Everyone has their own way of trimming brisket, but I like to leave 1/4 of a layer on the fat cap. Leave the fat on the underside of the point because this section can dry out easily. If you leave too much fat on top, the smoke won’t penetrate the meat, but you want most of the fat removed to get a better bark.
3. Inject
Injecting extra fluid into the brisket is optional, but if you want competition style brisket, injecting the meat with a marinade or bone broth is an important step. Meat injectors are an essential tool if you want to take your barbeque to the next level, and you don’t have to spend much money. You can buy affordable injectors on Amazon, and they are easy to use. For more information on the best brisket solutions for injecting, check out an article I write a while back: Should I Inject Brisket?
4. Brine
The brine is another important step if you want a moist and flavorful brisket. Adding salt to the brisket and giving it time to work its way into the meat will not only give it a flavor boost, but it will also help the meat hold in moisture while its cooking. To brine the brisket, rub kosher salt or sea salt into the meat, covering all parts. Cover the brisket, then leave it in the refrigerator overnight. However, if your rub contains salt, you may end up with a salty brisket.
5. Slather
Before you apply the rub to your brisket, apply a binder to the meat so the rub sticks. If you don’t use a binder, you may end up with a patchy bark. I like to use yellow mustard or olive oil, mostly because they are what I have on hand. You won’t be able to taste the mustard on the brisket, so don’t overthink this step. The object of the slather is to make the rub stick, that’s all.
6. Rub
Give the brisket an even layer of rub, covering the entire roast. If you want the rub to stick, apply a binder or wet the brisket with water. You can go as wild or as simple as you like with the barbeque rub. You can use a store-bought rub or you can make your own. The most basic rub is a salt and coarse black pepper rub. From there, you can add a little garlic powder, onion powder or paprika. For a full homemade recipe, check out my complete guide to brisket rubs. I’ll walk you through the best homemade rub recipes and provide links to some of the best store-bought rubs made by world famous pitmasters.
7. Wood
Brisket can handle any smoking wood, so I wouldn’t worry too much about what wood to use. Hickory, post oak and mesquite are a perfect match for brisket. So to is pecan, maple or mix-and-match any wood combination. Mesquite will give the brisket a real Texas flavor, but you may find this wood to be bitter.
8. How To Light Your Big Green Egg For Low-and-Slow Brisket
- Open the bottom vent all the way when lighting the fire. Later we will adjust the vent as soon as we place the brisket on the grill.
- Take the smaller pieces of lump charcoal and fill the BGE to the first ring.
- Place some larger pieces of lump charcoal into the middle and stack them upright.
- Place a fire lighter underneath the large pieces of charcoal in the middle, or use an automatic igniter.
- Allow 20 minutes for the pile of large coals to have formed a nice fire bed.
- Once the large coals in the middle of the egg are fully ignited, spread out the lit coals using a fire tool.
- Place about 4 wood chunks around the coals, spreading them out. We want a consistent smoke over several hours, so place one chunk in the middle and scatter the rest of the wood around the fire.
9. Insert The Diverter Plate
Once the fire is going and the wood is smoldering, take your ceramic diverter plate and place it on top of the fire. The diverter or plate setter is an important EGGcessory if you want to do slow roasting. If you don’t have a diverter, I recommend getting one. The diverter works as a heat deflector to protect the meat from direct heat.
As with all low-and-slow cooking, we want to set up our grills and smokers for indirect cooking by either placing the meat on the opposite side of the fire, or by using heat deflectors. Ceramic cookers like the Big Green Egg get hot fast which can be disastrous for your brisket. The number one reason your brisket will dry out is high heat. You need to hold that temperature at 220°F to 250°F for 10 plus hours, so the Egg Diverter is an important accessory.
10.Water Pan
A water pan is another way to help keep the temperature in the low range. Adding water will also create moisture to circulate around the BGE, and attract smoke, which will make for a smokier brisket. A water pan is optional, not everyone uses one in their kamado. However, if you are finding it difficult to keep the temperature low enough for slow roasting, then insert a water pan. If you are using water, you need to check the water pan regularly, and top it up as needed.
11. Adjust The Vents
Vent adjustments are extremely important when doing low-and-slow cooks like brisket. When lighting our coals, we want all the vents open to get the fire going. Once the BGE has come up close to our target temperature, we need to wind back the vents and stabilize the temperature between 220°F and 250°F.
- Close the top vent so it is open just a crack. This will be enough for the gases to escape and protect our brisket from being exposed to any bad smoke.
- Close the bottom vent so it is open about 1-inch. This will provide adequate airflow to hold the fire in the 250°F range.
12.Mopping/Spritzing
Mop or spritz your brisket every hour until the meat reaches the wrapping stage. Spray bottles are the easiest way to spritz brisket, and you can use apple juice, beer, or apple cider vinegar. A spritz is the best option if your liquid is simple. If you want to make a mop sauce with spices, and there are dozens of mop sauce recipes available online. If you want to apply a mop sauce, you will need a mop and bucket because spices will block the nozzle on the spray bottle.
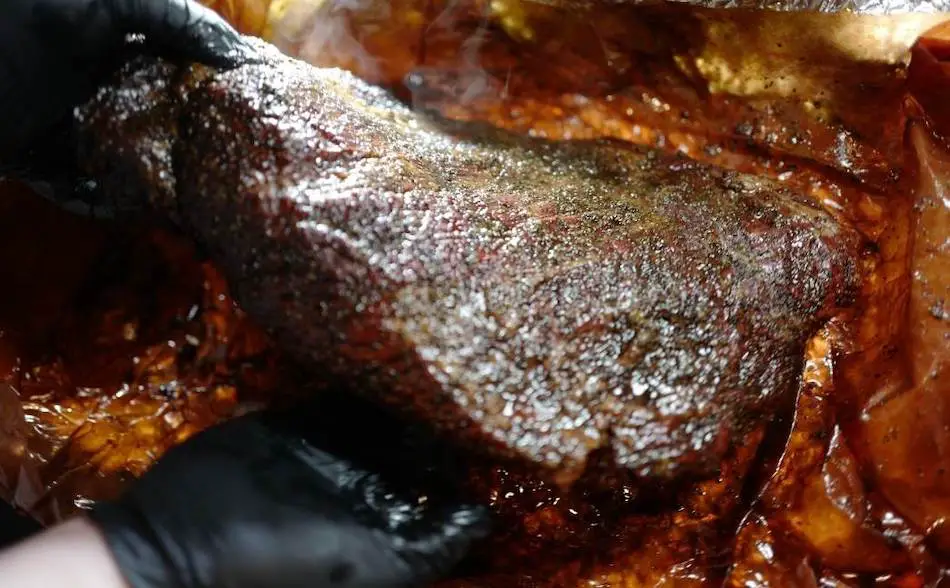
13. Wrap
After about 5 or 6 hours into the cook, the brisket bark should have a nice dark color to it, and it should be firm. Check the internal meat temperature and make sure it’s around 150°F. Once you’re happy with the bark, it’s time to wrap. Cut three layers of heavy duty aluminium foil and tightly wrap the brisket. Before you seal the foil, mop or spritz the brisket to add some extra liquid. You can also use peach paper (butcher paper), and I find the paper makes for a better bark and allows the meat to breathe more. For more info on wrapping briskets, check out this article.
14. Brisket Done Temp
You can pull the brisket from the heat anywhere from 200°F, but the best done temperature for brisket is 203°F. At this internal temperature, the brisket will be its most tender and juicy if you have done everything else right. Use an instant-read thermometer to verify different parts of the brisket, because the thinner flat will show a different reading to the thicker point. Be careful during the final stage of the cook because the temperature can climb fast. When the brisket is showing readings in the 190°F range, check every 5 or 10 minutes so that it doesn’t exceed 203°F.
15. Rest
If you are going to slice and eat straight away, first let the brisket rest for 30 minutes to an hour. This will give the meat time to allow the juices to settle. If you slice too early, the meat will be dry. Resting is one of the most important steps if you want to serve tender, juicy brisket. If you aren’t ready to slice and serve, put the brisket into holding.
16. Hold
If you aren’t ready to slice, place the brisket into holding. To hold a brisket, keep the meat in the wrapping and then wrap a towel around the outside. Then place the brisket in a dry cooler. It’s a good idea to leave your remote thermometer inserted into the meat so you can track the temperature. You can hold a brisket for up to 10 hours and it will still be hot. However, meat shoudn’t be left out this long, and could become a breeding ground for bacteria.
17. Slice
When slicing brisket, first identify which way the grain is running. For the best results and for more tender meat, you should always slice against the grain. If you and your guests are not going to eat an entire brisket in one sitting, then don’t slice the whole thing. When reheating brisket leftovers, slices of brisket tend to be very dry.
My Favorite Brisket Tools
Thanks for checking out this article. I hope you learned a few things. Here are some of my favorite tools I use when smoking brisket that may be useful to you. These are affiliate links, so if you decide to purchase any of these products, I’ll earn a commission. But in all honesty, these are the tools I recommend to my family and friends who are just starting out.
Meat Injector: Injecting meat is a great way to take your barbecue to the next level and help you make competition-style brisket. An injector is the only way you will be able to get flavor and moisture into the middle of the meat. The Beast Injector is a stainless steel injector that is sturdy and affordable. Check the latest price on Amazon here.
Brisket Marinade: The best injection solution on the market is the Butcher BBQ Brisket Injection. This marinade is used in competitions and is made by World Barbecue Champion pitmaster, Dave Bouska. You can find the marinade on Amazon here.
Butcher Paper: Wrapping brisket in butcher paper has become a huge trend in barbeque thanks to Aaron Franklin. Wrapping your brisket in paper will give you a nice brisket bark. However, you can’t just use any old paper, it has to be unwaxed, food grade paper. You can find it on Amazon here.
Brisket Rub: These days I make my own rub when possible, but I always have a few pre-made rubs for when I’m running low. Barbecue guru Malcom Reed produces Killer Hogs, one of the best brisket rubs I’ve found over the years. Another great rub is Slap Yo Daddy, made by brisket master and multiple World Barbecue Champion, Harry Soo.
Meat Thermometer: There are dozens of fancy thermometers on the market, but I still use my trusty TP20. For around $50, I have a high-quality meat thermometer with two probes, and can track the temperature of my smoker with one probe, and my meat with the other probe. The ThermoPro TP20 is an Amazon Best Seller because it’s the easiest thermometer to operate, is durable, highly accurate, and comes with pre-programmed meat settings.
Instant Read Thermometer: Arguably, the second most important tool you need is a fast and accurate instant-read thermometer. These tools play an important role in the latter stages of the cook when the meat needs regular checking in multiple areas. I use the ThermoPro TP19 because it can do everything a ThermaPen can do, but for a fraction of the cost. You can check out the TP19 on Amazon here.
Advanced Thermometer and Automatic Temperature Controller: Once you’re ready to take things seriously, the FireBoard 2 Drive is a six-channel Bluetooth/Wi-Fi thermometer that can monitor up to 6 pieces of meat, control and graph your cook sessions on your smartphone, and attaches to an an automatic blower that will convert your charcoal smoker to a set-and-forget. This is one of the most advanced meat thermometers on the market. You can check it out on the FireBoard website here.