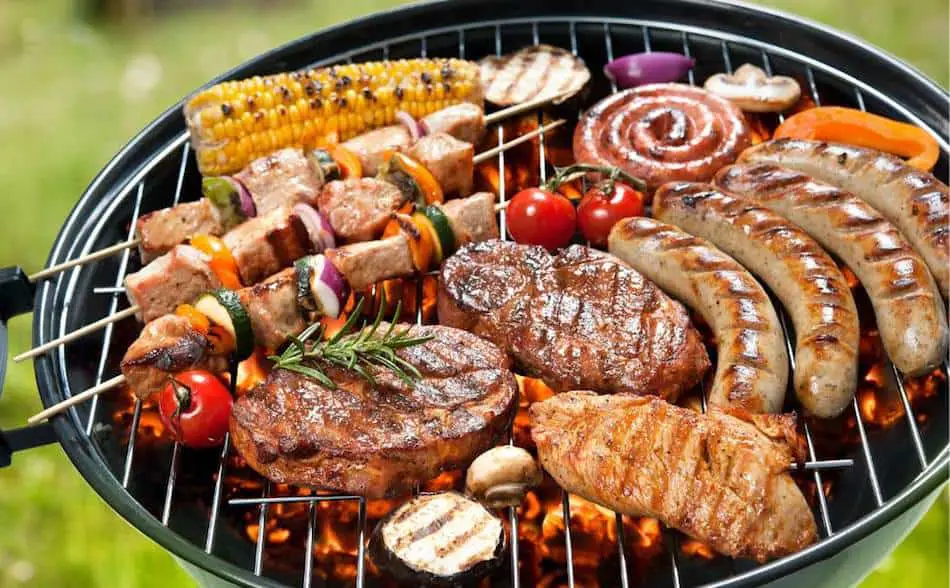
Welcome to our comprehensive guide on grilling for beginners – your pathway to becoming an outdoor cooking aficionado. In this article, we delve into the top 10 essential tips that will elevate your grilling skills from novice to maestro. We explore a range of topics, including mastering your grill and heat management, choosing the finest cuts of meat, infusing unique flavors, and even venturing into grilling vegetables and fruits. Upon completing this guide, you’ll possess the knowledge and techniques to dazzle your friends and family with delectable grilled creations.
To master the art of outdoor cooking as a beginner, start by familiarizing yourself with your grill and understanding the difference between direct and indirect heat cooking methods. Invest in essential grilling tools like a reliable thermometer, tongs, and a good grill brush, and learn to control the heat for even cooking. Select high-quality cuts of meat and prepare them with flavorful marinades or rubs, and don’t forget to also grill vegetables and fruits for added variety. Practice safe food handling, let your cooked meat rest for optimal juiciness, and experiment with new flavors and techniques to enhance your dishes.
1. Essential Grilling Equipment and Tools for Beginners
When it comes to grilling, you want to make sure you have the necessary tools to prepare and cook your meat to perfection. The first and most important tool is, of course, the grill itself. Whether you prefer gas, charcoal, or electric, choosing the right type of grill is key. As a beginner, I recommend starting with a gas grill as it’s easy to use and maintain.
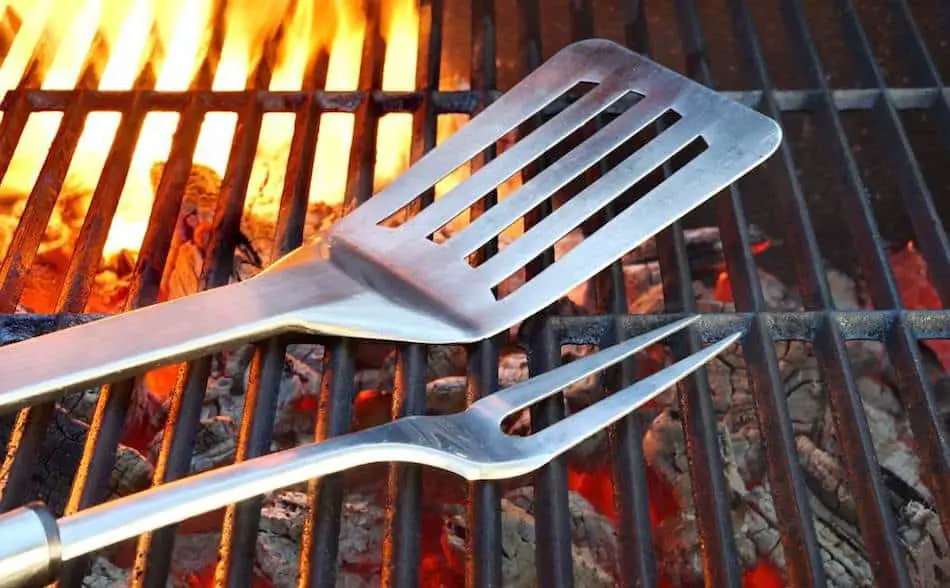
Next, you’ll need a set of grilling tools, including tongs, spatulas, and a grill brush for cleaning. I prefer using metal tools over wooden or plastic ones as they are more durable and heat-resistant. A good quality meat thermometer is also a must-have tool for any griller. It ensures that your meat is cooked to the proper internal temperature, preventing any potential foodborne illnesses.
Other essential grilling equipment includes a grill cover to protect your grill from the elements, a chimney starter for lighting charcoal, and a drip pan for catching grease and preventing flare-ups.
Grill Accessories: Thermometers, Tongs, Spatulas, and More
Having the right tools can make all the difference when it comes to grilling. Proper equipment not only makes the process easier but also ensures that your food cooks evenly and safely. Here are some must-have grilling tools for beginners.
I highly recommend investing in quality grill accessories to enhance your grilling experience. Some essential grill accessories are listed below.
| Tool | Purpose |
|---|---|
| Grill thermometer | Ensures consistent and accurate temperature control for even cooking |
| Meat thermometer | Checks internal temperature of meat to ensure it’s cooked to a safe and desired level |
| Tongs | Safely flips and moves food on the grill without piercing and losing juices |
| Grill brush | Cleans and maintains the grill grates for optimal performance and food quality |
| Basting brush | Applies marinades, sauces, or melted butter evenly on food while grilling |
| Grill spatula | Helps flip and move delicate items like fish or burgers without breaking them apart |
| Skewers | Holds small or cut-up pieces of meat, vegetables, or fruits together for easy grilling |
| Grilling basket | Prevents small or delicate items from falling through grill grates |
Long-handled Tongs and Spatula
A good pair of long-handled tongs and a sturdy spatula are essential for managing your food on the grill. The long handles help keep your hands a safe distance from the heat, while the sturdy construction ensures that you can securely grip and flip your food without it falling apart.
Look for tongs with a comfortable grip and a locking mechanism for easy storage. For the spatula, choose one with a beveled edge to easily slide under delicate foods like fish fillets.
Grill Brush and Gloves
Keeping your grill clean is crucial for both food safety and optimal cooking performance. A quality grill brush with stiff bristles will help you remove any stuck-on food and debris from the grates before and after each use. There are also grill brushes designed specifically for certain types of grates, such as stainless steel or cast iron, so choose one that suits your grill.
Grill gloves are another must-have tool for beginners. They protect your hands from the high heat when handling hot grates, grill lids, or adjusting vents. Look for gloves made from heat-resistant materials like leather, aramid fabric, or silicone. Make sure they fit well and provide adequate dexterity for handling tools and food.
Grill Types: Gas vs Charcoal vs Electric
One of the first decisions you’ll need to make as a beginner griller is what type of grill to use. There are three main types of grills: gas, charcoal, and electric. Each type has its own advantages and disadvantages, so it’s important to consider your needs and preferences before making a choice.
Gas grills are easy to use and require little maintenance. They’re a good choice for beginners as they offer precise temperature control and are quick to heat up. They’re also less messy than charcoal grills and can be used in smaller outdoor spaces.
Charcoal grills, on the other hand, offer a unique smoky flavor that can’t be achieved with gas grills. They take longer to heat up and require more maintenance, but many grill enthusiasts prefer them for their flavor and versatility. Charcoal grills are also more affordable than gas grills.
Electric grills are another option, particularly if you don’t have access to an outdoor space. They’re easy to use and maintain, but don’t offer the same smoky flavor as gas or charcoal grills. They’re also limited in terms of temperature control and can be more expensive than gas or charcoal grills.
2. How to Prepare Your Grill Before Grilling
Before you start grilling, it’s essential to prepare your grill properly. This not only ensures the best possible cooking results but also promotes safety and prolongs the life of your grill. Here are some steps I personally follow to prep my grill.
Cleaning and Seasoning Your Grill Grates
A clean grill grate is key to preventing food from sticking and ensuring even cooking. I always make it a habit to clean my grates before and after each grilling session.
To clean the grates, heat up the grill for a few minutes to loosen any stuck-on food, and then use a grill brush to scrub off any debris.
For stubborn residue, you can also use a mixture of water and a mild dish soap to help break it down. Just be sure to rinse the grates thoroughly and let them dry before using the grill again.
Preheating the Grill
Preheating your grill is a crucial step that many beginners overlook. I can’t stress enough how important it is to let your grill heat up properly before you start cooking. Preheating helps ensure that your food cooks evenly and that the grill grates are hot enough to create those desirable grill marks.
For gas grills, turn on the burners and let the grill heat up for about 10-15 minutes with the lid closed. For charcoal grills, light the charcoal and let it burn until it’s covered in white ash, which usually takes around 20-30 minutes. Once your grill is preheated, you’re ready to start cooking.
3. Choosing the Right Cuts of Meat for Grilling
Choosing the right cuts of meat is crucial for a successful grilling experience. Over the years, I’ve learned that the quality and preparation of the meat can make all the difference in how it turns out on the grill. For a more in-depth look at meat selection, check out this Meat Guide.
Choosing Quality Meat
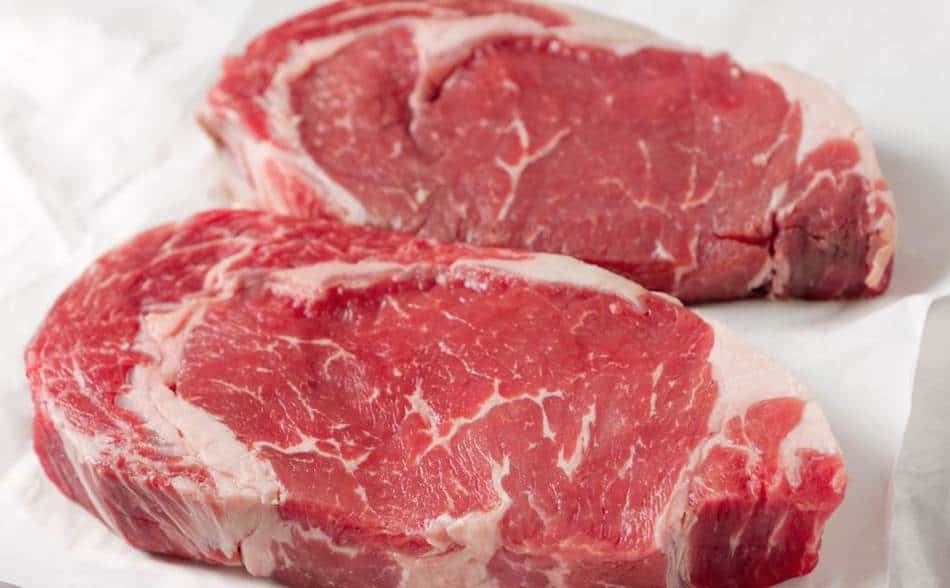
One of the best tips I can give is to invest in high-quality meat from a reputable source, like a trusted butcher or a local farmer’s market. Look for cuts with a good balance of lean meat and fat, as the fat adds flavor and helps keep the meat moist during cooking.
For steaks, marbling (the white flecks of fat within the muscle) is a sign of quality and tenderness. For chicken, opt for bone-in, skin-on pieces, which retain moisture better than boneless, skinless cuts.
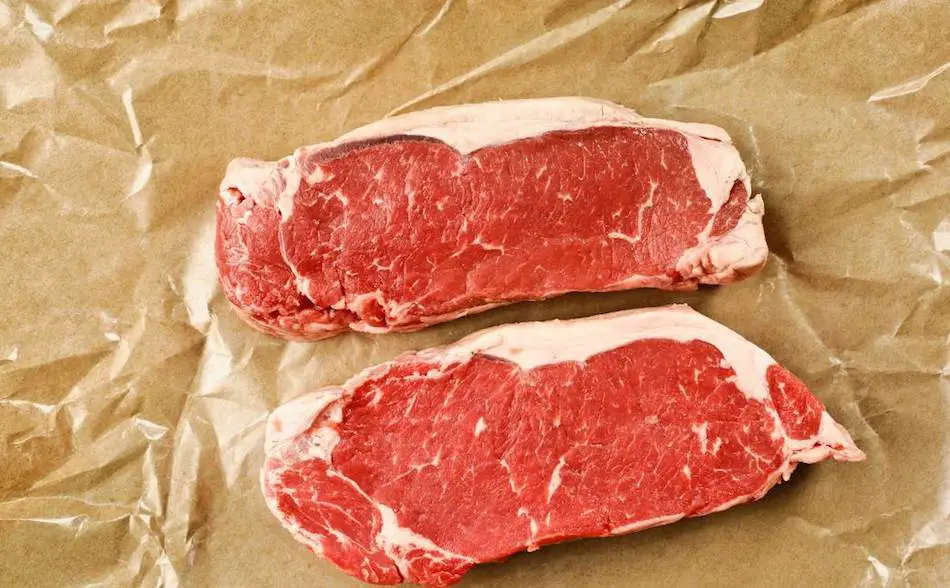
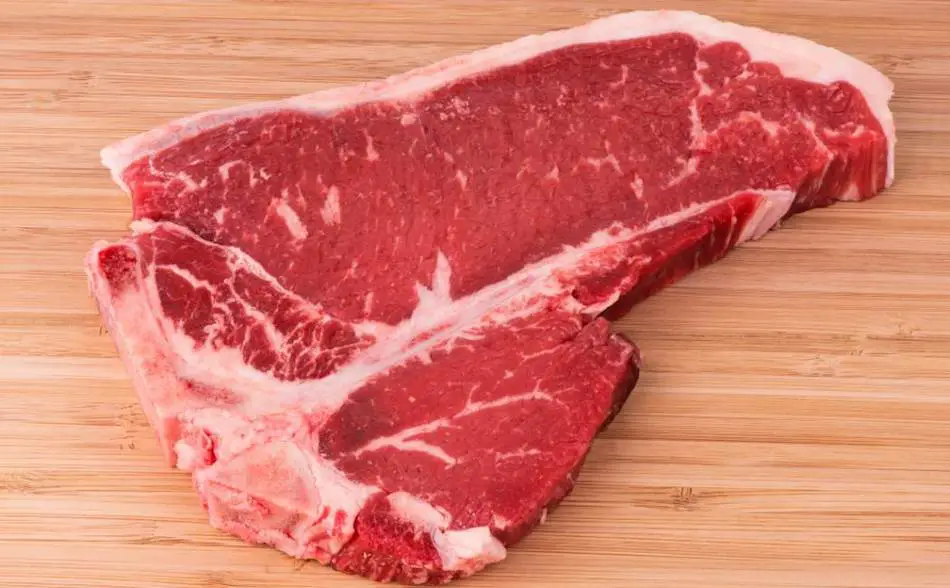
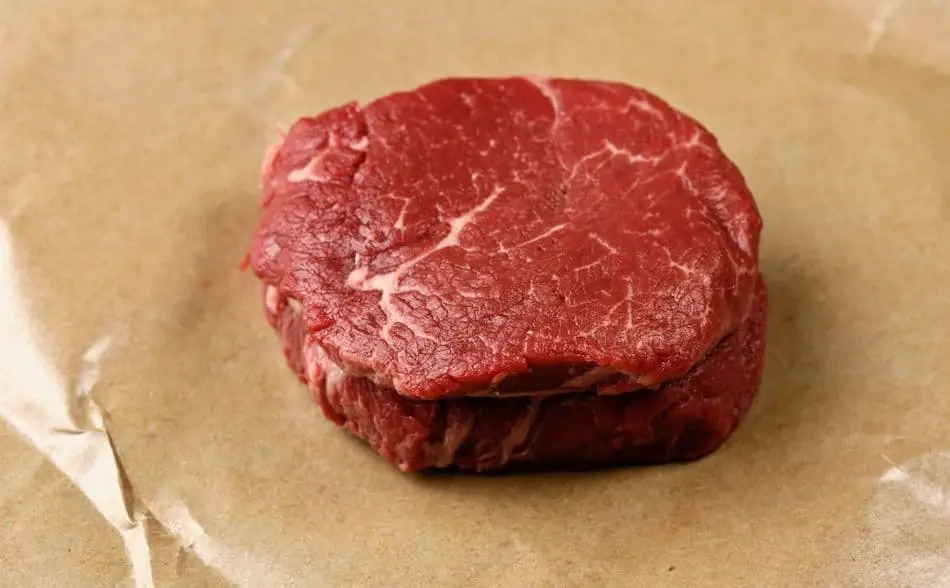
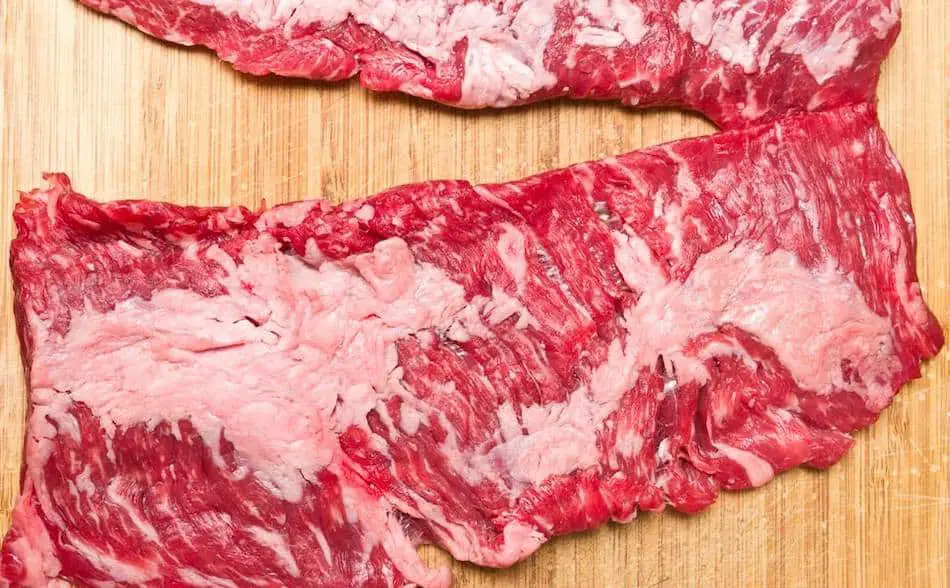
Popular Cuts for Grilling: Ribeye, New York Strip, T-Bone, and More
Grilling is an art, and choosing the right cut of meat plays a significant role in the final result. Here are some popular cuts for grilling, along with a brief description of each to help you make an informed decision when shopping for your next barbecue:
Ribeye: This tender and juicy cut comes from the rib section of the cow and is known for its rich marbling and beefy flavor. The marbling makes ribeye an ideal choice for grilling, as the fat renders and keeps the meat moist during cooking.
New York Strip: Also known as the strip steak, this cut comes from the short loin of the cow. The New York Strip has a good balance of tenderness and flavor, with a moderate amount of marbling. It grills well and is a popular choice for steak lovers.
T-Bone: The T-Bone is a combination of two cuts: the New York Strip and the tenderloin, separated by a T-shaped bone. This versatile cut offers the best of both worlds, with the tenderloin providing tenderness and the strip offering a more robust flavor. The T-Bone is perfect for grilling, but be mindful of the cooking time, as the tenderloin portion cooks faster than the strip.
Porterhouse: Similar to the T-Bone, the Porterhouse also features a New York Strip and tenderloin separated by a bone. The main difference is that the Porterhouse has a larger tenderloin portion, making it a popular choice for those who love a tender, juicy steak.
Filet Mignon: Cut from the tenderloin, the filet mignon is prized for its exceptional tenderness and mild flavor. While it’s leaner than other cuts and has less marbling, it still grills well when cooked carefully. Be sure not to overcook it, as it can dry out quickly due to the lower fat content.
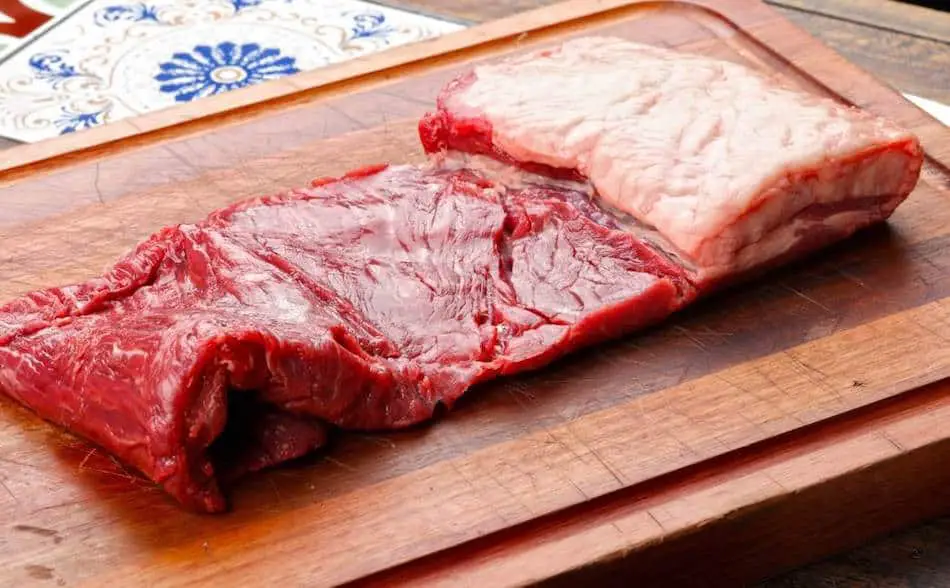
Skirt Steak: This long, thin cut comes from the cow’s diaphragm and is known for its intense beefy flavor and chewy texture. Skirt steak is perfect for marinating and grilling quickly over high heat. It’s commonly used in dishes like fajitas and tacos.
Flank Steak: Similar to skirt steak, flank steak is a lean, flavorful cut from the cow’s abdominal muscles. It benefits from marinating and grilling over high heat, followed by slicing thinly against the grain. Flank steak is popular for dishes like stir-fry, fajitas, and steak salads.
Top Sirloin: Top sirloin comes from the upper portion of the sirloin and is a versatile, lean, and moderately tender cut. It grills well and can be an affordable alternative to higher-priced cuts like ribeye and New York Strip.
Understanding Meat Grades: Prime, Choice, and Select
Meat grades, established by the United States Department of Agriculture (USDA), serve as a guideline to indicate the quality of beef based on factors such as marbling, tenderness, and overall flavor.
The three main grades you’ll encounter when shopping for meat are Prime, Choice, and Select. Understanding these grades can help you make informed decisions when selecting cuts for your grilling needs.
- Prime: The highest grade of beef, USDA Prime is characterized by its abundant marbling and superior tenderness, juiciness, and flavor. Prime cuts are typically found at high-end restaurants and specialty butcher shops. Due to the higher fat content, Prime beef is ideal for grilling, as the marbling helps keep the meat moist and tender during cooking.
- Choice: A step below Prime, USDA Choice beef has moderate marbling and still offers good tenderness, juiciness, and flavor. Choice cuts are widely available at grocery stores and can be a more budget-friendly option without sacrificing too much quality. Choice beef is suitable for grilling, although you may need to monitor the heat and cooking time more closely to prevent the meat from drying out.
- Select: USDA Select beef has the least marbling of the three grades, which can result in a leaner, less tender, and less flavorful cut of meat. While Select cuts are the most affordable, they may not provide the same grilling experience as Prime or Choice. If you choose to grill Select beef, consider using a marinade to help tenderize and add flavor to the meat.
You’ve heard of Select, Choice and Prime, but What is Wagyu Beef?
4. How to Season and Marinate Your Meat for Maximum Flavor
Seasoning and marinating your meat not only adds flavor but can also help tenderize and improve the texture of the meat. Here are some tips and techniques for seasoning and marinating your meat for maximum flavor:
Seasoning
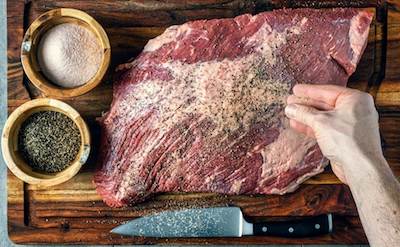
- Salt: Salt is a crucial component of seasoning, as it brings out the natural flavors of the meat. Be sure to use kosher or sea salt for the best results. Sprinkle a generous amount of salt evenly on all sides of the meat at least 30-60 minutes before grilling, allowing the salt to dissolve and penetrate the meat.
- Pepper: Freshly ground black pepper adds a nice kick and complexity to your meat. Like salt, apply pepper to all sides of the meat before grilling. Feel free to adjust the amount based on your preference for spiciness.
- Herbs and Spices: Adding herbs and spices to your seasoning mix can elevate the flavor profile of your meat. For a simple yet effective blend, try combining garlic powder, onion powder, and paprika. Experiment with other herbs and spices such as rosemary, thyme, or cumin for a more unique taste.
Marinating
- Choose the Right Marinade: A marinade typically consists of three components: an acid, oil, and flavorings. The acid (e.g., vinegar, citrus juice, or wine) helps tenderize the meat, the oil (e.g., olive or vegetable oil) helps retain moisture, and the flavorings (e.g., garlic, herbs, or spices) add depth and complexity.
- Marinating Time: The marinating time depends on the type of meat and the marinade’s acidity. Generally, more tender cuts like chicken breasts, fish, or shellfish require a shorter marinating time (30 minutes to 2 hours), while tougher cuts like beef or pork can benefit from a longer marinating time (4-24 hours). Be cautious not to over-marinate, as it can cause the meat to become mushy.
- Refrigerate While Marinating: Always refrigerate your meat while marinating to ensure food safety. Keep the meat in a sealed container or a resealable plastic bag, turning it occasionally to ensure even coverage.
- Reserve Some Marinade for Basting: If you’d like to use the marinade for basting, set aside a portion before adding the raw meat. This will help prevent cross-contamination.
Mastering Dry Rubs for Grilling: Enhance Flavor and Texture
Dry rubs are important for grilling for several reasons, as they enhance the overall flavor, texture, and appearance of grilled meats. Some key benefits of using dry rubs for grilling include:
- Flavor enhancement: Dry rubs are a blend of herbs, spices, and seasonings that create a unique and robust flavor profile for your grilled meats. They help to elevate the taste of the meat, adding depth and complexity that can turn a simple dish into something extraordinary.
- Texture improvement: When dry rubs are applied to the surface of the meat and exposed to the heat of the grill, they create a flavorful crust. This crust not only adds an appealing texture to the meat but also helps to seal in moisture, resulting in juicy, tender grilled dishes.
- Caramelization and color: Dry rubs often contain sugar, which caramelizes during the grilling process. This caramelization adds a rich, deep color to the meat and contributes a subtle sweetness that complements the savory flavors.
- Tenderization: The salt in dry rubs can help to tenderize the meat by breaking down proteins, leading to a more tender and succulent final product. Additionally, certain spices in dry rubs, such as paprika, can help to further tenderize the meat.
- Customization: Dry rubs allow for a high level of customization in your grilling, enabling you to experiment with different flavor profiles to suit your preferences or the preferences of your guests. By adjusting the herbs, spices, and seasonings in your rub, you can create a unique and personalized grilling experience.
What are Dry Rubs?
Dry rubs are a combination of dry herbs, spices, and seasonings applied to the surface of meat before grilling. They create a flavorful crust on the meat as it cooks, enhancing its taste and texture. Dry rubs are a popular alternative to marinades, as they don’t require additional liquids or long soaking times.
World Brisket Champion Harry Soo is now sharing his secrets with his Competition Meat Rubs.
Dry Rub Components
A good dry rub typically includes a balance of flavors, such as salt, sugar, and spices. Salt not only adds flavor but also helps tenderize the meat. Sugar, such as brown or white sugar, aids in caramelization, providing color and a slightly sweet note. Spices and herbs, like paprika, garlic powder, onion powder, cumin, or chili powder, contribute depth and complexity to the flavor profile. For a more in-depth look at dry rubs, check out: The Ultimate Guide to Dry Rubs for Smoked Chicken: Pre-Made and Homemade.
Creating Your Own Dry Rubs
Creating your own dry rubs allows you to customize the flavors and intensity of your grilled meats, providing a unique and personalized touch to your outdoor cooking. Here are some steps to help you craft the perfect dry rub:
- Start with a base: Begin by choosing a base for your dry rub, which typically includes salt and sugar. Salt is essential for enhancing the natural flavors of the meat, while sugar aids in caramelization and adds a touch of sweetness. Consider using kosher salt or sea salt, and either white or brown sugar, depending on your preference.
- Select your spices and herbs: The next step is to choose a variety of spices and herbs that will complement the flavors of the meat you’re grilling. Some popular choices include paprika, garlic powder, onion powder, cumin, chili powder, ground coriander, and mustard powder. For a more unique taste, you can also experiment with spices like smoked paprika, chipotle powder, or Chinese five-spice.
- Add heat: If you enjoy a little heat in your grilled meats, consider adding some spicy elements to your dry rub. Cayenne pepper, red pepper flakes, or ground black pepper can provide a kick without overpowering the other flavors.
- Balance the flavors: As you mix your dry rub, aim for a balance of flavors to ensure that no single ingredient dominates the taste. A good starting point is equal parts salt, sugar, and spices, but feel free to adjust the proportions based on your preferences.
- Test and adjust: Before applying your dry rub to a large piece of meat, test the blend on a small portion to ensure the flavor profile is to your liking. This allows you to make any necessary adjustments before committing to the full meal.
- Store your dry rub: If you’ve created a blend you love, consider making a larger batch to have on hand for future grilling sessions. Store the dry rub in an airtight container in a cool, dark place to maintain its freshness and flavor.
Standard Barbecue Rub
I found this great rub recipe through How To BBQ Right. I use this recipe and alter it slightly depending on what I'm cooking. Made by the guys at Townsend Spice & Supply: https://townsendspice.com/
Ingredients
- - ½ Cup Paprika
- - ½ Cup Salt
- - ½ Cup Sugar
- - ½ Cup Granulated Garlic
- - ¼ Cup Granulated Onion
- - ¼ Cup Chili
- - ¼ Cup Cumin
- - 2 Tablespoons Black Pepper
- - 2 Tablespoons Dry Mustard
- - 1 Tablespoon Cayenne Pepper
Instructions
- Combine all the spices together in a large mixing bowl
- Store rub in rub shakers
Experimenting with Flavors
The key to creating a successful dry rub is experimenting with different combinations of flavors. Start with a basic formula, such as equal parts salt, sugar, and spices, and then customize it to your taste preferences. You can try adding more heat with cayenne pepper, smokiness with smoked paprika, or earthiness with ground coriander.
Matching Rubs to Meat Types
Consider the type of meat you’re grilling when creating your dry rub. For example, a rub with bold spices like cumin and chili powder works well with beef, while a milder rub featuring herbs like rosemary or thyme might be better suited for chicken or fish.
Timing and Technique
For the best results, apply your dry rub evenly on all sides of the meat at least 30 minutes to an hour before grilling. This allows the flavors to penetrate the meat and ensures a well-seasoned crust. If using a rub with a high sugar content, be cautious not to burn the meat, as sugar can caramelize quickly.
The Problem With Pre-Made Rubs
While store-bought dry rubs can be convenient, there are some potential downsides to using them instead of making your own. Here are some factors to consider when deciding between store-bought and homemade dry rubs:
- Excess salt: Many store-bought rubs contain high levels of sodium, which can lead to overly salty food and potential health concerns for those watching their salt intake. Creating your own rub allows you to control the amount of salt used, ensuring a better balance of flavors and a healthier meal.
- Preservatives and additives: Commercial dry rubs often contain preservatives, anti-caking agents, and other additives to extend their shelf life and improve their appearance. These ingredients may not be harmful, but they can alter the taste of your grilled meats and detract from the natural flavors. Homemade rubs typically don’t require these additives, resulting in a cleaner, more authentic taste.
- Cost: Store-bought rubs can be expensive, especially if you’re purchasing premium or specialty blends. Making your own dry rubs can be more cost-effective, as you can buy spices and herbs in bulk and create a larger amount of rub for a fraction of the cost.
- Limited flavor options: When relying on store-bought rubs, you may be limited to the flavor profiles available on the market. Creating your own dry rubs allows you to experiment with different combinations of spices and herbs, resulting in a more personalized and unique flavor experience.
- Freshness: The spices and herbs in store-bought rubs may not be as fresh as those in homemade rubs. Over time, spices can lose their potency and flavor, leading to a less impactful taste. By making your own rubs, you can ensure the freshness of the ingredients and maintain the optimal flavor profile.
Storing and Reusing Dry Rubs
Store any leftover dry rub in an airtight container, away from heat and light, for up to six months. You can also make a large batch of your favorite dry rub to have on hand for future grilling sessions.
5. The Art of Direct and Indirect Heat Grilling
Learning to control the temperature on your grill is key to achieving perfectly cooked food. It might take some practice, but with a bit of patience and understanding, you’ll soon be able to manage the heat like a pro. Here’s what I’ve learned about temperature control over the years.
Understanding Direct and Indirect Heat
There are two primary methods of grilling: direct heat and indirect heat. Knowing when to use each method is essential for getting the best results.
Direct heat is when you cook your food directly over the heat source, such as the flame or hot coals. I use direct heat for fast-cooking items like burgers, steaks, and kebabs. This method produces a nice sear on the outside and cooks the food relatively quickly.
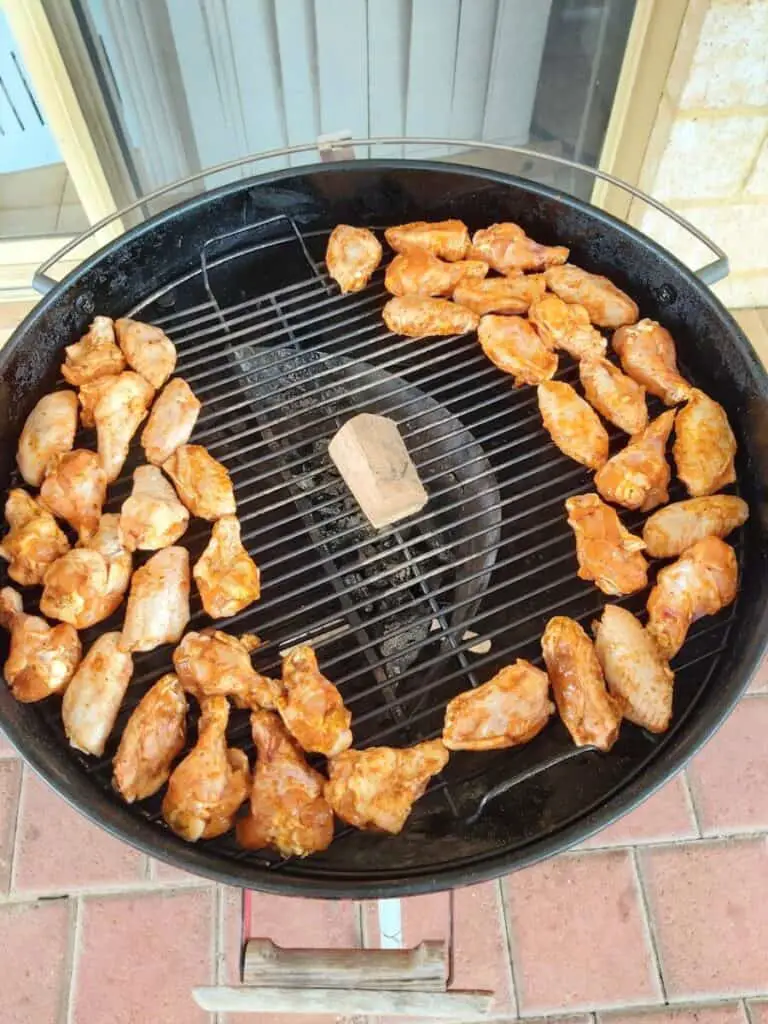
Indirect heat is when you cook your food next to, rather than directly over, the heat source. I use this method for larger, slow-cooking items like whole chickens, roasts, or ribs.
Indirect heat allows the food to cook more evenly and prevents the outside from burning before the inside is fully cooked. To set up your grill for indirect cooking, you’ll need to create a cooler zone by moving the coals to one side of the grill or turning off some burners on a gas grill.
6. How to Monitor Temperature and Achieve Perfect Doneness
Here’s a table with USDA recommended internal temperatures and approximate cooking times for various types of meat, including ground meat, chops, sausages, seafood, and other standard cuts:
| Type of Meat | USDA Internal Temperature | Approximate Cooking Time |
|---|---|---|
| Ground Beef and Lamb | 160°F (71°C) | 4-6 minutes per side |
| Beef and Lamb Chops | 145°F (63°C) (medium) | 4-5 minutes per side |
| Ground Poultry | 165°F (74°C) | 4-6 minutes per side |
| Whole Chicken and Turkey | 165°F (74°C) | 1.5-2 hours (indirect heat) |
| Chicken and Turkey Breasts | 165°F (74°C) | 5-7 minutes per side |
| Chicken and Turkey Thighs | 165°F (74°C) | 6-8 minutes per side |
| Pork Chops | 145°F (63°C) | 4-5 minutes per side |
| Pork Tenderloin and Roasts | 145°F (63°C) | 20-30 minutes per pound |
| Ground Pork | 160°F (71°C) | 4-6 minutes per side |
| Sausages | 160°F (71°C) (pork) | 6-8 minutes per side |
| 165°F (74°C) (poultry) | 6-8 minutes per side | |
| Fish (most types) | 145°F (63°C) | 3-5 minutes per side |
| Shellfish | Opaque and firm | 3-5 minutes per side |
Please note that these cooking times are approximate and may vary depending on the thickness of the meat, the heat of the grill, and other factors. Always use a meat thermometer to ensure that your grilled meats reach the recommended internal temperatures for food safety.
Understanding Safe Internal Temperatures for Different Cuts of Meat
Grilling requires a thorough understanding of safe internal temperatures for different cuts of meat to ensure food safety and avoid overcooking or undercooking. Using a meat thermometer is the most accurate way to check the internal temperature of your grilled meats. Here’s a guide to the recommended internal temperatures for various types of meat:
H2: Beef and Lamb H3: Steaks and Chops
- Rare: 120-125°F (49-52°C)
- Medium Rare: 130-135°F (54-57°C)
- Medium: 140-145°F (60-63°C)
- Medium Well: 150-155°F (66-68°C)
- Well Done: 160°F (71°C) and above
Ground Beef, Lamb and Poultry
When grilling ground beef and lamb, it’s essential to cook them to an internal temperature of 160°F (71°C) to ensure food safety. When grilling poultry, including chicken and turkey, it’s important to cook it to an internal temperature of 165°F (74°C) This temperature is crucial for killing harmful bacteria, such as E. coli and Salmonella, that may be present in ground meat and poultry.
Use a meat thermometer to accurately measure the internal temperature, and always insert it into the thickest part of the patty to get an accurate reading. Cooking ground beef and lamb to the recommended temperature not only ensures safety but also helps maintain the juiciness and flavor of your grilled dishes.
Using a Grill Thermometer
A reliable grill thermometer is an indispensable tool when it comes to mastering temperature control. Most grills come with built-in thermometers, but I’ve found that investing in a separate, high-quality thermometer provides more accurate readings.
A probe-style thermometer is particularly helpful for monitoring the internal temperature of meats, ensuring they’re cooked to the perfect doneness and safe to eat.
When grilling, it’s important to remember that each type of meat has a recommended internal temperature for safe consumption. For example, poultry should reach an internal temperature of 165°F (74°C), while medium-rare steak should be around 130-135°F (54-57°C).
For more information on grill thermometers, check out this article: The Best Instant-Read Grill Thermometers
7. How to Grill Vegetables, Seafood, and Other Non-Meat Items
Grilling isn’t just for meat lovers; vegetables, seafood, and other non-meat items can also shine on the grill. Here’s a guide to help you master the art of grilling these items:
Selecting Vegetables for Grilling
When selecting vegetables for grilling, choose fresh, firm vegetables that hold up well on the grill, such as bell peppers, zucchini, eggplant, asparagus, corn, and mushrooms. Cut the vegetables into even-sized pieces or slices to ensure consistent cooking.
The table below provides a list of popular grilling vegetables, along with preparation tips, approximate grilling times, and suggested flavor pairings. Keep in mind that grilling times may vary depending on the size and thickness of the vegetables and the heat of your grill. Always monitor your vegetables closely and turn them as needed to ensure even cooking and prevent burning.
| Vegetable | Preparation Tips | Grilling Time | Flavor Pairings |
|---|---|---|---|
| Asparagus | Trim woody ends, leave whole or cut in half | 6-8 minutes | Garlic, lemon, Parmesan |
| Bell Peppers | Cut into 2-inch wide strips or rings | 8-10 minutes | Balsamic vinegar, basil, oregano |
| Zucchini | Slice lengthwise into 1/4-inch thick strips | 4-6 minutes | Garlic, rosemary, thyme |
| Eggplant | Slice into 1/2-inch thick rounds or strips | 8-10 minutes | Garlic, balsamic vinegar, basil |
| Corn on the Cob | Grill with husks on or remove husks and wrap in foil | 15-20 minutes | Butter, lime, chili powder |
| Portobello Mushrooms | Remove stems, scrape out gills | 10-12 minutes | Balsamic vinegar, garlic, thyme |
| Red Onions | Slice into 1/2-inch thick rounds | 8-10 minutes | Balsamic vinegar, rosemary, thyme |
| Cherry Tomatoes | Use a grill basket or skewers | 3-5 minutes | Basil, garlic, balsamic vinegar |
| Yellow Squash | Slice lengthwise into 1/4-inch thick strips | 4-6 minutes | Garlic, oregano, basil |
Seasoning and Oiling
Toss the vegetables in olive oil, salt, pepper, and any desired herbs or spices before grilling. The oil helps prevent sticking and promotes even cooking.
Grilling Technique
Grill vegetables over medium heat, turning occasionally until they are tender and have visible grill marks. Smaller or more delicate vegetables, like cherry tomatoes or sliced onions, can be grilled using a grill basket or skewers to prevent them from falling through the grates.
Grilling Seafood
Selecting the Best Seafood for Grilling
Choose firm, oily fish like salmon, tuna, or swordfish for grilling. These types of fish hold up well on the grill and are less likely to stick or fall apart during cooking. Shellfish such as shrimp, scallops, and lobster are also excellent choices for grilling.
Preparing and Seasoning
Pat the seafood dry before grilling and lightly coat it with oil to prevent sticking. Season with salt, pepper, and a squeeze of lemon juice, or create a simple marinade with olive oil, herbs, and garlic.
Grilling Technique
Grill seafood over medium-high heat, turning once until it reaches the recommended internal temperature (145°F or 63°C for most fish) or until it flakes easily with a fork. Shellfish should be cooked until they become opaque and firm.
Grilling Other Non-Meat Items
Tofu and Tempeh
Choose firm or extra-firm tofu and press it to remove excess moisture before grilling. Marinate tofu and tempeh for at least 30 minutes to impart flavor. Grill over medium heat, turning occasionally until they are browned and heated through.
Fruit
Fruit can be a delicious and unexpected addition to your grilling menu. Choose firm fruits like pineapple, peaches, or watermelon, and cut them into thick slices or wedges. Lightly brush the fruit with oil, and grill over medium heat until caramelized and tender.
8. The Importance of Resting Your Meat After Grilling
One of the most important yet often overlooked aspects of grilling is allowing the meat to rest after cooking. Over time, I’ve learned that properly resting meat helps to lock in its juices, resulting in a more tender and flavorful dish.
Why Resting Meat Matters
During cooking, the heat causes the proteins in the meat to contract, which in turn pushes the juices towards the center. By allowing the meat to rest, you give the proteins time to relax, and the juices redistribute throughout the cut.
Cutting into the meat too soon can cause those precious juices to escape, leaving your meat dry and less flavorful.
How Long to Rest Meat
The amount of time you should let your meat rest depends on the size and type of the cut. As a general rule, I follow these guidelines:
- Small cuts like steaks, chops, or chicken breasts: Rest for 5-10 minutes.
- Medium cuts like tri-tip or pork tenderloin: Rest for 10-15 minutes.
- Large cuts like whole chickens or roasts: Rest for 20-30 minutes.
To keep your meat warm while it rests, you can loosely tent it with aluminum foil. However, avoid wrapping the meat too tightly, as this can cause it to steam and become soggy.
| Type of Meat | Approximate Resting Time | Resting Tips |
|---|---|---|
| Steaks (e.g., ribeye, strip) | 5-10 minutes | Tent loosely with foil to retain heat |
| Thin Cuts (e.g., flank) | 5 minutes | Tent loosely with foil to retain heat |
| Chops (e.g., pork, lamb) | 5-10 minutes | Tent loosely with foil to retain heat |
| Ground Meat Patties | 3-5 minutes | Place on a warm plate or cutting board |
| Whole Chicken or Turkey | 15-20 minutes | Tent loosely with foil to retain heat |
| Chicken Breasts | 5-10 minutes | Tent loosely with foil to retain heat |
| Chicken Thighs | 5-10 minutes | Tent loosely with foil to retain heat |
| Pork Tenderloin or Roasts | 10-15 minutes | Tent loosely with foil to retain heat |
| Beef Roasts (e.g., prime rib) | 15-20 minutes | Tent loosely with foil to retain heat |
| Fish (e.g., salmon, tuna) | 3-5 minutes | Place on a warm plate or cutting board |
This table provides a list of different types of meat, approximate resting times, and tips for resting the meat properly. Resting meat after cooking allows the juices to redistribute, ensuring a tender and juicy result. Remember that these resting times are approximate and can vary depending on the size and thickness of the meat, as well as personal preferences.
9. Tips for Cleaning Your Grill After Grilling
A well-maintained grill not only prolongs its lifespan but also ensures better cooking results and food safety. Here are some tips on how to clean your grill grates and other parts:
How to Clean Your Grill Grates and Other Parts
- Preheat the grill: Before cleaning, preheat your grill for 10-15 minutes to help burn off any remaining food particles and make them easier to remove.
- Use a grill brush: After preheating, use a grill brush to scrub the grates clean. For stubborn residue, use a brush with stainless steel bristles, but be cautious with coated or cast iron grates, as they can be damaged by harsh brushing.
- Clean the burners: Check the burners for any debris or buildup and clean them as needed to ensure even heat distribution.
- Empty the grease tray: Regularly empty and clean the grease tray to prevent flare-ups and maintain a clean cooking environment.
- Wipe down the exterior: Keep the exterior of your grill clean by wiping it down with a damp cloth and mild soapy water.
Tips for Maintaining Your Grill
- Regular cleaning: Clean your grill grates after each use to prevent buildup and maintain a safe and efficient grilling surface.
- Deep cleaning: Perform a deep cleaning of your grill at least once or twice a year to remove any accumulated grease, ash, or debris.
- Cover your grill: Protect your grill from the elements by using a grill cover when not in use.
- Store your grill accessories: Keep your grill tools and accessories organized and clean by storing them in a designated place.
- Inspect your grill: Periodically inspect your grill for any signs of wear, rust, or damage and address any issues promptly to ensure safe and efficient operation.
Common Grilling Mistakes to Avoid
Grilling can be a fun and rewarding way to prepare food, but there are some common mistakes that can hinder your success. Here’s a list of common grilling pitfalls and how to avoid them:
Overcrowding the Grill
Cramming too much food onto the grill can lead to uneven cooking and make it difficult to manage flare-ups. Give your food plenty of space to cook evenly and develop a proper sear.
Not Preheating the Grill
Preheating your grill is essential for achieving a good sear and preventing food from sticking to the grates. Allow your grill to heat up for at least 10-15 minutes before adding your food.
Using the Wrong Heat Level
Different foods require different heat levels for optimal cooking results. Ensure you’re using the appropriate heat setting for the food you’re grilling – high heat for searing, medium heat for cooking through, and low heat for slow-cooking or smoking.
Flipping or Moving Food Too Often
Constantly flipping or moving your food can prevent it from developing a good sear and lead to uneven cooking. Resist the temptation to fuss with your food, and only flip it when necessary.
Cutting Into Meat to Check for Doneness
Cutting into your meat to check for doneness can release precious juices and result in a dry, less flavorful dish. Instead, use a meat thermometer to accurately gauge the internal temperature.
Not Letting Meat Rest After Cooking
Resting meat after cooking allows the juices to redistribute, resulting in a more tender and juicy final product. Give your meat the appropriate amount of time to rest before cutting into it.
Neglecting Grill Maintenance
A dirty or poorly maintained grill can lead to uneven cooking, flare-ups, and food sticking to the grates. Regularly clean and maintain your grill to ensure optimal performance.
By avoiding these common grilling mistakes, you can enhance your outdoor cooking skills and enjoy better, more consistent results from your grilling endeavors.