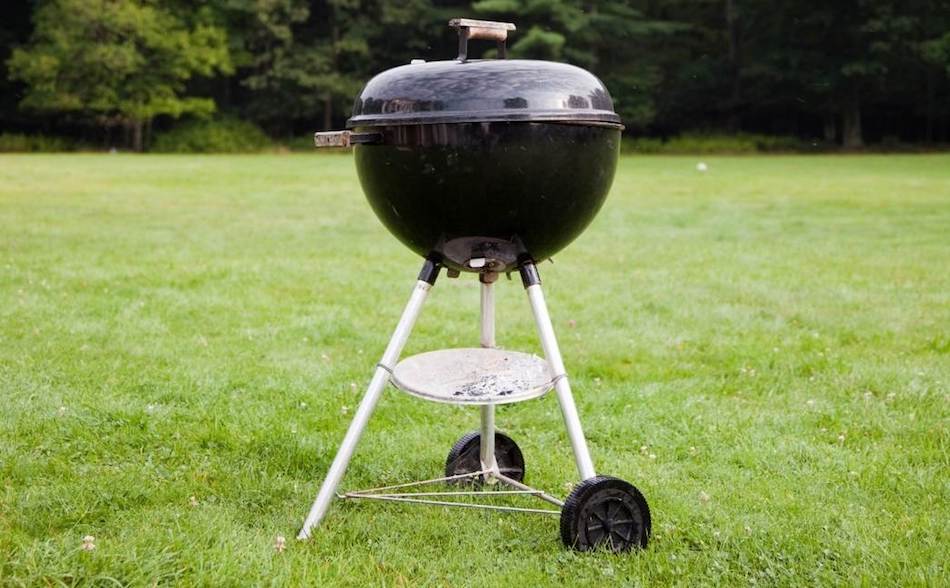
Smoking meat on a kettle grill can be a delicious and simple way to add a new dimension of flavor to your barbecue game. A kettle grill, also known as a charcoal grill, is a great option for smoking meat because it can reach high temperatures and has a tight-fitting lid that helps to trap in smoke. With a little bit of preparation and a thermometer, you can turn your regular kettle grill into a smoker and enjoy mouth-watering, smoky-flavored meats that will impress your friends and family. In this guide, we will walk you through the process of setting up your kettle grill for smoking and the basics of smoking different types of meats to perfection.
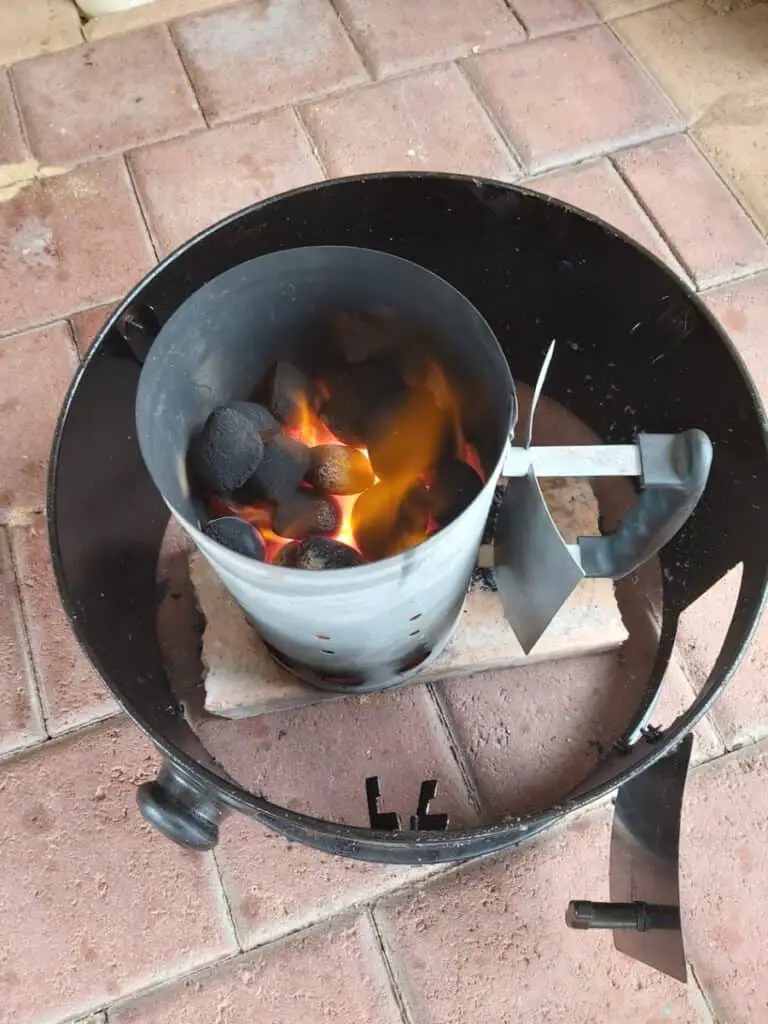
A kettle grill, also known as a charcoal grill, is a great option for smoking meat because it can reach high temperatures and has a tight-fitting lid that helps to trap in smoke. To smoke meat on a kettle grill, you’ll first need to set it up for indirect cooking. This means creating a hot and a cool side of the grill by lighting a chimney starter full of charcoal, waiting for the coals to turn ashed over, then pouring the hot coals on one side of the grill and leaving the other side empty.
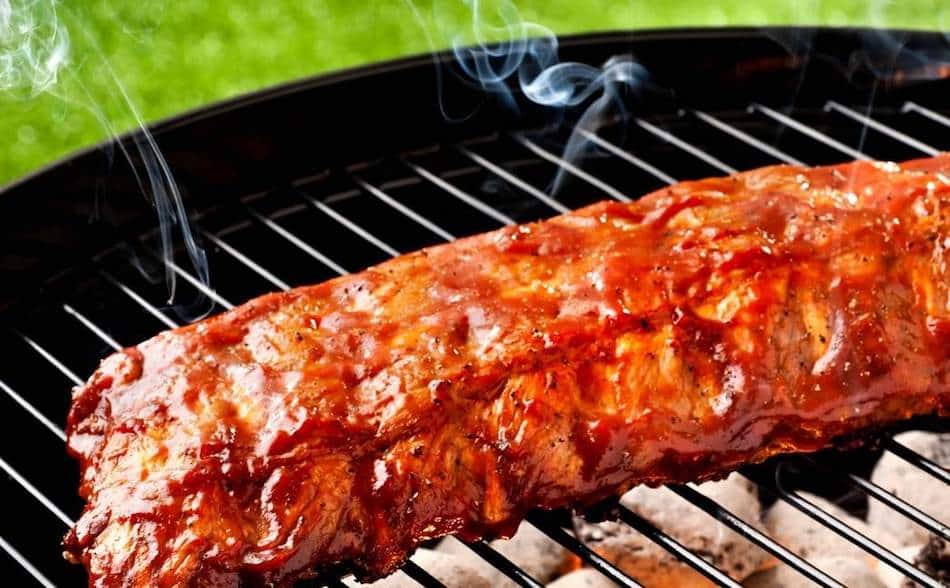
Next, you’ll need to add some wood chips to the coals, which can be soaked in water for 30 minutes to an hour before adding them to the coals to help them smoke for longer. Once the wood chips are added, place your meat on the cool side of the grill, away from the coals and the wood chips, and put the lid on the grill. You’ll want to keep the lid closed as much as possible while smoking to trap in the smoke and keep the temperature stable. You’ll need to monitor the temperature inside the grill using a thermometer, and adjust the vents as needed to maintain a temperature between 225-250F. Depending on the type of meat and the size of the cut you’re smoking, it can take anywhere from a few hours to a full day to smoke the meat to perfection.
How To Setup a Kettle Grill for Smoking
Step-by-Step Guide for Setting Up a Kettle Grill for Indirect Cooking:
- Fill a chimney starter with charcoal and light it.
- Wait for the coals to turn ashed over.
- Pour the hot coals on one side of the kettle grill, leaving the other side empty.
- Soak wood chips in water for 30 minutes to an hour.
- Add the wood chips to the coals.
- Place your meat on the cool side of the grill, away from the coals and wood chips.
- Put the lid on the grill and close it as much as possible to trap in smoke and maintain a stable temperature.
- Use a thermometer to monitor the temperature inside the grill and adjust the vents as needed to maintain a temperature between 225-250F.
- Smoke the meat for the appropriate amount of time and temperature for the type of meat you are using, consult a meat-specific smoking guide or recipe for more detailed instructions.
- https://www.youtube.com/watch?v=337y4bgOcVI
The 20 Best Cuts of Meat for Smoking
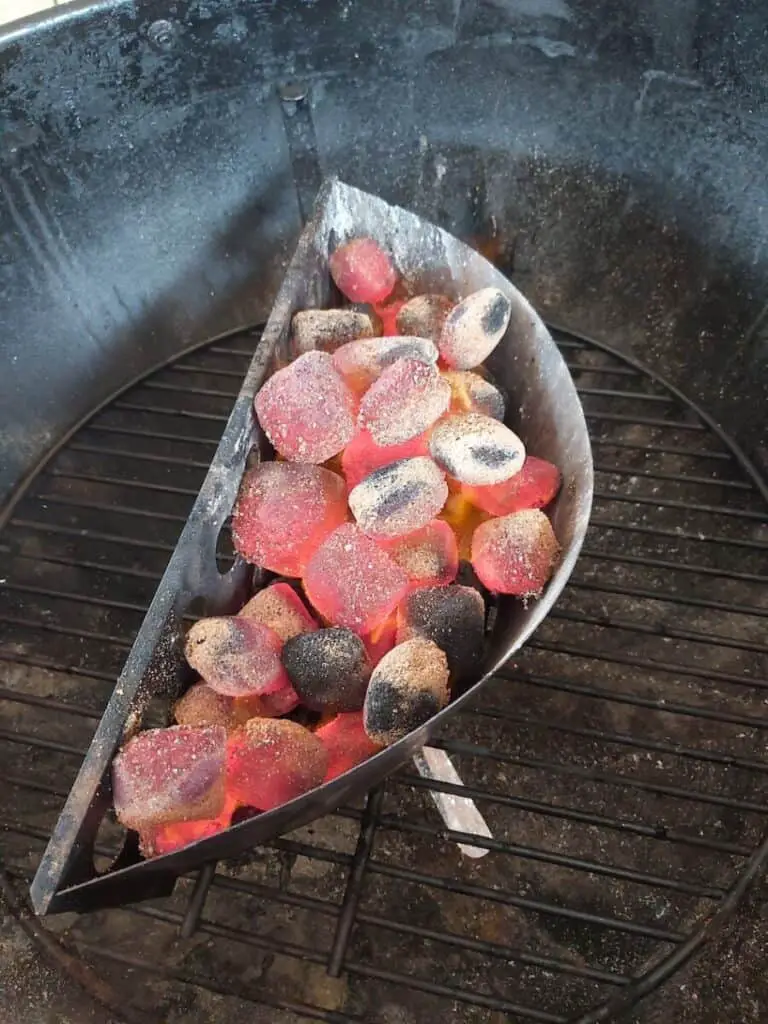
The Snake Method
The Snake Method is where you snake the coals around the bottom of the Weber kettle. The snake should be about two or three briquettes wide. You only light the head or tail of the snake, so it can slowly burn the full length over several hours.
This is the best way to smoke large roasts such as brisket and pork butts. You can make a half snake or a duel snake, depending on how long you want to cook. Scatter wood chunks along the snake so you get a consistent flow of smoke.
It’s more important to have the wood at the front end of the snake so that most of the smoke is absorbed the first two or three hours of the cook. Most of the big meats will need to be wrapped in foil for the second half of the cook, so it doesn’t dry out.
It’s pointless burning wood when the meat is wrapped in foil, so don’t place wood on the back end of the charcoal snake. Place the meat in the middle of the snake so that it doesn’t cook over direct flames.
The Minion Method
The Minion Method is like the Snake Method, but the briquettes and bunched together rather than spread out around the entire bottom layer. To set up the Minion Method, place unlit coals on the bottom of the kettle. Leave a gap in the middle and put some lit coals in the middle.
The unlit coals will slowly catch fire and provide a consistent heat for several hours. Spread some wood chunks over the coals so you get a nice, even flow of smoke.
Control the Vents
When you’re smoking meat on a Weber kettle, it’s important to get the temperature inside the kettle just right. The key to doing this is to make sure the temperature inside the kettle is steady before you start adjusting the vents to change the temperature.
If the temperature inside the kettle is not stable, it will be hard to get the temperature to the level you want it to be. So, before you start messing around with the vents, give the temperature inside the kettle a chance to even out. Once it’s steady, you can use the vents to get the temperature just where you want it for smoking your meat.
Meat is best smoked in the 225°F to 250°F (106°C to 121°C) range. Chicken and turkey turns out better when smoked high and fast in the 300°F (148°C) range. It’s impossible to get a crispy skin any lower than 275°F.
The only way to hold the temperature in the ideal range is by adjusting the vents. Kettle grills have an intake vent on the bottom and a top exhaust vent. When you are starting up your kettle, open all the vents to bring the temperature up to cooking range.
Once you have reached the target temperature, wind back the vents so it’s only open about 1/4. Keep adjusting until the temperature has stabilised. Make sure you only make one adjustment at a time and allow 10-minutes for each change to work.
Keep the top vent open at least 1/4 so that the smoke and fumes can escape. If the top vent isn’t opened enough, the meat is at risk to become bitter.
Vent Settings
My go-to method for adjusting the vents is to start with both of them set at halfway when I’m cooking at temperatures between 275-350 degrees. This way, once the temperature inside the kettle is nice and steady, I can use the top vent to tweak the temperature to my liking.
But if I need to make bigger changes, I’ll use the bottom vent. I also keep an eye on the bottom vent towards the end of the cook – if I need to open it all the way, it’s usually a sign that the heat is dying down and I may need to add more coals to keep things going.
| Temperature | Meat | Lit Coal | Unlit Charcoal | Start Up | Total Cook Time | Top Vent Settings | Bottom Vent Settings |
|---|---|---|---|---|---|---|---|
| 225-250°F | Brisket | 5 | 100 | 20-30 minutes | 5-6 hours | 1/8 – 1/4 open | 1/8 – 1/4 open |
| 225-250°F | Pork Butt | 5 | 130 | 20-30 minutes | 10-12 hours | 1/8 – 1/4 open | 1/8 – 1/4 open |
Pros and Cons of Kettle Grills
Pros of Kettle Grills:
- They are versatile and can be used for both grilling and smoking.
- They are relatively inexpensive and easy to find at most stores that sell grills.
- They are easy to set up for indirect cooking.
- They can reach high temperatures, which allows for searing and charring meats.
- They have a tight-fitting lid that helps to trap in smoke, which is important for smoking meat.
Cons of Kettle Grills:
- They are not as durable as other types of grills and may rust or wear out faster.
- They can be more difficult to control the temperature than other types of grills.
- They are not as large as other types of grills, which may limit the amount of food that can be cooked at one time.
- They are not as efficient as other types of grills and may require more charcoal to maintain temperature.
- It is not easy to monitor the temperature inside the grill, you may need to purchase additional thermometer or temperature gauge to monitor the temperature inside the grill.
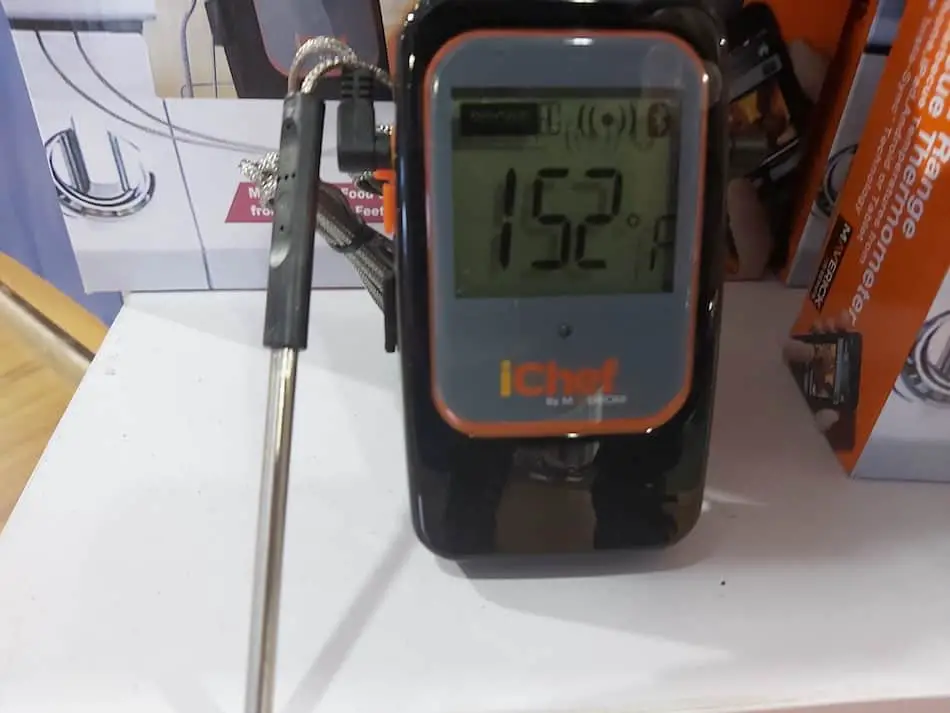
Use a Wireless Thermometer
The best way to monitor temperature inside the kettle is by using a wireless thermometer. Some kettle grills will have a good thermometer in-built, however, others aren’t to be trusted. You are better off using a duel-probe wireless thermometer so you can measure the cook chamber and the internal meat temperature without having to open the lid.
The biggest mistake you can make is opening the lid too often. This will give the fire a big shot of oxygen and send the temperature soaring. Opening the lid can also have the opposite effect where you lose all the precious heat that you worked so hard to maintain.
Everything You Need to Know About Meat Thermometers
Cook to Internal Temperture
Traditional roast cooking goes by time. For example, I was always told to cook a roast 1-hour per kilo. When smoking meat low-and-slow, we cook to temperature, not time, which is why meat thermometers are so important.
By inserting a thermometer probe inside the meat and leaving it there, we can cook until a safe internal temperature. The ideal internal temperature for big roasts such as brisket or pork butts is around 195°F to 200°F (93°C) range.
An instant-read thermometer is another handy tool for trying to determine if the meat is done. An instant-read thermometer can probe multiple areas of the roast and get an accurate read.
The Beginner’s Guide to Smoking Meat
Smoking in Wintry Conditions
Kettle grills are hard to control in wintry conditions, especially if it’s windy or snowy. If you are contending with wind, use a wind deflector or make sure you set up the kettle grill somewhere that is shielded from the wind.
In freezing conditions, you can cover the kettle with a welding blanket which will provide good insulation and allow you to smoke year-round. Keep in mind that you will use more fuel during the colder months because it will take longer to bring up to temperature.
Limited Cooking Capacity
Compared to other meat smokers, kettle grills have a smaller surface area, which makes it difficult to cook for large crowds. Kettles are fine if you are just smoking for you and your family, but if you’re wanting to smoke multiple briskets or ribs, then you might want to look at an upgrade.
Kettle grills like the Weber are a popular choice for backyard cooking, however, they do have some limitations when compared to larger, more complex smokers. One of the main limitations is the cooking capacity. The 22-inch and 18-inch Weber Kettle grills are relatively small, making them best suited for smaller groups or parties. These sizes are good for grilling for 2-6 people, and it can be a challenge to cook for larger groups.
Also, the smaller size of the Weber Kettle grills can also make it more challenging to cook multiple items at different temperatures or with different cooking methods. For example, it can be difficult to smoke a brisket at a low temperature while also grilling burgers or vegetables at a higher temperature.
However, despite these limitations, the Weber Kettle grill still offers a lot of versatility and is a great option for those who are looking for a compact and portable grill that can handle a variety of cooking tasks. With a little creativity and some clever accessories, the cooking capacity of a Weber Kettle can be expanded.
Using charcoal baskets, drip pans, and other accessories, you can create a two-zone cooking setup, which will allow you to cook different items at different temperatures.
Charcoal Baskets
Charcoal baskets for the Weber kettle are accessories that are designed to hold the charcoal in a specific shape and configuration, providing more control over the heat distribution in the grill.
They typically have a basket-like shape, and are made of durable materials such as stainless steel or heavy-duty wire. They can be used in conjunction with the Weber Kettle’s built-in vents to control the airflow and temperature, allowing for more precise grilling.
Some popular charcoal baskets for Weber Kettles include the Slow ‘N Sear, the Weber Rapidfire Chimney Starter and the Weber Hinged Cooking Grate.
Slow ‘N Sear Accessory
The Slow ‘N Sear is a fantastic accessory for smoking on kettle grills. The Slow ‘N Sear is a stainless steel charcoal basket with a water reservoir. The water creates steam for up to 5-hours, which is ideal for low-and-slow roasting. This creates two separate zones: a cool zone and a hot zone. The two-zone cooking setup gives you more options.
In the indirect cool zone you can smoke, bake and roast, while on the hot zone you can cook at hot temperatures perfect for grilling steaks.
How to Use a Slow ‘N Sear
The Slow ‘N Sear is easy to use.
- Place the Slow ‘N Sear to one side of the Kettle, just below the grill grate.
- Ignite about 10 to 15 charcoal briquettes and put them to one side of the Slow ‘N Sear.
- Place some unlit charcoal on the opposite side of the Slow ‘N Sear.
- Place a couple of wood chunks on top of the coals.
- Pour water into the reservoir.
- Close the lid of the kettle grill.
- Adjust the top vent so it’s open all the way.
- Adjust the bottom vent to half.
- Allow 20-minutes for the kettle to come up to temperature.
- Adjust the top vent to 1/3 when the kettle reaches 200°F.
- Adjust the bottom vent to 1/4.
- Add the meat once some clean smoke is rolling, and the temperature has stabilised at 220-230°F.
The Vortex Accessory
The Vortex is a cool gadget for your grill that lets you experiment with different charcoal setups. It’s a cone made of stainless steel that works with Weber Kettle and kamado cookers. You can use it four different ways to create two zones of direct and indirect heat – put the charcoal inside the vortex or around the outside, and use the vortex with the wide side up or down. It’s pretty simple to use and comes in different sizes, from mini to large. Prices range from around 35 bucks to 43 bucks. It’s not as good as the Slow ‘N Sear, but it’s still a nice idea.
Get a Charcoal Chimney
If you’re wanting to do a lot of smoking in your kettle, then a chimney starter is one of the few must-have accessories you can buy. They only cost about $20 and you will find them in the barbecue section of all major stores. Otherwise you can get one from Amazon.
A chimney will save you a lot of time and headaches because they make lighting the coals easy. You should never use lighter fluid when smoking meat because it will leave a horrible aftertaste and can be dangerous.
A chimney starter is a metal tube with holes which allows air to flow through. It has a handle on the side so you can hold it like a jug. Once you’ve lit the coals, sit the chimney on the kettle grate or on a paver. It takes 20-30 minutes to fully light a chimney of briquettes. There is a compartment below which allows you to stuff newspaper or place a fire lighter.
Chimneys are a safer than lighter fluid, but still be aware of flying embers. Light the chimney in an open area away from anything flammable. There are different sized chimneys that have various capacities. On average, a chimney will hold about 75 briquettes. Chimneys also works as a measuring tool. You can judge your cooks by the size and number of chimneys used.
What are the Best Charcoal Briquettes?
There have been several You Tube videos that have tested different brands of charcoal briquettes. These tests proved very interesting. The testing placed the four most popular charcoal brands:
- Royal Oak Charcoal
- Kingsford Charcoal
- B&B Charcoal
- Embers Charcoal
They placed the four brands in a head-to-head battle to determine waste, longevity and temperature. The findings were:
- At 10-minutes, the B&B brand had the clearest smoke and Embers had the thickest smoke. Royal Oak and Kingsford were producing a clean smoke.
- At 10-minutes, they found the most flames on Royal Oak and Kingsford had the least amount of flames. Embers and B&B had a moderate amount of flame.
- They saw the first sign of ashing from B&B.
- At15-minutes, B&B was burning the fastest and had the most flames. Royal Oak was second followed by Embers and Kingsford.
- They saw the least amount of shrinkage on B&B.
- B&B burned the longest. Second was Kingsford, followed by Royal Oak. Embers burned out faster than other brands.
- So the findings found B&B to be the best charcoal briquette on the market. It burned cleaner, faster and longer than the other three brands.
How to Smoke a Brisket on a Weber Kettle
| Steps | Description |
|---|---|
| 1 | Trim fat cap 1/4 inch – This step involves removing any excess fat from the top of the brisket, leaving a 1/4 inch layer of fat to help keep the meat moist during the cooking process. |
| 2 | Apply binder – A binder is a liquid that can be applied to the brisket to help the rub adhere to the meat. This can be something like mustard, oil or Worcestershire sauce. |
| 3 | Apply rub – A rub is a mixture of spices and seasonings that are applied to the brisket to add flavor and create a crust, or bark, on the outside of the meat. Popular ingredients in rubs include salt, pepper, paprika, garlic powder, and brown sugar. |
| 4 | Set Weber to 225 to 250 °F using the snake method. Put 2 or 3 chunks of wood. – The snake method involves arranging the charcoal in a snake-like shape, which allows for a long, slow-burning fire that can maintain a consistent temperature for hours. This step involves setting the grill to the desired temperature range and adding chunks of wood for smoke flavor. |
| 5 | Cook for about 4 or 5 hours before spritz or mop. – During this step, the brisket is placed on the grill and slow-cooked for 4 or 5 hours. Spritzing or mopping can be done periodically to add moisture and flavor to the meat. |
| 6 | Cook until crispy bark and internal temp about 160 – The brisket is cooked until the outside has a crispy bark and the internal temperature reaches around 160°F. This usually takes around 6-8 hours depending on the size of the brisket. |
| 7 | Wrap in foil or butcher paper. – Wrapping the brisket in foil or butcher paper helps to trap in moisture and allows the meat to continue cooking without drying out. |
| 8 | Cook until internal temp reaches 195 to 205 or tender – The brisket is cooked until it reaches an internal temperature of 195 to 205°F or until it is tender to the touch. This step usually takes around 2-3 hours. |
| 9 | Rest – After cooking, the brisket should be rested for at least 30 minutes before slicing. This allows the juices to redistribute throughout the meat, making it more tender and juicy. |
| 10 | Slice – After resting, the brisket is sliced against the grain and served. |
Barbecue Rubs
Just about everything you smoke in your Weber Kettle is going to need a barbecue rub. There are dozens of recipes and even more pre-made rubs in stores. Here is a basic rub recipe that you can use on just about any meat.
Standard Barbecue Rub
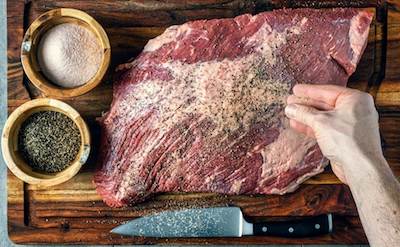
I found this great rub recipe through How To BBQ Right. I use this recipe and alter it slightly depending on what I'm cooking. Made by the guys at Townsend Spice & Supply: https://townsendspice.com/
Ingredients
- - ½ Cup Paprika
- - ½ Cup Salt
- - ½ Cup Sugar
- - ½ Cup Granulated Garlic
- - ¼ Cup Granulated Onion
- - ¼ Cup Chili
- - ¼ Cup Cumin
- - 2 Tablespoons Black Pepper
- - 2 Tablespoons Dry Mustard
- - 1 Tablespoon Cayenne Pepper
Instructions
- Combine all the spices together in a large mixing bowl
- Store rub in rub shakers
My Favorite Meat Smoking Tools
Thanks for checking out this article. I hope you learned a few things. Here are some of my favorite tools I use when smoking brisket that may be useful to you. These are affiliate links, so if you decide to purchase any of these products, I’ll earn a commission. But in all honesty, these are the tools I recommend to my family and friends who are just starting out.
Meat Thermometer: There are dozens of fancy thermometers on the market, but I still use my trusty TP20. For around $50, I have a high-quality meat thermometer with two probes, and can track the temperature of my smoker with one probe, and my meat with the other probe. The ThermoPro TP20 is an Amazon Best Seller because it’s the easiest thermometer to operate, is durable, highly accurate, and comes with pre-programmed meat settings.
Instant Read Thermometer: Arguably, the second most important tool you need is a fast and accurate instant-read thermometer. These tools play an important role in the latter stages of the cook when the meat needs regular checking in multiple areas. I use the ThermoPro TP19 because it can do everything a ThermaPen can do, but for a fraction of the cost. You can check out the TP19 on Amazon here.
Wireless Thermometer: The latest thermometers on the market have no wires and can be controlled by wi-fi via your phone. Airprobe 3 is the best of this technology.
Butcher Paper: Wrapping brisket in butcher paper has become a huge trend in barbeque thanks to Aaron Franklin. Wrapping your brisket in paper will give you a nice brisket bark. However, you can’t just use any old paper, it has to be unwaxed, food grade paper. You can find it on Amazon here.
Advanced Thermometer and Automatic Temperature Controller: Once you’re ready to take things seriously, the FireBoard 2 Drive is a six-channel Bluetooth/Wi-Fi thermometer that can monitor up to 6 pieces of meat, control and graph your cook sessions on your smartphone, and attaches to an an automatic blower that will convert your charcoal smoker to a set-and-forget. This is one of the most advanced meat thermometers on the market. You can check it out on the FireBoard website here.
Related Articles:
How to Smoke Ribs on a Kettle Grill (Pro Tips Using The 3-2-1 Method)
How to Smoke Bacon on a Weber Kettle
Hot And Fast Brisket on a Weber Kettle
How To Smoke Brisket on a Weber Kettle- 15 Steps