The humble chicken wing. It’s a staple at any good barbecue joint, and for good reason: when done right, a plate of smoked chicken wings can be downright transcendent. Chicken wings are a quick and easy on a Weber kettle. But, how do the experts do it? I wanted to find out how the pros smoke wings when using a kettle grill. I did some research and found some great techniques that you can try when smoking wings on a Weber or any other kettle grill.
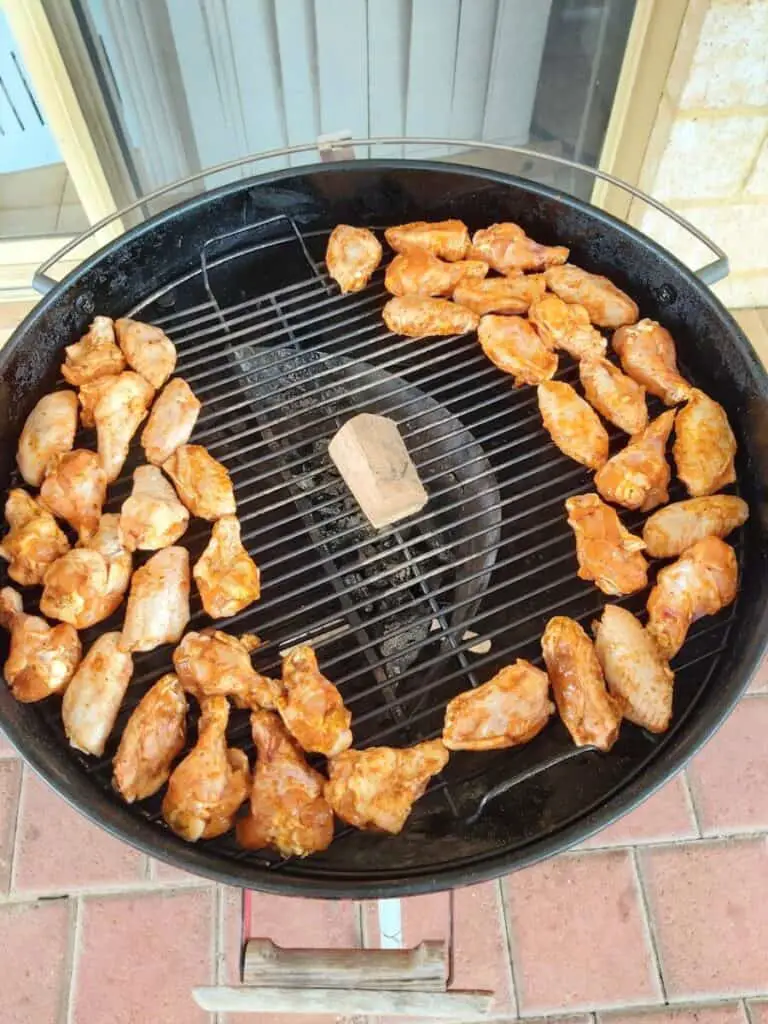
The ideal temperature for smoking chicken wings on a Weber kettle is in the 300⁰F range. To reach this temperature, you will need 80 charcoal briquettes. Pre-light 30 briquettes, and place them in the kettle beside the unlit coals. Add two chunks of your favorite smoking wood. Adjust both vent settings to 1/4, and place the wings on the opposite side to the fire for indirect cooking. Flip the wings after 45 minutes and cooking for another 45. Apply a barbecue sauce or glaze in the last 10 minutes. Prior to cooking, cover the wings in your favorite dry rub.
Key Points
- Use 80 charcoal briquettes
- Pre-light 30 of them and place them in the kettle beside the unlit coals
- Add two chunks of your favorite smoking wood (optional)
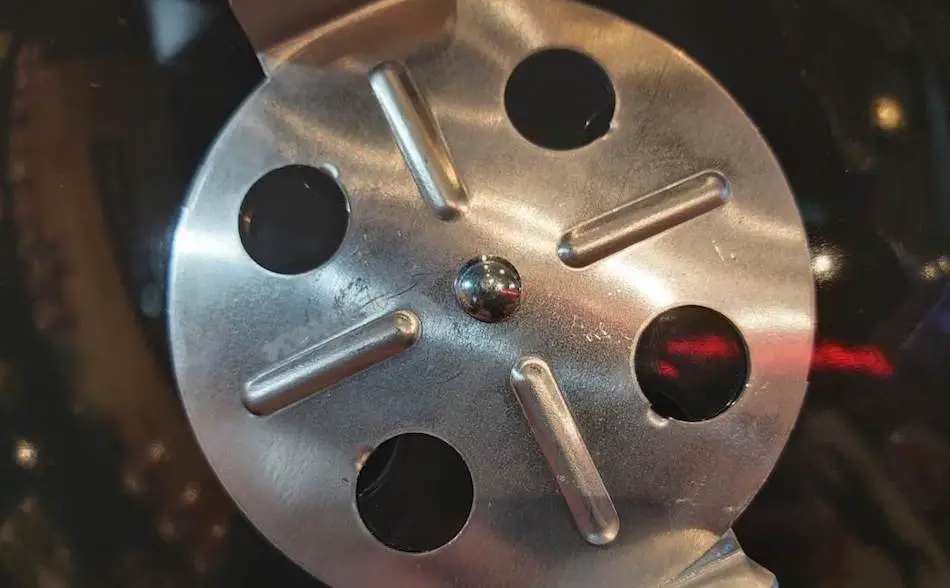
- Adjust both vent settings to 1/4
- Place the wings on the opposite side of the fire for indirect cooking
- Flip the wings after 45 minutes and cook for another 45 minutes
- Smoking wood is optional but can add additional flavor to the wings
- Prior to cooking, dry the wings with a paper towel for crispy chicken skin
- Season with salt and pepper
- Apply a dry rub
- Make a pile of 80 to 100 charcoal on one side of the kettle
- Use an aluminium pan or foil as a drip tray on the opposite side
- Rotate the lid to place the vent on the opposite side of the fire
- Adjust the vents to 1/8 to 1/4 open
- Close the top vent a little if the temperature goes beyond the target temperature
- Make adjustments one at a time and wait 10 minutes before making another adjustment
- Finish at a high temperature of 350°F to crisp the skin
- Monitor closely to avoid burning or drying out the wings
- Apply a barbecue sauce or glaze in the last 10 minutes
Chicken Wings on a Weber Kettle

Smoked barbecue chicken wings
Ingredients
- Chicken Wings
- Salt and Pepper
- Dry Rub
- Barbecue Sauce
Instructions
How To Prepare The Chicken
1. Dry the wings with a paper towel for crispy chicken skin.
2. Sprinkle salt and pepper onto the wings.
3. Cover the wings with a dry rub
How To Cook The Wings On A Kettle Grill
1. Take about 80 charcoal briquettes.
2. Pre-light 30 briquettes, and place them in the kettle beside the unlit coals.
3. Throw on two chunks of your favorite smoking wood.
4. Adjust both vent settings to 1/4, and place the wings on the opposite side to the fire for indirect cooking.
5. Close the lid and cook for 45 minutes.
6. After 45 minutes, flip the wings
7. Cook for another 30 minutes.
8. With a basting brush, apply a barbecue sauce.
9. Cook for another 10 minutes.
.
Nutrition Information:
Serving Size:
3 wingsAmount Per Serving: Calories: 180Total Fat: 8 gCarbohydrates: 8 g
How Set Up Your Weber Kettle For Wings
- Your target temperature for wings is between 275° F and 300° F. For this temperature, you will need to use roughly 80 charcoal briquettes.
- Pre-light 30 of the 80 charcoal briquettes in a charcoal chimney.
- Place the 50 unlit charcoal briquettes and make a pile on one side of the kettle grill.
- Once you have fully lit 30 briquettes in a chimney, pour the lid coals directly on top of the unlit pile.
- On the opposite side of the kettle, place an aluminium pan or some foil as a drip tray.
- Rotate the lid of your Weber kettle so the vent is on the opposite side of the fire. You want to take your temperature readings from the indirect side of the cooker.
- Adjust the vents to 1/8 to 1/4 open on the top and the bottom. If you want to make adjustments, use the top vent and leave the bottom vent a line for the entire cook.
Weber Kettle Settings for Smoking Chicken
| Cooking Temperature | Pre-lit Coal | Charcoal | Time to Target Temp | Cook Time | Top Vent | Bottom Vent |
|---|---|---|---|---|---|---|
| 275°F | 30 | 80 | 20 minutes | 2-2.5 hours | 1/2 | 1/2 |
| 325°F | 40 | 80 | 20 minutes | 2-2.5 hours | 1/2 | 1/2 |
| 350°F | 60 | 100 | 20 minutes | 2-2.5 hours | 1/2 | 1/2 -3/4 open |
Stabilize Your Grill
Allow 20 to 30 minutes for your Weber kettle to come up to temperature. Make the vent adjustments according to the weather. If it’s windy etc, then you may need to close off your vents a little. Make one adjustment at a time, then wait 10 minutes. I always open both vents to half while I’m bringing my kettle up to temperature, and then wind them back to 1/4. Depending on the wind, I’ll make relevant adjustments until the grill has stabilized at my target temperature.
Smoke Chicken Wings For How Long?
Temperature Control Using Vents
During the cook, the temperature may go beyond the target temperature. Close the top vent a little. If you find the temperature goes over 300° F, just pull back the top vent a little, but no less than 1/4, and no more than 1/2. You don’t need to touch the bottom vent, just make all your adjustments from the top. Adjusting the top vent a little can make a 10 to 15° F temperature difference. After you’ve made the change, wait about 10 minutes before making another adjustment.
Finish At A High Temp
To make the skin crispy, some pitmasters prefer to finish chicken wings at a high temperature. This is totally optional. To use this method:
- Smoke the wings 45 minutes to one side.
- Then, flip the wings and cook a further 20 minutes.
- Open the vents of your Weber kettle to about half, then bring the temperature up to 350° F. This will crisp up the skin, but just keep it close eye on the wings, otherwise they will burn and dry out.
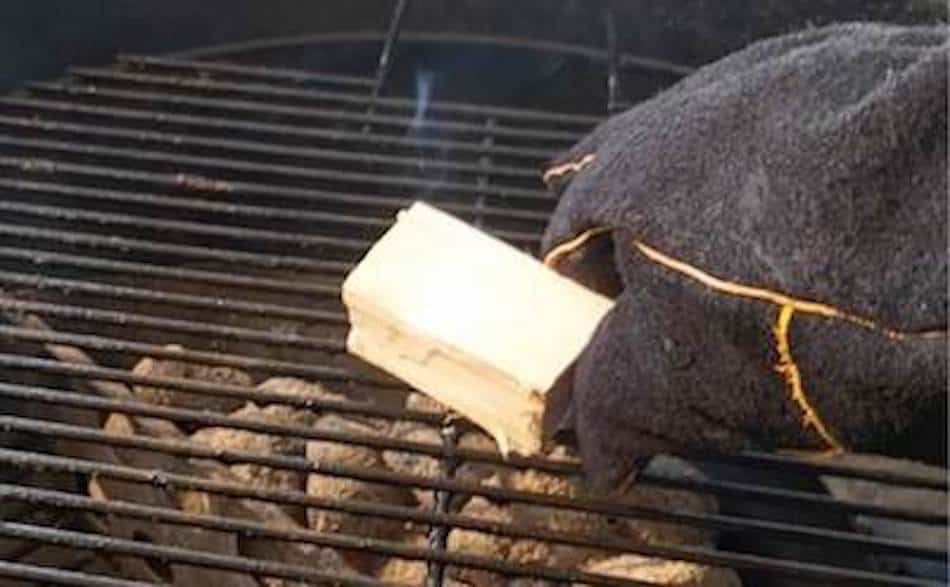
Add Some Smoking Wood
You don’t have to use smoking wood when cooking wings in a kettle grill because charcoal will give you a nice flavor. However, a little wood will give the wings an enormous flavor boost. I prefer to use wood chunks because they last longer. Wood chips will give you a quick burst of smoke but will burn up too easily. I find chunks will provide a consistent smoke for the entire cook.
World Brisket Champion Harry Soo is now sharing his secrets with his Competition Meat Rubs.
Best Wood flavors For Wings
I prefer to use a combination of hickory and fruit wood, such as apple or cherry. The hickory adds a nice bold smoky flavor, while the fruit wood adds a subtle sweetness that pairs well with the chicken.
Whenever you’re smoking chicken or poultry, it’s best to use a mild smoking wood. Chicken has a thin flesh, so too much smoke can overpower the wings. The best flavor wood for chicken is apple or cherry. Hickory will give a stronger smoke flavor, but too much may overpower the chicken. Pecan is a moderate and is always a safe bet.
You can use just about any smoking wood. However, just be careful using mesquite, as it can make the chicken taste bitter if the meat is exposed to the smoke for too long.
| Type of Wood | Why it’s good for chicken |
|---|---|
| Hickory | Gives a strong smoky flavor, perfect for chicken wings and legs. |
| Apple | A milder flavor, adds a sweet and fruity taste that complements the chicken well. |
| Cherry | Similar to apple, gives a sweet and fruity flavor that pairs well with chicken. |
| Maple | Milder than hickory, adds a subtle sweetness to the chicken without overpowering it. |
| Pecan | Provides a nutty and buttery flavor, goes great with all types of chicken dishes. |
| Oak | A strong wood with a robust and heavy smoke flavor, it’s best used with larger cuts of chicken or to complement other milder woods. |
| Mesquite | This wood gives a strong and distinct smoky flavor that can be too intense if used alone, but great for chicken if mixed with other milder woods |
How Long Does It Take To Cook Wings On A Weber Kettle?
The total cook time for chicken wings is 1.5 hours, plus 30 minutes to preheat your kettle grill. If you’re cooking jumbo wings, it may take around 2.5 hours. Allow 20 to 30 minutes to bring a Weber kettle up to temperature. Then, it should take around 30 to 45 minutes to cook the wings on each side.
I like to smoke my wings at a higher temperature (around 275-300°F) for a shorter amount of time (around 1-1.5 hours). This gives the wings a crispy skin while still keeping the meat juicy and tender.
“Why Are My Chicken Wings Soft? – 10 Ways To Get Crispy Chicken Skin”
Rub and Seasoning
When cooking chicken wings, I usually keep the seasoning fairly simple with salt, pepper and all-purpose seasoning. You can use your favorite dry rub, or use this homemade dry rub recipe. If you want some of the best pre-made rubs on the market, check them out here.
| Product | Maker | Ingredients | Price |
|---|---|---|---|
| Killer Hogs | Malcolm Reed | Brown sugar, paprika, salt, spices, dehydrated garlic, dehydrated orange peel, natural flavors, and less than 2% dry calcium phosphate added to prevent caking | $20 |
| Slap Yo’ Daddy All-Purpose Rub | Harry Soo | Sea salt, cane sugar, garlic, chili powder, paprika, cumin, chipotle powder, black pepper, Rosemary, Cayenne pepper, rice concentrate, spices, parsley flakes, and natural flavors | $20 |
| Butcher BBQ | Dave Bouska | Sugar, salt, garlic, onion, spices, lemon, powder, corn syrup, solids, natural flavors, and BHA as an antioxidant | $20 |
| Meat Church | Sugar, salt, spices, paprika, dextrose, dehydrated garlic, celery, silicon dioxide, spice extra foods, and is gluten-free | $15 | |
| Kosmos Killer Bee Rub | Sugar, salt, honey powder, refined syrup, honey, and spices, including paprika, dextrose, dehydrated garlic, and celery | $16 |
Apply a Glaze For Next-Level Wings
During the final stages of the cook, most pitmasters will apply a glaze using a barbecue or hot sauce. All you need to do is take a basting brush and apply the sauce onto the chicken wings in the final 10 to 15 minutes of the cook.
Don’t be afraid to get creative with your sauces and glazes. While a traditional buffalo sauce is always a crowd-pleaser, you can also try experimenting with different flavors like teriyaki, honey mustard, or even a spicy sweet Thai chili glaze.
| Sauce/Glaze | Flavor Profile | Best for |
|---|---|---|
| Buffalo | Spicy, tangy | Classic buffalo-style chicken wings |
| Ranch | Creamy, tangy, herby | Dipping sauce for buffalo-style wings or as a marinade |
| BBQ | Sweet, smoky, tangy | Smoked or grilled chicken wings |
| Honey Mustard | Sweet, tangy, mustardy | Grilled or fried chicken wings |
| Teriyaki | Sweet, savory, slightly sticky | Grilled or smoked chicken wings |
| Lemon pepper | Tangy, citrusy, herby | Grilled or smoked chicken wings |
| Cajun | Spicy, savory, smoky | Grilled or smoked chicken wings |
When To Apply The Glaze
After you have smoked the wings 45 minutes on the first side, flip them over and cook for about another 30 minutes. Then, open the kettle lid and apply the glaze. Then, cook for another 15 minutes. You don’t want to apply the glaze too early, otherwise the sauce will burn. Most barbecue sauces contain sugar. If a sugary sauce burns, it will turn the wings black.
When are Wings Done?
The USDA recommends cooking chicken to a safe internal temperature of 165° F. This is the minimum temperature to remove the wings from your kettle grill. Chicken contains a lot of bacteria like salmonella, so it needs to be cooked to well-done. Use an accurate instant-read thermometer such as a Thermapen, or my favorite the TP19. You can take your wings beyond 165° F, but I wouldn’t go over 200⁰F are they will dry out.
The best way to tell is to use a meat thermometer. Chicken wings should be cooked to an internal temperature of 165°F. You can also use the “bend test”. Take a wing and give it a little bend, if it starts to crack or the meat starts to pull away from the bone, it’s done.

8 Ways To Get Crispy Wings
There’s nothing worse than soft rubbery chicken skin. There are several things you can do to avoid soft skin.
- Always cook above 275° F. It’s very difficult to get a crispy skin if you’re cooking below this temperature.
- Dry this chicken wings with a paper towel prior to cooking. Remove as much moisture as possible, as this will help crisp the skin.
- Avoid using wet brine or marinating the wings prior to cooking. This may cause the wings to have rubbery skin.
- Don’t use a water pan in your Weber kettle. Water pans are good in most circumstances, but the extra steam will not do the wings any good if you’re after a crispy skin.
- Don’t foil or tent the wings. This will create steam and cause soggy skin.
- Don’t place your wings in a pan because they will cook in the moisture and the bottom of the wings will be soft and soggy.
- Don’t spritz the wings during the cook, however, you can spray with olive oil spray. This will help with browning the wings.
- Before adding the rub, sprinkle some cornstarch or baking powder on the wings. This little trick will make the wings crunchier.
Homemade Rub Recipe For Wings
Below is a rub recipe to make a large batch of barbecue rub that you can use on different smoking meats. This rub recipe will make enough for you to store away for future cooks. If you are going to go to the effort of making a rub, you might as well make up a large batch.
| Ingredient | Quantity |
|---|---|
| Paprika | 1/2 cup |
| Salt | 1/2 cup |
| Sugar | 1/2 cup |
| Granulated Garlic | 1/2 cup |
| Granulated Onion | 1/4 cup |
| Chili powder | 1/4 cup |
| Cumin | 1/4 cup |
| Black Pepper | 2 tablespoons |
| Dry Mustard | 2 tablespoons |
| Cayenne Pepper | 2 tablespoons |
Salt Your Meat Separately
Be careful with the salt content when preparing wings. I always try to control the salt when smoking meat. If making a batch of rub, often I will leave about the salt. When preparing the main, prior to adding a rub, I will add the salt separately. This gives me the option of using a salty sauce like hoisin or oyster sauce when applying the glaze. The last thing you want is salty wings.
You should always be careful when purchasing pre-made rubs, because they do contain a lot of salt. Some people also like to dry brine meat prior to smoking, which involves rubbing kosher salt onto the wings a few hours before cooking. This can be dangerous if you are using a rub that contains salt, because then your wings will get double the amount. Plus, if you’re applying a glaze with salt, you can end up ruining your wings.
“Chicken Legs Done Temp – How To Cook Drumsticks To Perfection”
What About Chicken Legs And Thighs?
You can follow the same steps when using chicken pieces such as thighs or legs. Just keep in mind that legs and thighs contain more fat and more blood vessels, so they will need to be cooked a little longer. Chicken wings and chicken breasts need to be cooked to 165° F, but chicken thighs and chicken legs need to be cooked to 175° F.
Pre Brine Chicken Wings
Another way to add extra flavor to chicken is to pre-brine with kosher salt. Brining is a process where you soak the chicken in a salt-water solution for several hours before smoking. This does a few things: it seasons the meat all the way through, it helps to keep the chicken juicy during the cooking process, and it also allows the smoke to penetrate deeper into the meat.
I always brine meat the night before, and leave them in the fridge overnight. Some people use wet brine for chicken and turkey, but I find it makes the skin too soggy. A basic wet brine for chicken wings comprises 1/4 cup of sugar and 1/2 cup of salt in a medium container of water.
For a basic brine, you’ll want to use 1 cup of salt for every 2 gallons of water. Add in any other seasonings or aromatics you like, such as sugar, black pepper, garlic, or herbs. Soak the wings in the brine for at least 4 hours, or overnight for best results.
Dipping Sauces for Smoked Chicken Wings
Smoked chicken wings are best served with a dip. A good dip can take your smoked wings to the next level by adding a whole other layer of flavor. Plus, it’s just plain fun to have a variety of dips to choose from!
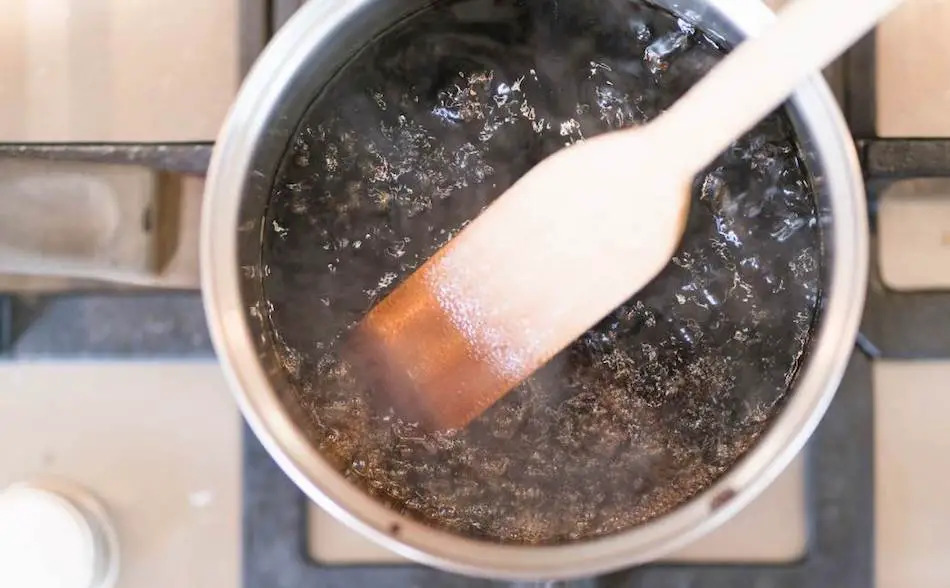
Now, as far as making dips at home, it’s easier than it sounds. Most dips can be made with just a few simple ingredients that you probably already have in your pantry. For example, for a classic buffalo sauce, all you need is some butter, hot sauce, vinegar, and a few spices. Just toss it all together in a pot, bring it to a simmer, and you’ve got yourself a delicious dip.
Same goes for the ranch, blue cheese, and honey mustard dips too, all you need is a few simple ingredients and a mixing bowl. And the BBQ sauce, a staple at any barbecue, it’s just a matter of mixing a few ingredients in a pot and simmering it for a bit.
Making dips at home is a great way to experiment with different flavors and find your own signature dips. So, next time you smoke up some wings, don’t be afraid to whip up a quick dip or two to go along with ’em.
Classic Buffalo Sauce
| Ingredients | Quantity |
|---|---|
| Butter | 1/2 cup |
| Hot sauce (such as Frank’s RedHot) | 1 cup |
| White vinegar | 2 tablespoons |
| Garlic powder | 1 teaspoon |
| Cayenne pepper | 1/4 teaspoon |
| Salt | 1/4 teaspoon |
Instructions:
- In a medium saucepan over medium heat, melt the butter.
- Add the hot sauce, white vinegar, garlic powder, cayenne pepper, and salt to the melted butter and stir to combine.
- Bring the mixture to a simmer and cook for 2-3 minutes, or until the sauce is thickened.
- Remove from heat and use as a dip for your chicken wings.
Ranch Dressing
| Ingredients | Quantity |
|---|---|
| Mayo | 1 cup |
| Sour cream | 1 cup |
| Buttermilk | 1/2 cup |
| Lemon juice | 2 tablespoons |
| Dried parsley | 2 tablespoons |
| Dried chives | 2 tablespoons |
| Garlic powder | 2 teaspoons |
| Onion powder | 2 teaspoons |
| Dried dill | 1 teaspoon |
| Salt and pepper | 1 teaspoon |
Instructions:
- In a medium bowl, whisk together the mayo, sour cream, buttermilk, lemon juice, dried parsley, dried chives, garlic powder, onion powder, dried dill, salt, and pepper.
- Taste and adjust the seasoning as desired.
- Cover the bowl and refrigerate the sauce for at least 2 hours to allow the flavors to meld together.
- Stir the dressing again before serving.
BBQ Sauce
| Ingredients | Quantity |
|---|---|
| Ketchup | 1 cup |
| Brown sugar | 1/2 cup |
| Apple cider vinegar | 1/4 cup |
| Worcestershire sauce | 2 tablespoons |
| Mustard | 1 tablespoon |
| Chili powder | 2 teaspoons |
| Cumin | 1 teaspoon |
| Garlic powder | 1 teaspoon |
| Salt | 1/2 teaspoon |
| Pepper | 1/4 teaspoon |
Instructions:
- In a medium saucepan, whisk together ketchup, brown sugar, apple cider vinegar, Worcestershire sauce, mustard, chili powder, cumin, garlic powder, salt, and pepper.
- Cook over medium heat, stirring occasionally, until the sauce comes to a simmer.
- Reduce heat and let the sauce simmer for 15-20 minutes or until thickened.
- Taste and adjust the seasoning as desired.
- Allow the sauce to cool before serving
Blue Cheese Dip
| Ingredients | Quantity |
|---|---|
| Blue Cheese | 1 cup |
| Mayo | 1/2 cup |
| Sour cream | 1/2 cup |
| Buttermilk | 1/4 cup |
| Lemon Juice | 2 tablespoons |
| Salt | 1/4 teaspoon |
| Pepper | 1/4 teaspoon |
Instructions:
- In a medium bowl, whisk together blue cheese, mayo, sour cream, buttermilk, lemon juice, salt, and pepper.
- Taste and adjust the seasoning as desired.
- Cover the bowl and refrigerate the sauce for at least 2 hours to allow the flavors to meld together.
- Stir the dressing again before serving.
My Favorite Meat Smoking Tools
Thanks for checking out this article. I hope you learned a few things. Here are some of my favorite tools I use when smoking brisket that may be useful to you. These are affiliate links, so if you decide to purchase any of these products, I’ll earn a commission. But in all honesty, these are the tools I recommend to my family and friends who are just starting out.
Meat Thermometer: There are dozens of fancy thermometers on the market, but I still use my trusty TP20. For around $50, I have a high-quality meat thermometer with two probes, and can track the temperature of my smoker with one probe, and my meat with the other probe. The ThermoPro TP20 is an Amazon Best Seller because it’s the easiest thermometer to operate, is durable, highly accurate, and comes with pre-programmed meat settings.
Instant Read Thermometer: Arguably, the second most important tool you need is a fast and accurate instant-read thermometer. These tools play an important role in the latter stages of the cook when the meat needs regular checking in multiple areas. I use the ThermoPro TP19 because it can do everything a ThermaPen can do, but for a fraction of the cost. You can check out the TP19 on Amazon here.
Wireless Thermometer: The latest thermometers on the market have no wires and can be controlled by wi-fi via your phone. Airprobe 3 is the best of this technology.
Butcher Paper: Wrapping brisket in butcher paper has become a huge trend in barbeque thanks to Aaron Franklin. Wrapping your brisket in paper will give you a nice brisket bark. However, you can’t just use any old paper, it has to be unwaxed, food grade paper. You can find it on Amazon here.
Advanced Thermometer and Automatic Temperature Controller: Once you’re ready to take things seriously, the FireBoard 2 Drive is a six-channel Bluetooth/Wi-Fi thermometer that can monitor up to 6 pieces of meat, control and graph your cook sessions on your smartphone, and attaches to an an automatic blower that will convert your charcoal smoker to a set-and-forget. This is one of the most advanced meat thermometers on the market. You can check it out on the FireBoard website here.