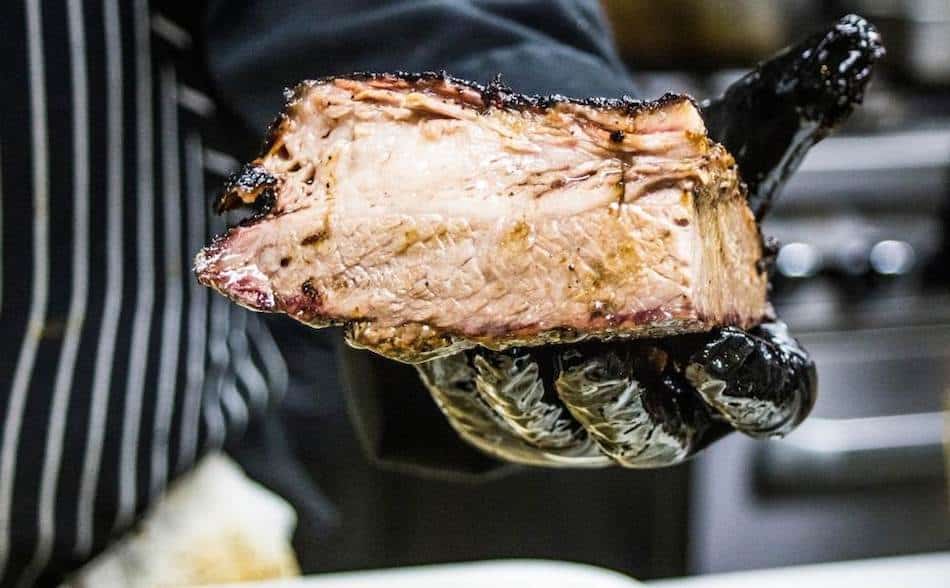
Smoking a brisket on a pellet grill is a surefire way to impress your family and friends with your barbecue skills. But smoking that perfectly tender and flavorful brisket isn’t always easy. That’s why I reached out to some of the top barbeque gurus to get their tips and tricks for smoking a brisket on a pellet grill. In this article, we’ll walk you through the entire process, from preparation to cook, so you can master this challenging yet rewarding meat.
To smoke a brisket on a pellet grill, start by setting the temperature between 250°F and 275°F. Allow the brisket to cook until the bark hardens and the internal meat temperature reaches 150°F, which should take around 5-6 hours. Then, wrap the brisket in foil or butcher paper and return it to the pellet grill for an additional 4 hours or until the internal meat temperature reaches 203°F or the meat feels like butter when poked. Before cooking, trim the fat cap to 1/4 inch and remove the silver skin from the brisket, and consider applying a binder such as olive oil or mustard and seasoning the meat with a barbeque rub. Once the brisket is finished cooking, allow it to rest for at least an hour or place it in a dry cooler for up to 4 hours before slicing and serving.
| Step | Description |
|---|---|
| 1 | Trim the fat cap to 1/4 inch and remove the silver skin from the brisket |
| 2 | Preheat the pellet grill to 250°F |
| 3 | Season the brisket with a barbeque rub and apply a binder (optional) |
| 4 | Place the brisket on the pellet grill and smoke for 1 hour per pound |
| 5 | After the first hour, spritz the brisket every 30 minutes with a mixture of equal parts apple juice and water |
| 6 | When the internal meat temperature reaches 150°F, wrap the brisket in foil or butcher paper |
| 7 | Return the wrapped brisket to the pellet grill and continue smoking until the internal meat temperature reaches 203°F |
| 8 | Remove the brisket from the pellet grill and allow it to rest for at least an hour before slicing and serving |
| 9 | If desired, sauce or glaze the brisket before serving |
Tips for Buying the Best Brisket
- Quality of brisket is important for perfect smoked brisket
- Low-quality briskets may be more difficult to cook and result in less flavorful, tender final product
- High-quality briskets with good marbling and fat content are easier to cook and result in more flavorful, tender final product
- When choosing a brisket, look for well-marbled, thick fat cap and deep red color; wet-aged is ideal
- Avoid excessively lean or gristly briskets
- In the US, the USDA grades beef based on age, marbling, and yield
- The most common grades in supermarkets and restaurants are prime, choice, and select
- Prime is highest quality, known for tenderness, juiciness, and flavor
- Choice is next highest quality, known for good balance of tenderness, juiciness, and flavor
- Select is lowest quality commonly found in supermarkets and restaurants, known for lower cost and lower quality compared to prime and choice
- Other five grades (standard, commercial, utility, cutter, and canner) are typically used for processed and lower-quality beef products
There’s no saving a poor brisket. The quality of the brisket you use is an important factor in achieving the perfect smoked brisket. Many YouTube pitmasters don’t mention this, but using a low-quality brisket can make it more difficult to cook and result in a less flavorful and tender final product. On the other hand, a high-quality brisket with good marbling and fat content will be easier to cook and result in a more flavorful and tender finished product. Keep this in mind when selecting a brisket for smoking and don’t rely solely on barbecue tips and tricks to save a low-quality cut of meat.
Look for good marbling. When choosing a brisket for smoking, it’s important to look for a cut that is well-marbled with fat. This will help the brisket stay moist and flavorful during the long cooking process. Look for a brisket with a thick fat cap, as this will help protect the meat from drying out. You should also choose a brisket with a deep red color, as this indicates a high level of marbling. If possible, try to find a brisket that has been wet-aged, as this will enhance the flavor and tenderness of the meat. Avoid briskets that are excessively lean or have a lot of gristle, as these will not produce as good of a finished product.
Buy the highest grade you can afford
- In the United States, the USDA grades beef based on factors such as the age of the animal, marbling, and yield of the carcass
- There are eight grades of beef, ranging from prime (highest quality) to canner and cutter (lowest quality)
- The most common grades of beef found in supermarkets and restaurants are Prime, Choice, and Select
- Prime beef is the highest quality grade, known for its tenderness, juiciness, and flavor
- Choice beef is the next highest quality grade, known for its good balance of tenderness, juiciness, and flavor
- Select beef is the lowest quality grade commonly found in supermarkets and restaurants, known for its lower cost and lower quality compared to prime and choice
Trimming The Brisket
Trimming a brisket is an important step in the smoking process because it helps to prepare the meat for cooking. When you trim off excess fat and remove the silver skin from the brisket, you are creating a more evenly-shaped piece of meat that will cook more evenly and consistently. Trimming also helps to remove any tough or inedible parts of the brisket that might make it less enjoyable to eat. By leaving a thin layer of fat on the brisket, you can also help to protect the meat from drying out during the long smoking process.
Trimming brisket in 4 steps:
- Begin by inspecting the brisket and identifying the fat cap and the silver skin. The fat cap is the layer of fat on top of the brisket, and the silver skin is the thin, tough layer of connective tissue underneath the fat cap.
- Using a sharp knife, trim off any excess fat or meat from the sides and ends of the brisket. You want to leave a layer of fat that is about 1/4 inch thick to protect the meat during the smoking process.
- Next, remove the silver skin from the brisket by sliding the knife underneath it and carefully slicing it away from the meat. This can be a bit tricky, so take your time and be careful not to cut into the meat.
- Once you have trimmed off the excess fat and removed the silver skin, the brisket should be ready for seasoning and smoking. If desired, you can also apply a binder such as olive oil or mustard to the brisket before seasoning it with a barbeque rub.
Dry Brining The Brisket – Totally Optional
Dry brining a brisket is a way to add flavor and moisture to the meat before cooking. Here’s how you can do it:
- Start by mixing together some kosher salt and any other seasonings you’d like to use. You can use a ratio of about 1 tablespoon of salt for every 2-3 pounds of meat.
- Rub the salt mixture all over the brisket, making sure to coat the entire surface of the meat. You can use your hands or a basting brush to apply the salt.
- Place the brisket in a plastic bag or wrap it in plastic wrap, and let it sit in the refrigerator for at least a few hours or up to a day. This will allow the salt to penetrate the meat and add flavor.
- When you’re ready to cook the brisket, remove it from the bag or plastic wrap and let it sit at room temperature for about an hour before cooking. This will help the meat to cook more evenly.
Dry brining a brisket is a good way to add flavor and moisture to the meat before cooking. The salt helps to break down the proteins in the meat and create a flavorful crust on the outside of the brisket. It also helps to retain moisture in the meat, which can keep it from drying out while it’s cooking.
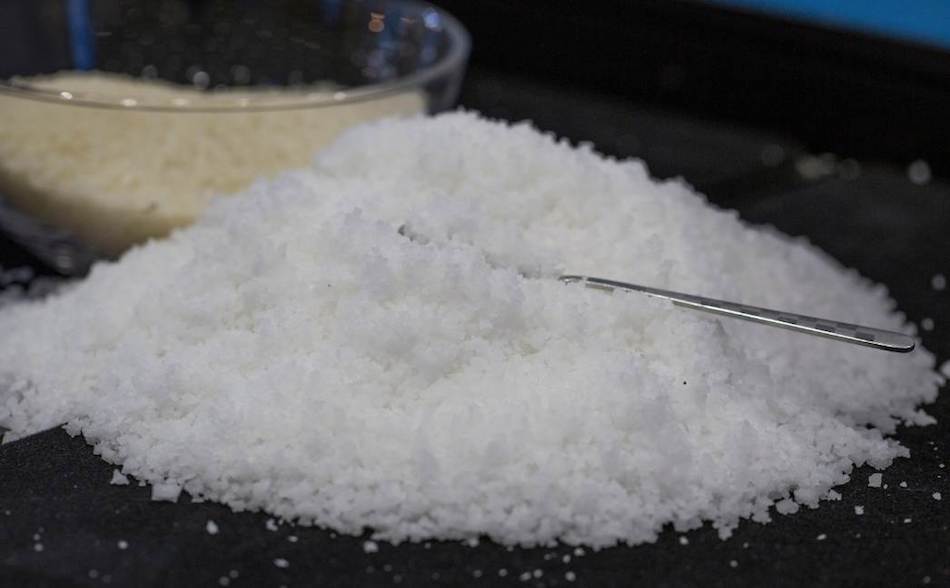
Using kosher salt for dry brining is a good choice because it has larger crystals than regular table salt. This allows it to dissolve more slowly and penetrate the meat more evenly.
Overall, dry brining a brisket is a simple and effective way to add flavor and moisture to the meat. It can help to create a delicious and tender brisket every time you cook.
WARNING. If you choose to dry brine, just watch the salt content of your rub. Otherwise you might double-salt the meat.
Injecting Brisket For ” Next-Level” BBQ
- Injecting a brisket is a way to add flavor and moisture to the meat before cooking
- It is done using a meat injector, a tool with a needle that can be filled with liquids such as broth, marinades, and other flavorings
- Pros of injecting a brisket include added flavor and moisture, and potentially shorter cooking time
- Cons of injecting a brisket include the risk of puncturing the meat too deeply or creating holes that are too large, and the time and effort required for the extra step
- The science behind injecting a brisket is that the liquids can help to break down the proteins in the meat and create a more tender and flavorful result
- Different liquids can be injected into a brisket, including broth, marinades, and other flavorings.
Injecting a brisket is a way to add flavor and moisture to the meat before cooking. Some competition pitmasters do it because they believe it helps to create a more flavorful and tender brisket.
Get a meat injector. To inject a brisket, you’ll need a meat injector, which is a special tool with a needle that you can use to inject liquids into the meat. You can fill the injector with a variety of liquids, including broth, marinades, and other flavorings. Meat injectors are affordable. Amazon sell stainless steel injectors for about $30. This injector is a best-seller.
The benefits of injecting. The pros of injecting a brisket include that it can add extra flavor and moisture to the meat, which can help to make it more tender and juicy. It can also help to speed up the cooking time, since the liquids can help to heat up the center of the meat more quickly.
The cons of injecting. There are also some cons to injecting a brisket. One concern is that it can be difficult to get the needle into the meat without puncturing it too deeply or making holes that are too large. This can lead to the meat falling apart or drying out. Also, injecting a brisket requires an extra step in the cooking process and can be time-consuming.
Why inject? The science behind injecting a brisket is that the liquids can help to add flavor and moisture to the meat, and can also help to speed up the cooking time. The liquids can help to break down the proteins in the meat and create a more tender and flavorful result.
What marinade? There are many different things you can inject into a brisket, including broth, marinades, and other flavorings. Some people like to use a mixture of different liquids to create a unique and flavorful injection. If you want to use the marinade competition pitmasters use, check out Butcher BBQ Brisket Marinade.
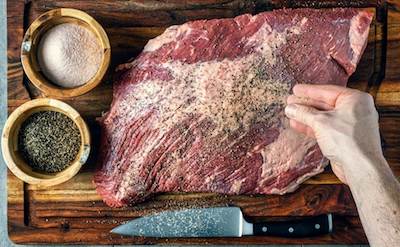
Applying The Brisket Rub
When smoking a brisket, a rub can be an important tool for adding flavor and helping to create a flavorful, delicious brisket. The spices and seasonings in a rub can help to enhance the natural flavors of the meat and add depth and complexity to the brisket. A rub also plays a role in bark formation, the crust on the surface of the brisket. The bark adds texture and visual appeal to the smoked brisket. Here is a great brisket rub recipe from barbecue website, Amazing Ribs:
| Ingredient | Amount |
|---|---|
| Paprika | 1/2 cup |
| Garlic powder | 1/4 cup |
| Onion powder | 1/4 cup |
| Salt | 1/4 cup |
| Black pepper | 1/4 cup |
| Cayenne pepper | 2 tablespoons |
| Ground cumin | 2 tablespoons |
To use this rub, mix the ingredients together in a small bowl and follow the steps for applying a rub to a brisket as described in the previous answer. This rub can be stored in an airtight container for future use. If you prefer a pre-made rub, I love Killer Hogs.
Standard Barbecue Rub
I found this great rub recipe through How To BBQ Right. I use this recipe and alter it slightly depending on what I'm cooking. Made by the guys at Townsend Spice & Supply: https://townsendspice.com/
Ingredients
- - ½ Cup Paprika
- - ½ Cup Salt
- - ½ Cup Sugar
- - ½ Cup Granulated Garlic
- - ¼ Cup Granulated Onion
- - ¼ Cup Chili
- - ¼ Cup Cumin
- - 2 Tablespoons Black Pepper
- - 2 Tablespoons Dry Mustard
- - 1 Tablespoon Cayenne Pepper
Instructions
- Combine all the spices together in a large mixing bowl
- Store rub in rub shakers
Does Brisket Need A Binder?
A slather or binder is a thin layer of liquid or paste that is applied to the surface of a brisket before it is smoked. The purpose of a slather or binder is to help the dry rub seasonings adhere to the surface of the meat, and to provide an additional layer of flavor. Some common ingredients used in slathers or binders include yellow mustard, barbecue sauce, honey, and olive oil.
Whether or not you choose to use a slather or binder when smoking brisket is a matter of personal preference. At the end of the cook, you won’t be able to taste the slather anyway. Some people find that it helps to add flavor and moisture to the meat, while others prefer to let the dry rub seasonings speak for themselves. I find olive oil is the safest bet when adding a binder. Also, Aaron Franklin also uses olive oil when adding a binder.
Choosing the Right Wood for Smoking Brisket
There are many different types of wood pellets that can be used to smoke brisket, and the best choice will depend on your personal preference and the flavor profile you are trying to achieve. Brisket is a tough cut of meat, so it can handle a bit of smoke. However, it’s going to be in the smoker for a long time so you still need to choose the right wood. Some popular wood pellet flavors for smoking brisket include:
- Oak: Oak is a classic wood pellet flavor that adds a subtle, smoky flavor to brisket. It pairs well with most rubs and sauces and is often used as a base flavor in BBQ blends.
- Mesquite: Mesquite is a strong, bold wood pellet flavor that most people find too bitter. Be careful using this wood, as it can overpower the flavor.
- Pecan: Pecan is a mild wood pellet flavor that adds a sweet, nutty taste to brisket.
- Apple: Apple is a fruity wood pellet flavor that adds a subtle sweetness and a hint of tartness to brisket. Apple is always a safe bet, and won’t overpower the meat.
- Cherry: Cherry is another fruity wood pellet flavor that gives a sweet taste to your brisket, and also add a dark color.
Setting the Perfect Temperature for Smoking Brisket on a Pellet Grill
There are a few different temperatures at which you can smoke a brisket, and each one has its own set of pros and cons. Here are the most common temperatures for smoking brisket, along with their pros and cons:
Low and Slow: Low and slow smoking refers to cooking the brisket at a low temperature (around 225-250°F) for an extended period of time, usually 8-12 hours or longer. The pros of low and slow smoking include a more tender, moist final product, as well as a deeper, more complex flavor. The cons include the fact that it takes longer, and it can be more challenging to maintain a consistent temperature for such a long period of time.
Hot and Fast: Hot and fast smoking refers to cooking the brisket at a higher temperature (around 300-350°F) for a shorter period of time, usually 4-6 hours or less. The pros of hot and fast smoking include the fact that it takes less time and is easier to maintain a consistent temperature. The cons include the fact that the final product may not be as tender and moist as a low and slow cooked brisket, and the flavor may not be as deep and complex.
Always Clean Your Pellet Grill Before a Brisket Cook
It’s important to clean a pellet grill before a long cook because it helps the grill to cook your food evenly and taste better. When you cook on a dirty grill, the food can pick up flavors from any leftover bits of food or grease that may be stuck to the grill. This can make your food taste strange or burnt. Cleaning the grill also helps to remove any built-up gunk that could potentially cause the grill to malfunction or even start a fire. So it’s always a good idea to take a few minutes to clean the grill before you start cooking. This way, you can enjoy delicious, evenly cooked food every time you use your pellet grill. Cleaning is especially important if you plan to leave your pellet grill unattended.
Bring The Brisket Up To Room Temperature Before Cooking
When you’re smoking a brisket, it’s really important to make sure it’s at room temperature before you start. This is because if the meat is cold, it can take a long time for it to cook all the way through. And if it takes too long to cook, the outside of the meat might get burnt before the inside is fully cooked.
But if you let the brisket sit out at room temperature for a little while before you start cooking it, the inside of the meat will warm up a bit. This can help the meat cook more evenly, so the outside isn’t burnt and the inside is nice and juicy.
So, to make sure your brisket turns out delicious, it’s a good idea to let it sit out for a little bit before you start cooking it. This way, you can be sure that it’s cooked just right and tastes amazing!
Fat-Side-Up or Fat-Side-Down?
When smoking a brisket, you have the option of placing the fat side up or fat side down on the grill. Both methods have their own set of pros and cons.
One benefit of placing the fat side up is that the fat will melt and baste the meat as it cooks. This can help to keep the meat moist and flavorful. It can also help to create a crispy crust on the outside of the brisket, which is called the “bark.”
However, there are also some drawbacks to placing the fat side up. One concern is that the fat may not render fully, which means it may not melt completely. This could lead to pockets of hard fat on the surface of the meat. Also, if the fat doesn’t render fully, it may not provide enough moisture to the meat, which could lead to it drying out.
On the other hand, placing the fat side down has some benefits as well. One advantage is that the fat will help to protect the meat from the direct heat of the grill, which can prevent it from drying out. Additionally, because the fat is not exposed to the heat, it is less likely to cause flare-ups or burning.
There are also some drawbacks to placing the fat side down. One concern is that the fat may not melt and baste the meat as it cooks, which could lead to the meat being less flavorful and moist. This means the fat side down method may not create as crispy of a bark on the outside of the brisket. For more information, check out this article: Should I Smoke Brisket Fat Side Up Or Down?
| Method | Pros | Cons |
|---|---|---|
| Fat side up | – Melts and bastes the meat as it cooks, helping to keep it moist and flavorful | – May not render fully, leading to pockets of hard fat on the surface of the meat. If the fat doesn’t render fully, it may not provide enough moisture to the meat, leading to it drying out |
| Fat side down | – Protects the meat from the direct heat of the grill, preventing it from drying out. Less likely to cause flare-ups or burning | – May not melt and baste the meat as it cooks, leading to the meat being less flavorful and moist. May not create as crispy of a bark on the outside of the brisket |
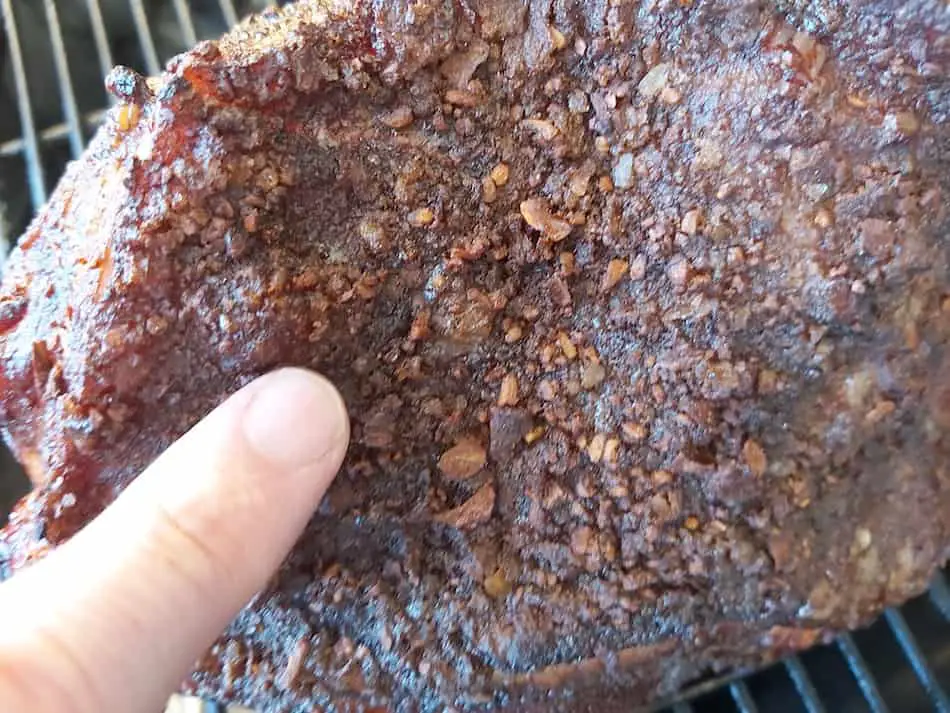
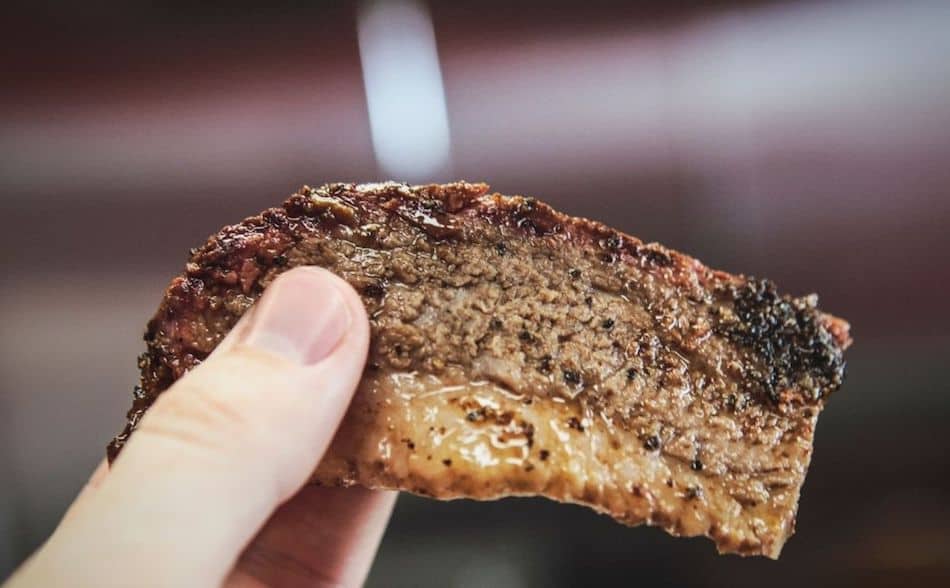
How To Develop A Nice Crispy Bark On Your Brisket
- Brisket bark is the crispy, crunchy outer layer of a brisket
- To develop a good bark, use a dry rub or spice mixture and try poking the meat with a knife before cooking
- The bark forms due to the Maillard reaction, which is a chemical reaction between the proteins and sugars in the meat and rub
- Brisket bark is full of flavor and has a satisfying crunch, making it a tasty and popular addition to many dishes.
What is bark? Brisket bark is the crispy, crunchy, and flavorful outer layer of a brisket. It is made up of the spices and rub that you put on the meat before cooking, as well as the juices and fat that are released from the meat as it cooks.
How to get crispy bark? To develop a good brisket bark, it’s important to use a good dry rub or spice mixture on the outside of the meat. This will help to add flavor and create a crusty texture. You can also try brushing the meat with a sharp knife before cooking, which can help the rub to stick better and create more surface area for the bark to form on.
The science behind creating a good bark is all about the Maillard reaction. This is a chemical reaction that occurs when the heat of the grill causes the proteins and sugars in the meat and rub to break down and form new, flavorful compounds. As the bark forms, it helps to seal in the juices of the meat and create a delicious, crispy texture.
Bark adds crunch and texture. Brisket bark is so good to eat because it is full of flavor and has a satisfying crunch. It’s the perfect combination of savory, spicy, and smoky flavors, and it goes great with the moist and tender meat of the brisket. Whether you’re eating it on its own or using it to top a sandwich or salad, brisket bark is sure to be a hit with everyone. For more information, check out an article I wrote on the subject: How To Get Bark On Brisket.
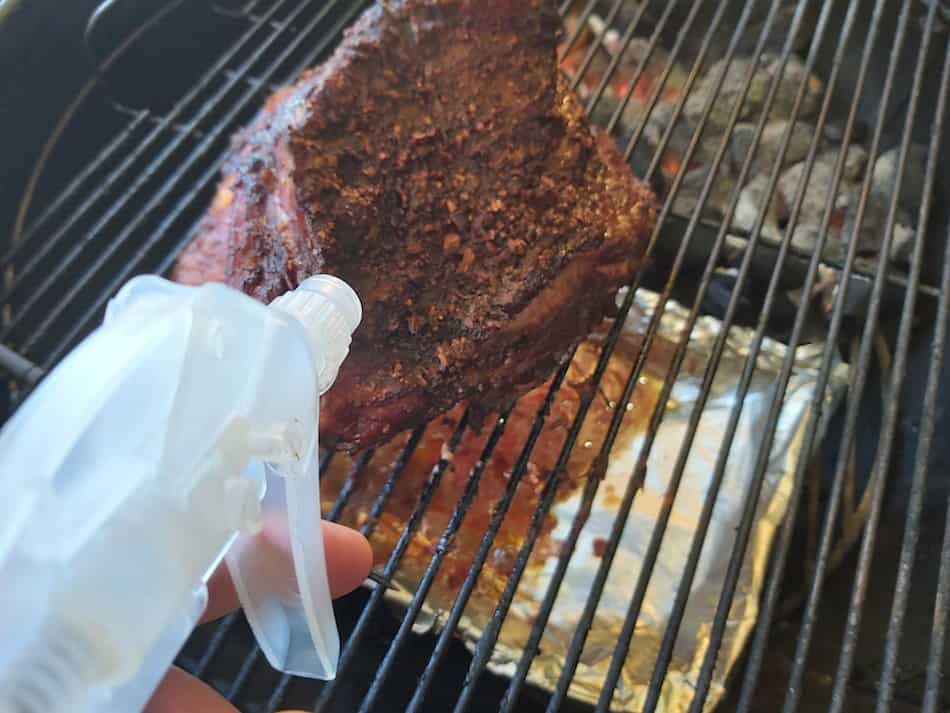
Spritzing and Mopping Brisket – When and How?
Spritzing and mopping a brisket while it’s cooking can help to keep the meat moist and flavorful. Here are some things to consider when spritzing and mopping:
- Spritzing: This is when you spray the meat with a liquid mixture while it’s cooking. Some common ingredients for a spritz mix include apple cider vinegar, Worcestershire sauce, and water. You can use a spray bottle or a mop to apply the spritz to the meat.
- Mopping: This is when you brush the meat with a liquid mixture using a mop or a basting brush. A common mopping recipe includes equal parts apple cider vinegar, water, and barbecue sauce. You can also add in some Worcestershire sauce, mustard, or other seasonings to give the mopping liquid extra flavor.
- Tools: To spritz or mop a brisket, you’ll need a spray bottle, a mop, or a basting brush. You’ll also need a bowl or container to mix up the spritz or mopping liquid.
- How often?: It’s a good idea to spritz or mop the brisket every hour or so while it’s cooking. This will help to keep the meat moist and flavorful.
- When to start: Don’t start spritzing or mopping the brisket until the bark is firm. You can start sooner, but opening the lid of your pellet grill isn’t a good idea.
- When to stop?: You can stop spritzing or mopping the brisket once it has reached the wrapping stage. If you’re not wrapping, stop wetting the brisket when it’s done.
- Pros and cons: One benefit of spritzing and mopping is that it can help to keep the meat moist and flavorful. However, it’s important to be careful not to apply too much liquid, as this can cause the bark to become too soft and lose its crispiness. It’s also a good idea to avoid getting the liquid on the coals or in the drip pan, as this can cause flare-ups and affect the temperature of the grill.
Pro Tips On Wrapping Brisket
- Wrapping brisket is a technique used by some pitmasters to help retain moisture and prevent the bark (crusty exterior) from becoming too hard.
- There are a few different options for what to use to wrap the brisket, including pink butcher paper and foil.
- Aaron Franklin, a well-known pitmaster, prefers to use pink butcher paper because it allows the meat to breathe and helps to even out the cooking temperature.
- Foil is a good choice for pitmasters who want to retain as much moisture as possible, but it can also trap heat, which can lead to an overcooked exterior and undercooked interior (the “foil wrap stall”).
- The best time to wrap is after the brisket has formed a crispy bark.
- Wrapping will soften the bark, but will speed up the cook.
- Wrapping will also help push the brisket through the stall.
- Whether or not to wrap the brisket, and what material to use, is a personal decision for each pitmaster.
- If you do decide to wrap your brisket, it’s important to make sure that the wrap is snug and secure, but not too tight.
- Insert a thermometer probe into the brisket after wrapping so you can monitor the internal temperature.
Some pitmasters choose to wrap their brisket in order to help retain moisture and keep the bark from becoming too hard. There are a few different options for what to use to wrap the brisket, including pink butcher paper and foil.
Aaron Franklin, a well-known pitmaster and owner of Franklin Barbecue in Austin, Texas, is a fan of using pink butcher paper to wrap brisket. He believes that the paper allows the meat to breathe, which helps to retain moisture and prevent the bark from becoming too hard. Franklin also notes that the pink color of the paper helps to reflect heat, which can help to even out the cooking temperature across the brisket.
On the other hand, some pitmasters prefer to wrap their brisket in foil. Foil is a good choice for pitmasters who want to retain as much moisture as possible, as it creates a tight seal around the brisket. However, foil can also trap heat, which can lead to a brisket that is overcooked on the outside while still being undercooked on the inside. This is known as the “foil wrap stall,” and it can be difficult to predict or avoid. Foil will also make the bark softer.
In general, it’s up to the individual pitmaster to decide whether or not to wrap their brisket, and what type of material to use. Some pitmasters prefer to wrap their brisket at a certain point in the cooking process, while others prefer to let the brisket cook without wrapping it at all. If you do decide to wrap your brisket, it’s important to make sure that the wrap is snug and secure, but not so tight that it constricts the meat. For more on the subject, check out this article: Should I Wrap Brisket In Foil Or Paper?
How Long Does It Take To Smoke Brisket On A Pellet Grill?
Cooking brisket on a pellet grill can take a long time, usually around 8-10 hours or more, depending on the cooking temperature, the size and thickness of the brisket, as well as the desired level of tenderness. This is because brisket is a tough cut of meat that benefits from low and slow cooking, which helps to break down the connective tissue and make the meat more tender. You’ll know the brisket is done when it reaches an internal temperature of at least 190-200°F and is tender enough to pull apart easily with a fork. It’s important to be patient and let the brisket cook for as long as it needs, even if it takes all day. The extra time and effort will be worth it in the end.
| Brisket Size | Temperature | Cook Time | Including Resting |
| 12 lbs | 225°F | 18 hours | 19 hours |
| 18 lbs | 250°F | 18 hours | 19 hours |
| 12 lbs unwrapped | 225°F | 19 hours | 20 hours |
| 18 lbs unwrapped | 250°F | 19 hours | 20 hours |
| 16 lbs | 275°F | 10 – 12 hours | 11-13 hours |
| 16 lbs unwrapped | 275°F | 11-13 hours | 12-14 hours |
How To Tell When Brisket Is Perfectly Tender
There are several different ways to test the tenderness of smoked brisket to see if it is done cooking. Here are a few methods you can try:
- The fork test: This is a simple method that involves inserting a fork into the brisket and trying to pull it apart. If the meat falls apart easily and feels tender, it is likely done cooking.
- The toothpick test: This method involves inserting a toothpick into the brisket and seeing how easily it goes in. If the toothpick goes in easily and feels tender, the brisket is likely done cooking.
- The bounce test: This method involves pressing on the brisket with your finger. If the meat feels soft and bouncy, it is likely done cooking.
The ideal internal temperature for smoked brisket varies depending on the desired level of tenderness. Here are some general guidelines:
- For very tender brisket, aim for an internal temperature of 200-210°F
- For tender brisket, aim for an internal temperature of 190-200°F
- For medium-tender brisket, aim for an internal temperature of 180-190°F
It’s important to use an instant-read meat thermometer to accurately gauge the internal temperature of the brisket, as this will help you to know when it is done cooking. An instant-read thermometer is a tool that allows you to quickly and accurately measure the temperature of the meat without having to wait for a dial or digital display to update. This is especially important when cooking brisket, as it can take several hours to cook and you’ll want to know when it’s done as quickly as possible.
Why Does Brisket Take So Long To Cook?
- Brisket is a tough cut of meat because it has a lot of connective tissue made up of collagen
- Collagen breaks down during cooking, making the meat more tender and easier to chew
- Low and slow cooking is a method that involves cooking the meat at a lower temperature for a longer period of time
- This method is effective for tough cuts of meat like brisket because it allows the heat and moisture to penetrate the meat slowly and evenly, which helps to break down the collagen more effectively
- The result is a more tender and juicy piece of meat.
Brisket is a cut of meat because it’s used for a lot of movement and weight-bearing, which means it has a lot of connective tissue. Connective tissue is made up of protein fibers called collagen, which help to hold the muscle fibers together and give structure to the meat.
When you cook brisket, the heat and moisture from the cooking process help to break down the collagen into a softer, more gelatinous substance. This process is called collagen hydrolysis, and it’s what makes the meat more tender and easier to chew.
Low and slow cooking is a method of cooking that involves cooking the meat at a lower temperature for a longer period of time. This method is especially effective for tougher cuts of meat like brisket, because it allows the heat and moisture to penetrate the meat more slowly and evenly. This helps to break down the collagen more effectively, resulting in a more tender piece of meat.
The Ideal Resting Time For Brisket
- Resting brisket is important because it allows the juices to redistribute and the meat to become more tender
- When you cook brisket, the heat and moisture cause the proteins to contract and squeeze out some of the juices
- If you cut into the brisket immediately after cooking, these juices will spill out and the meat will be dry and less flavorful
- To rest brisket, simply remove it from the grill or oven and let it sit at room temperature for 30 minutes to an hour, wrapping it in foil or butcher paper if desired
- During the resting period, the juices will slowly make their way back into the meat, making it more tender and flavorful.
Resting brisket is important because it allows the juices to redistribute and the meat to become even more tender. When you cook brisket, the heat and moisture from the cooking process cause the proteins in the meat to contract and squeeze out some of the juices. If you cut into the brisket immediately after it comes off the grill, these juices will spill out and the meat will be dry and less flavorful.
To rest brisket, simply remove it from the pellet grill and let it sit at room temperature for a period of time, usually 30 minutes to an hour. You can wrap the brisket in foil or butcher paper to help retain heat and moisture, or you can place it on a cutting board or platter.
During the resting period, the juices will slowly make their way back into the meat, making it more tender and flavorful. This is especially important for brisket, as it is a naturally tough cut of meat that benefits from a longer resting time.
Holding Brisket In A Cooler – Why Do It?
- Holding brisket in a cooler is a technique that involves wrapping the brisket in foil or butcher paper and placing it in a cooler with towels or blankets to retain heat
- The cooler should be well-insulated and have a tight-fitting lid to keep the heat in
- You can hold the brisket in the cooler for at least an hour, and possibly up to several hours, depending on the temperature of the cooler and the size and thickness of the brisket
- Holding brisket in a cooler helps to keep the meat hot and moist until it is ready to be served, and also helps to prevent it from drying out.
Holding brisket in a cooler, also known as the “cooler method,” is a technique that involves letting the brisket rest in a cooler or other insulated container after it is cooked. This technique is often used by professional pitmasters and competition barbecue teams to ensure that the brisket stays hot and moist until it is ready to be served.
To hold brisket in a cooler, you’ll need to wrap the brisket in foil or butcher paper after it comes off the grill or smoker, then place it in a cooler with a couple of towels or blankets to help retain heat. You’ll want to make sure the cooler is well insulated and has a tight-fitting lid to keep the heat in.
The length of time you can hold the brisket in the cooler will depend on the temperature of the cooler and the size and thickness of the brisket. In general, you can expect to hold a brisket in a cooler for at least an hour, and possibly up to 4-plus hours, without it losing too much heat or moisture. For safety, keep a thermometer inserted into the brisket so you can continue to monitor the internal meat temperature. That way, you can be sure the brisket is still at a safe eating temperature.
Holding brisket in a cooler is a useful technique because it allows you to keep the meat hot and moist until it is ready to be served. This is especially important if you are cooking a large brisket that will take several hours to cook, as it gives you a little bit of flexibility in terms of timing. It also helps to prevent the brisket from drying out, which can happen if it sits out at room temperature for too long.
How To Slice Brisket Like A Pitmaster
To slice brisket like a pitmaster, you’ll need to follow a few simple steps:
- Allow the brisket to rest: After the brisket is cooked, it’s important to let it rest for at least 30 minutes to an hour. This allows the juices to redistribute and the meat to become more tender.
- Trim the fat: Before slicing the brisket, it’s a good idea to trim off any excess fat that may be on the surface of the meat. This will help to make the brisket more flavorful and easier to slice.
- Slice against the grain: To make the brisket as tender as possible, it’s important to slice it against the grain. This means slicing the meat perpendicular to the direction of the muscle fibers, rather than with them. Slicing against the grain creates shorter muscle fibers, which makes the meat easier to chew and more tender.
- Slice thinly: To get the best results, try to slice the brisket as thinly as possible, using a sharp knife. This will help to ensure that each slice is tender and easy to chew.
- Serve and enjoy: Once the brisket is sliced, it’s ready to be served and enjoyed! You can serve it on its own, or you can use it to make sandwiches, tacos, or any other dish that calls for tender, flavorful brisket.
What Are Some Brisket Side Dishes?
- Mashed potatoes: A creamy, comforting side dish that pairs well with the rich flavor of brisket
- Mac and cheese: A classic comfort food that goes well with just about any barbecue dish
- Baked beans: A sweet and savory side dish that complements the smoky flavor of brisket
- Coleslaw: A refreshing and crunchy side that helps to balance out the richness of the meat
- Cornbread: A sweet and crumbly bread that’s perfect for soaking up any leftover juices from the brisket
Salads:
- Caesar salad: A classic salad made with romaine lettuce, croutons, and a creamy dressing
- Arugula salad: A refreshing and slightly spicy salad made with arugula, cherry tomatoes, and a vinaigrette
- Spinach salad: A hearty salad made with spinach, bacon, and a warm bacon dressing
Sandwiches:
- Brisket sandwiches: Slice the brisket thinly and serve it on a bun with your choice of toppings, such as BBQ sauce, coleslaw, and pickles
- Tacos: Shred the brisket and serve it in a taco shell with your choice of toppings, such as salsa, cheese, and sour cream
- Sliders: Slice the brisket thinly and serve it on small buns with your choice of toppings, such as cheese, pickles, and mustard
Smoked Brisket

Tender, juicy smoked brisket cooked low and slow on a smoker.
Ingredients
- Brisket
- Barbecue rub
- Kosher salt ( for the dry brine)
- Yellow mustard or olive oil ( for the binder)
Instructions
1. Select a brisket with good marbling.
2. Trim the fat but leave 1/4 inch of fat on top.
3. Dry brine the brisket by sprinkling kosher salt on both sides of the meat and refrigerate for a few hours or overnight.
4. Inject the brisket with broth or marinade. * Optional
5. Slather the brisket with olive oil or yellow mustard. *Optional
6. Apply an even layer barbeque rub. If the rub contains salt, skip the dry brine step.
7. Use hickory, oak, pecan or your favorite smoking wood.
8. Set the temperature of your smoker between 225°F to 250°F
9. Place the brisket in smoker away from the heat source.
10. Fill the water pan with hot water.
11. Insert a leave-in meat thermometer into the brisket.
12. Leave the brisket alone for the first 3 hours or so. Allow the brisket to absorb smoke and develop a bark.
13. Once the rub has fused to the meat, begin to spritz the brisket every hour with either apple juice, broth, apple cider vinegar or beer. Otherwise, mop with a mop sauce.
14. Once the bark is firm, wrap the brisket in foil or butcher paper. By this stage, the meat should have reached an internal temperature between 150°F and 160°F.
15. Insert the thermometer into the meat and place the brisket back in the smoker.
16. Continue cooking until the brisket is tender as butter when poked with a toothpick or probe. The internal meat temperature should read somewhere between 195°F and 203°F when perfectly tender.
17. Allow the meat to rest for about 1 hour before slicing. If you're not ready to serve, place the brisket into a dry cooler. Keep the brisket wrapped in foil or butcher paper, then wrap again with a towel or dish cloth. The brisket will remain hot for over 4 hours. Keep a thermometer probe inserted.
18. Slice against the grain and serve.
Nutrition Information:
Serving Size:
85 gramsAmount Per Serving: Calories: 246 grams
My Favorite Brisket Tools
Thanks for checking out this article. I hope you learned a few things. Here are some of my favorite tools I use when smoking brisket that may be useful to you. These are affiliate links, so if you decide to purchase any of these products, I’ll earn a commission. But in all honesty, these are the tools I recommend to my family and friends who are just starting out.
Meat Injector: Injecting meat is a great way to take your barbecue to the next level and help you make competition-style brisket. An injector is the only way you will be able to get flavor and moisture into the middle of the meat. The Beast Injector is a stainless steel injector that is sturdy and affordable. Check the latest price on Amazon here.
Brisket Marinade: The best injection solution on the market is the Butcher BBQ Brisket Injection. This marinade is used in competitions and is made by World Barbecue Champion pitmaster, Dave Bouska. You can find the marinade on Amazon here.
Butcher Paper: Wrapping brisket in butcher paper has become a huge trend in barbeque thanks to Aaron Franklin. Wrapping your brisket in paper will give you a nice brisket bark. However, you can’t just use any old paper, it has to be unwaxed, food grade paper. You can find it on Amazon here.
Brisket Rub: These days I make my own rub when possible, but I always have a few pre-made rubs for when I’m running low. Barbecue guru Malcom Reed produces Killer Hogs, one of the best brisket rubs I’ve found over the years. Another great rub is Slap Yo Daddy, made by brisket master and multiple World Barbecue Champion, Harry Soo.
Meat Thermometer: There are dozens of fancy thermometers on the market, but I still use my trusty TP20. For around $50, I have a high-quality meat thermometer with two probes, and can track the temperature of my smoker with one probe, and my meat with the other probe. The ThermoPro TP20 is an Amazon Best Seller because it’s the easiest thermometer to operate, is durable, highly accurate, and comes with pre-programmed meat settings.
Instant Read Thermometer: Arguably, the second most important tool you need is a fast and accurate instant-read thermometer. These tools play an important role in the latter stages of the cook when the meat needs regular checking in multiple areas. I use the ThermoPro TP19 because it can do everything a ThermaPen can do, but for a fraction of the cost. You can check out the TP19 on Amazon here.
Advanced Thermometer and Automatic Temperature Controller: Once you’re ready to take things seriously, the FireBoard 2 Drive is a six-channel Bluetooth/Wi-Fi thermometer that can monitor up to 6 pieces of meat, control and graph your cook sessions on your smartphone, and attaches to an an automatic blower that will convert your charcoal smoker to a set-and-forget. This is one of the most advanced meat thermometers on the market. You can check it out on the FireBoard website here.
Meat Thermometers – Your Most Important Tool
The Beginner’s Guide To Meat Thermometers
The Best Meat Thermometers Under $50 (We List the Top 8 Choices)
The Best Thermometers for Smoking Meat
Best Wi-Fi Meat Thermometers (We Review the 5 Top Models)
Best Instant-Read Thermometers for Smoking (Top 6 Picks)
What Are Automatic Barbeque Temperature Controllers? The Complete Buyers Guide