The Weber Smoky Mountain makes smoking a brisket a breeze. The WSM has an amazing ability to maintain stable temperatures over a long period, which makes the brisket smoking process much easier. I gathered all the information I could find out from the pros about smoking brisket in a WSM. I’ll walk you through the entire process from the preparation through to the cook.
To smoke a brisket using a Weber Smokey Mountain (WSM), first set the temperature between 250°F and 275°F. Place wood chunks in the bottom of the fire basket, then fill the basket with lump charcoal and light it using the Minion Method. Allow the smoker to reach the target temperature, then put the trimmed and seasoned brisket on the top grate and insert a meat probe. Mop or spritz the meat every hour for the first 5 to 7 hours. Wrap the brisket once the bark has formed and the internal meat temperature is in the 150°F to 160°F range. Place the wrapped brisket back in the WSM and cook until the internal meat temperature reaches 203°F or feels like butter when poked with a thermometer probe. Allow the brisket to rest for 1 hour before slicing, or hold it in a dry cooler for up to 4 hours. Trim most of the fat from the brisket, leaving 1/4 inch on the fat cap, and apply a binder and BBQ rub. Optional: inject the brisket with broth or marinade for extra flavor. The best cooking temperature for brisket is between 220°F to 275°F, with a cooking time of around 12 hours at 275°F. To maintain the desired temperature range, adjust the vents on the WSM and try to keep the smoker out of the wind.
| Instructions |
|---|
| 1. Set up the WSM to cook at a temperature between 250°F and 275°F. |
| 2. Lay wood chunks at the bottom of the fire basket. |
| 3. Fill the fire basket with lump charcoal and light using the Minion Method. |
| 4. Allow the smoker to reach the target temperature. |
| 5. Place the trimmed and seasoned brisket on the top grate and insert a meat probe. |
| 6. Mop or spritz the meat every hour for the first 5 to 7 hours. |
| 7. Wrap the brisket once the bark has formed and the internal meat temperature is in the 150°F to 160°F range. |
| 8. Place the wrapped brisket back in the WSM and cook until the internal meat temperature reaches 203°F or feels like butter when poked with a thermometer probe. |
| 9. Allow the brisket to rest for 1 hour before slicing, or hold it in a dry cooler for up to 4 hours. |
| 10. Trim most of the fat from the brisket, leaving 1/4 inch on the fat cap. |
| 11. Apply a binder and season with BBQ rub. |
| 12. Optional: inject with broth or marinade for extra flavor. |
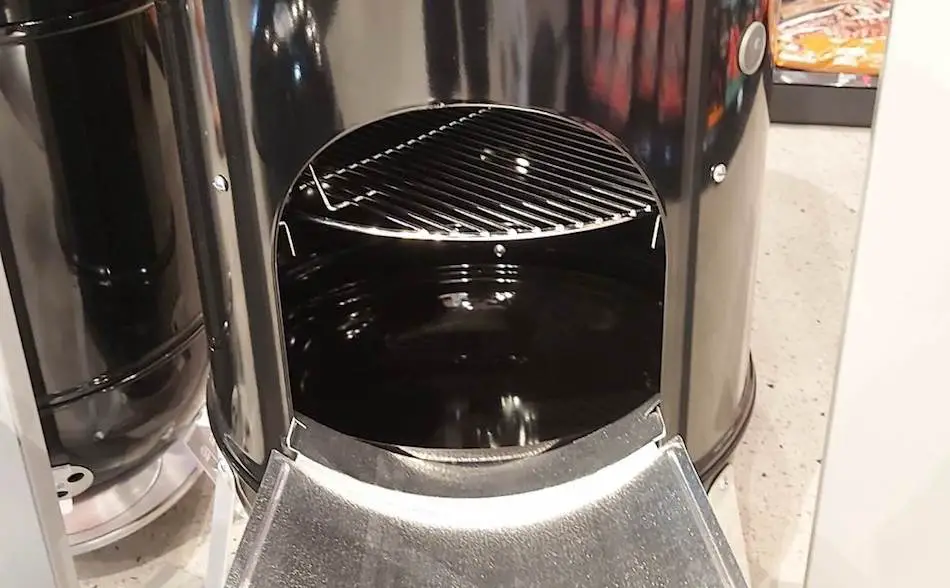
How To Light Your Weber Smokey Mountain For Brisket
- Take the top half off your WSM and set the top section aside.
- Pour the charcoal over the wood chunks (if you prefer the wood on the bottom). If you are planning on a long cook, fill your WSM fire basket with lump charcoal. For an 8 hour cook, add enough coal to reach the fire ring. For a longer cook, fill the entire basket.
- Using the Minion Method, make a crater in the middle of the fire basket by pushing the coal to the side. The idea is to light the middle and the fire will slowly work its way to the outside.
- Place a fire lighter in the middle of the charcoal crater and ignite the fire.
- A faster method is to light a full charcoal chimney of lump charcoal and dump the hot coals in the middle of the crater. To light your chimney quickly, use the side burner on your gas barbecue and the coals will light in half the time.
- The Minion Method will cause the fire to burn outwards and provide heat for over 10 to 15 hours.
The Best Cooking Temperature For Brisket?
The standard slow-smoked brisket is cooked between 220°F to 275°F. The temperature you choose depends on how long you want to be cooking. If you want to cook the little faster, then cook at 275°F, but careful not to go much higher. A large brisket at this temperature and probably takes about 12 hours, give or take an hour or so. Adjust the vents on you WSM until you can maintain a 220°F to 275°F range. Make one vent adjustment at a time and wait 10 minutes before making another vent adjustment. Keep the smoker out of the wind as this will cause the WSM to fluctuate.
Cook Brisket In Two Stages – Unwrapped and Wrapped
The first stage of the cook is critical for the bark development and the infusing smoke flavor into the brisket. The second stage of the cook is the wrapped phase. In the wrapped phase, we are no longer concerned about developing flavor or bark; we’re only interested getting the brisket over the finishing line.
In the first 5 to 7 hours, the brisket is going to be absorbing all that wonderful smoke flavor from the smoking wood and the charcoal. In this first phase, the bark is also going to be developing by fusing with the meat and the fat, forming that crispy out a layer. Applying liquid through a mop or spritz is crucial during this stage because it will help slow down the cooking, attract more smoke, and help the rub fuse with the meat to form the bark.
The Best Smoking Wood For Brisket
You can use any smoking wood on brisket, but the best flavors are hickory, post oak or pecan. Be careful using mesquite, it can make your brisket taste bitter. It’s definitely an acquired taste. Mix and match your wood chunks for a combined flavor. For brisket, I always go a half mix of hickory and a fruit wood such as apple and cherry. I sometime go a 50/50 mix of post oak and cherry. Experiment with different flavors and find a combination that suits your taste pallet.
How Much Wood For a Brisket?
The amount of wood depends on the size of the brisket you are smoking. A huge packer brisket might take 12 hours to cook, which will require about 6 or 7 chunks of wood. If you are smoking a small brisket flat, then you will only need 2 or 3 chunks of wood for a 7 or 8 hour cook.
This brisket injection marinade is the secret used in competitions and made by a World Barbecue champion.
How To Lay Out Your Wood – Top or Bottom?
There are two schools of thought when it comes to where to place the wood in a Weber Smokey Mountain. Most people lay their wood on top of the coals, however, most pros on the bbq competition circuit place their wood under the charcoal. Both methods have their pros and cons, and you can watch some comparison videos on YouTube, but your best bet is to try both methods.
Option 1: Wood Underneath the Charcoal
If you prefer the smoldering wood method, the first step is to lay your wood chunks at the bottom of the WSM fire basket. If you’re smoking a large packer brisket, use 6 or 7 big chunks or 4 chunks for a small brisket. Spread them evenly around the fire basket so the wood doesn’t burn at the same time. This method will provide your Smokey Mountain with smoke for over 12 hours. With the wood at the bottom method, you will get a good smoke burning faster, but some believe the meat doesn’t taste as smokey.
Option 2: Wood on Top of the Charcoal
The other option is playing the wood on top of the charcoal. This is the most commonly used method by newcomers,and will give your meat more smoke flavor according to those who practice this method. The wood on top method will take a little longer to smoke, and skeptics of this method say the smoke doesn’t last as long.
Arranging The Charcoal – The Minion Method
Arrange your charcoal using the Minion Method. This arrangement will give you an even burn for 12 hours or more. Two create a Minion Method, make a crater in the middle of the charcoal pile in the Weber Smokey Mountain. Using a charcoal starter, light half a charcoal chimney starter and place it in the crater once lit. The coals will slowly spread, producing an even burn.
Lump Charcoal or Briquettes?
Lump charcoal works well in the Weber Smokey Mountain, but you can also use briquettes. There are dozens of different brands and we could debate all day about which brand is the best. I’ve seen a few experiments on YouTube where pitmasters had a burn off to test the different brands. There are pros and cons for each brand, but the results from the experiment found B&B lump charcoal burns hotter and longer than other brands. Cowboy finished 2nd and Royal Oak 3rd. When it comes to flavor differences, that will come down to personal preference.
If you don’t have a meat injectors, you can get one for about $30 on Amazon: Simple Meat Injectors.
Smoking The Brisket
Once you have reassembled your WSM and the fire basket is burning well, place your grill grates into place. It’s best to place your brisket on the top rack of your Weber Smokey Mountain. The temperature on the bottom rack will be hotter, so to protect the brisket I like to put it on the top rack for more of an indirect heat.
Do You Need A Water Pan?
While you’re waiting for your fire, piece together your Weber Smokey Mountain by placing the water pan in the smoker. The water pan is optional, but I think you will find a lot of the pros don’t put water in the water pan, but instead wrap it in foil and use it as a drip tray. A water pan is good for regulating temperature and adding much needed moisture, however, you can instead opt for mopping or spritzing your brisket for added moisture rather than a water pan.
When Is Brisket Done?
We consider brisket done when the temperature reaches 203°F. It pays to check the brisket at about 195°F, and poke it with a probe. They say a brisket should feel like butter when you insert the probe, so that’s what you should look for. The temperature on your instant-read should just be a guide. Train yourself to go more by feel rather than the exact thermometer reading.
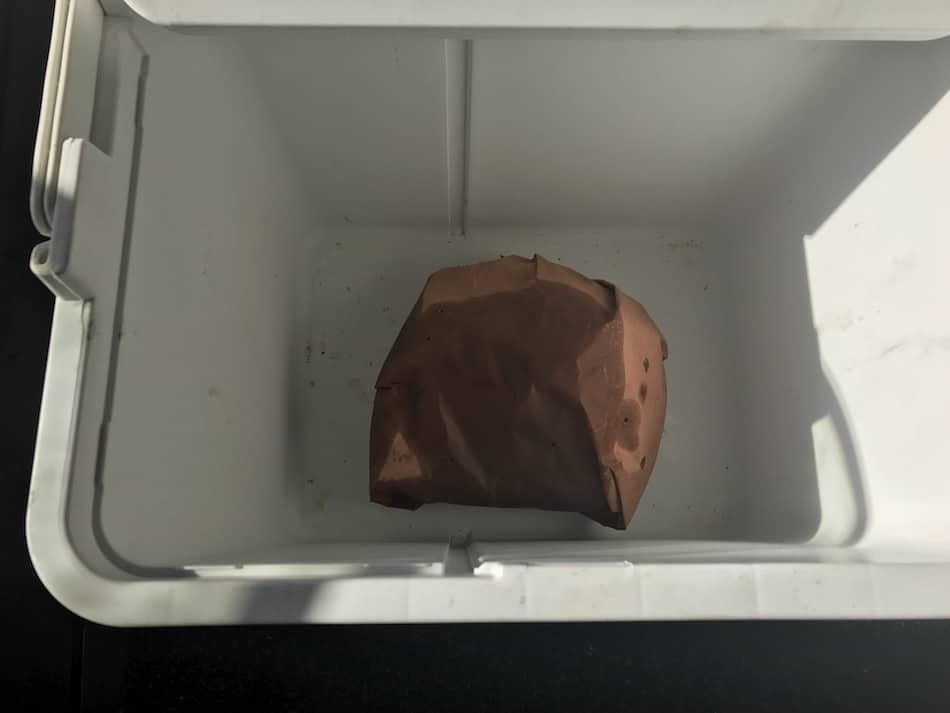
Rest and Hold
Rest your brisket for about an hour after you have removed it from the smoker. Cut open some of your foil or butcher paper to allow some of the steam to escape. If you don’t, carry over cooking will continue. If you’re not ready to slice your brisket, put it into holding by placing it in a dry cooler. Leave it in its wrapping, and you can even wrap a towel around the outside and it will keep this way for several hours.
Holding gives you more flexibility so you can time your slicing right before dinner. Slicing will allow you to wait for your dinner guests to arrive have a few drinks and then the moment you’re about to sit down you can slice your brisket nice and fresh and it will be tender and juicy like you’ve just pulled it out of your WSM.
USDA Select, Choice or Prime – Which Grade Is Better?
There are several grades of beef. There is Select, Choice, Prime and Wagyu. Choosing the right beef grade is one of the most important steps if you want to smoke a perfect brisket. If you can only afford the select beef, then learn how to cook that great of beef as best you can. You need to apply all the techniques you have learned and master all the fundamentals of smoked brisket. Learn more about beef grades in this post: What Brisket Should I Buy? Choice, Select or Prime?
How To Prepare The Brisket For Smoking
Remove most of the fat from your brisket, otherwise you will not get a good bark or nice smoke flavor. Some people take nearly all the fat off, but I like to leave a little, about 1/4 of an inch. And I always place my brisket fat cap up, but you might be a fat cap down kind of person.
Tallow – The Pitmasters Secret
You can use your brisket fat trimmings and play some on the grill above your brisket so that it drips down onto the meat as you cook. Another thing you can do with the fat, is turn it into tallow. Beef tallow is a popular trend in all the Texas barbecue joints at the moment. Tallow will give your brisket a massive flavor boost and you added at the wrapping stage of the cook. Simply smear Italo over the butcher paper before you wrap the brisket, then wrap it up, put the brisket back in the smoker, and let the tallow work its magic. You will get a more juicy flavorful slice of brisket. To learn more, check out this article: Tallow For Brisket.
Apply A Slather
Before applying your rub, cover your brisket in olive oil or yellow mustard. This will help your rub stick and form a nice bark on your brisket. The last thing you want is a patchy bark. The binder won’t be recognizable at the end, so don’t worry about it adding a strange flavor to your brisket. Slather Brisket?
The Barbecue Rub
There are dozens of good rub recipes on the Internet and even more rubs that you can buy. You need to be careful buying barbecue rubs because many of them contain a lot of salt and sugar. Many experts will tell you to control the salt on your brisket by adding it separately to the rub. I’ve made a few mistakes with salty briskets, and it’s very disappointing. If you want to know where to get all the best rubs online and how to make a really easy and delicious rub at home, check out my Brisket Rub Guide.
Standard Barbecue Rub

I found this great rub recipe through How To BBQ Right. I use this recipe and alter it slightly depending on what I'm cooking. Made by the guys at Townsend Spice & Supply: https://townsendspice.com/
Ingredients
- - ½ Cup Paprika
- - ½ Cup Salt
- - ½ Cup Sugar
- - ½ Cup Granulated Garlic
- - ¼ Cup Granulated Onion
- - ¼ Cup Chili
- - ¼ Cup Cumin
- - 2 Tablespoons Black Pepper
- - 2 Tablespoons Dry Mustard
- - 1 Tablespoon Cayenne Pepper
Instructions
- Combine all the spices together in a large mixing bowl
- Store rub in rub shakers
Inject The Brisket With Marinade
For next level brisket, inject it with a competition style marinade. There are a few really excellent products on the market and injectors are cheap and easy to use. I recommend you get one, because it’s a great tool to have in your arsenal. Read my injecting brisket guide for more information. Inject Brisket?
Does Brisket Need A Brine
At least a few hours before smoking, rub kosher salt or sea salt into the brisket on both ends. Then give the salt time to work its way into the meat. I brine my brisket the night before and leave it in the refrigerator. Adding salt in a brine will enhance the flavor and it will help the brisket retain moisture.
World Brisket Champion Harry Soo is now sharing his secrets with his Competition Meat Rubs.
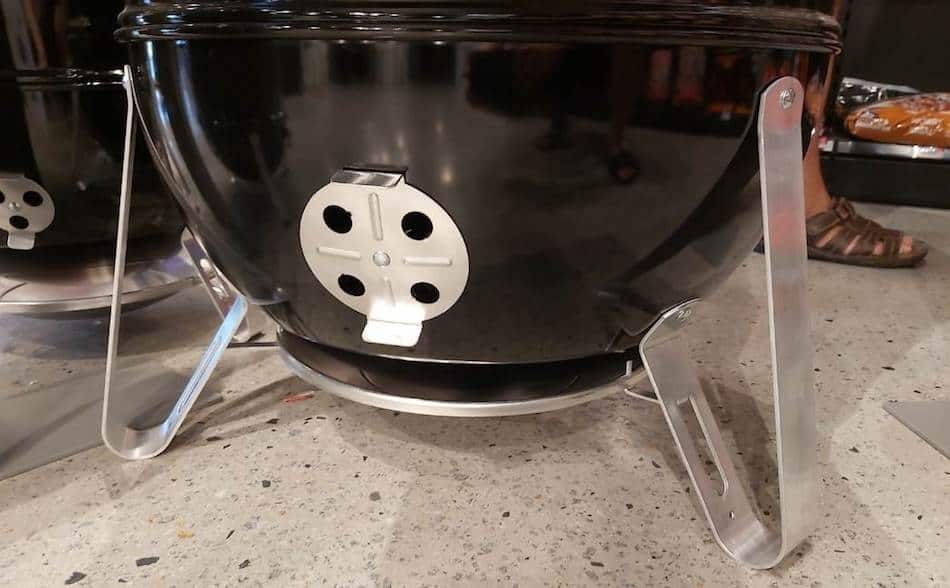
Barbecue Temperature Controller on a WSM
A great attachment for your Weber Smoky Mountain is a barbecue temperature controller. This will put your WSM on autopilot and blow air through the bottom vent. Most temperature controllers will have a sensor and shut off the fan once your smoker reaches a certain temperature. The great thing about a temperature controller is it you have more control over the time. Cooking meat in the traditional way, weather can influence the temperature of your pit. A temperature control I will give you a consistent temperature for the entire cook and will turn a charcoal grill like the WSM into a set-and-forget smoker. The Complete Guide To BBQ Temperature Controllers.
Hot-and-Fast Brisket On A Weber Smoky Mountain
In recent years, the hot-and-fast brisket has become a trend in the world of barbeque. If you don’t have a spare 12 hours to smoke a regular brisket, you can knock one out in 3 or 4 hours using the hot-and-fast method on your Webber Smoky Mountain. A hot-and-fast brisket is cooked at 400°F, and could be ready in as little 3 hours. It will not taste as good as a low n slow brisket, but will still be delicious.
A Weber Smokey Mountain hot-and-fast brisket won’t have a good smoke ring, the bark won’t form as well, and the color won’t be good and it will taste less smokey because it would have spent less time in the smoker. The brisket point will be a little chewy when cooked hot-and-fast.The point end of the brisket contains a lot of muscle and connective tissue, which is why it needs several hours cooked low and slow to breakdown all that connective tissue.
It’s best to inject a hot and fast brisket with broth or apple juice, just to get some extra fluid in the brisket because it will lose liquid cooked at such a high temperature. I would also recommend dry brining and spritzing the brisket every half an hour. If you use a sugary rub, it will caramelize with a high temperature and make your bark crispy. The mallard effect will also be in play at such a high temperature. A hot and fast brisket will reach wrapping stage in about 90 minutes. Before wrapping, pour your mop sauce all over the brisket and then wrap it tightly in foil or butcher paper. From there, you can continue cooking at 400°F, or you can drop it back to 275°F.
Pro Tips For Smoking On Your WSM
For more WSM tips and tricks, watch this pitmaster setup and cook on his Weber Smokey Mountain.
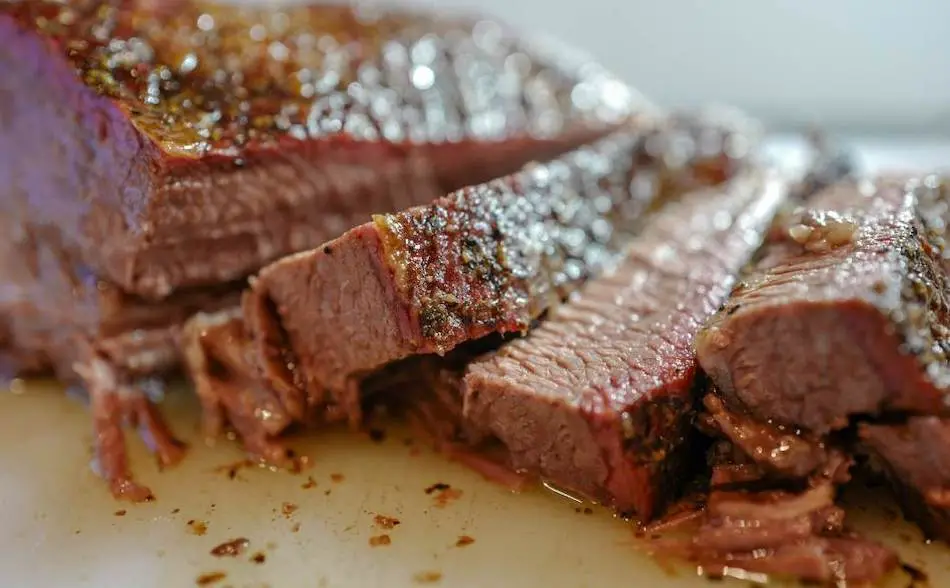
Brisket On A Weber Smokey Mountain

Smoked brisket cooked low-n-slow with charcoal and wood on a Weber Smokey Mountain.
Ingredients
- Brisket
- Barbecue Rub
- Yellow mustard or olive oil (binder)
Instructions
1. Setup your Weber Smoky Mountain to cook between 250°F and 275°F.
2. Lay about 5 or 6 chunks of wood at the bottom of the fire basket.
3. Fill the fire basket with lump charcoal.
4. Light the charcoal using the Minion Method.
5. Wait for the smoker to come up to the target temperature of 250°F and 275°F.
6. Place the brisket on the top grate and insert a meat probe.
7. Mop/spritz the meat every hour for the first 5 to 7 hours.
8. Wrap the brisket once the bark has formed and the internal meat temperature is in the 150°F to 160°F range.
9. Place the brisket back in the WSM and cook until the internal meat temperature reaches 203°F or feels like butter when poked with a thermometer probe.
10. Allow the brisket to rest for 1 hour before slicing, or hold it in a dry cooler for up to 4 hours.
11. Prior to cooking, trim most of the fat from the brisket, leaving 1/4 inch on the fat cap.
12. Apply a binder to the meat before sprinkling an even layer of barbeque rub into the brisket.
13. For a competition-style brisket, inject with broth or a marinade for an extra juicy, flavorful brisket.
Nutrition Information:
Serving Size:
85 gramsAmount Per Serving: Calories: 246 grams
My Favorite Brisket Tools
Thanks for checking out this article. I hope you learned a few things. Here are some of my favorite tools I use when smoking brisket that may be useful to you. These are affiliate links, so if you decide to purchase any of these products, I’ll earn a commission. But in all honesty, these are the tools I recommend to my family and friends who are just starting out.
Meat Injector: Injecting meat is a great way to take your barbecue to the next level and help you make competition-style brisket. An injector is the only way you will be able to get flavor and moisture into the middle of the meat. The Beast Injector is a stainless steel injector that is sturdy and affordable. Check the latest price on Amazon here.
Brisket Marinade: The best injection solution on the market is the Butcher BBQ Brisket Injection. This marinade is used in competitions and is made by World Barbecue Champion pitmaster, Dave Bouska. You can find the marinade on Amazon here.
Butcher Paper: Wrapping brisket in butcher paper has become a huge trend in barbeque thanks to Aaron Franklin. Wrapping your brisket in paper will give you a nice brisket bark. However, you can’t just use any old paper, it has to be unwaxed, food grade paper. You can find it on Amazon here.
Brisket Rub: These days I make my own rub when possible, but I always have a few pre-made rubs for when I’m running low. Barbecue guru Malcom Reed produces Killer Hogs, one of the best brisket rubs I’ve found over the years. Another great rub is Slap Yo Daddy, made by brisket master and multiple World Barbecue Champion, Harry Soo.
Meat Thermometer: There are dozens of fancy thermometers on the market, but I still use my trusty TP20. For around $50, I have a high-quality meat thermometer with two probes, and can track the temperature of my smoker with one probe, and my meat with the other probe. The ThermoPro TP20 is an Amazon Best Seller because it’s the easiest thermometer to operate, is durable, highly accurate, and comes with pre-programmed meat settings.
Instant Read Thermometer: Arguably, the second most important tool you need is a fast and accurate instant-read thermometer. These tools play an important role in the latter stages of the cook when the meat needs regular checking in multiple areas. I use the ThermoPro TP19 because it can do everything a ThermaPen can do, but for a fraction of the cost. You can check out the TP19 on Amazon here.
Advanced Thermometer and Automatic Temperature Controller: Once you’re ready to take things seriously, the FireBoard 2 Drive is a six-channel Bluetooth/Wi-Fi thermometer that can monitor up to 6 pieces of meat, control and graph your cook sessions on your smartphone, and attaches to an an automatic blower that will convert your charcoal smoker to a set-and-forget. This is one of the most advanced meat thermometers on the market. You can check it out on the FireBoard website here.