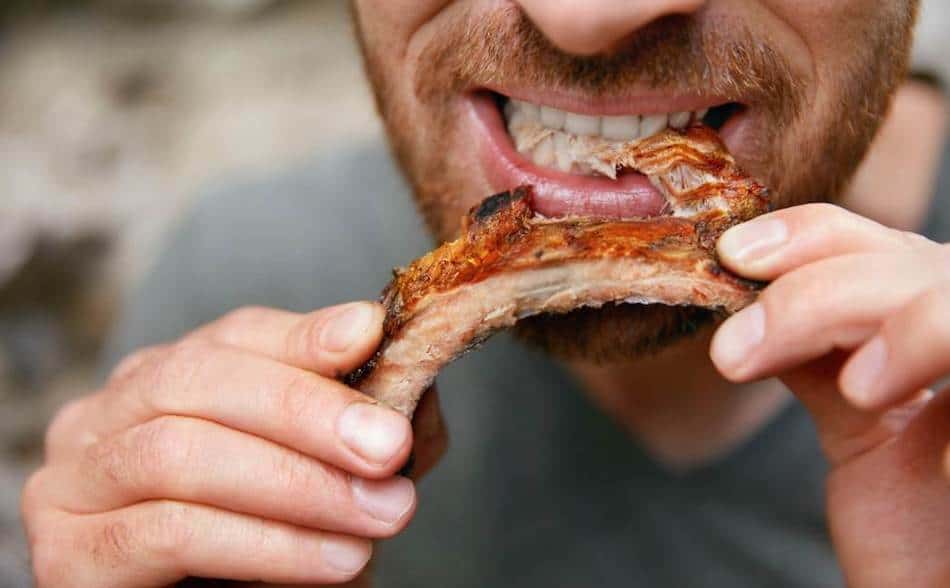
When it comes to barbecue, smoked ribs are often considered the ultimate dish. But did you know that there are actually 7 different types of pork ribs? Maybe more! In this guide, we’ll show you step-by-step how you can cook a 7 types of ribs in your smoker. Each has its own unique method and recipe, but we will show you the best techniques for smoking each one to perfection.
7 Types Of Pork Ribs
There are several types of pork ribs, but the 7 most common are listed in the table below. Spare ribs are a budget-friendly option with a high bone and cartilage content, while baby backs and St Louis ribs offer a more meaty texture. Baby backs come from the top of the rib cage and contain 8-13 ribs with a generous amount of loin meat, while St Louis style ribs are taken from the pork belly with the cartilage removed and typically served with barbecue sauce. Kansas City ribs are similar to St Louis ribs, but are served with a tomato sauce instead.
How To Trim Ribs Before Smoking
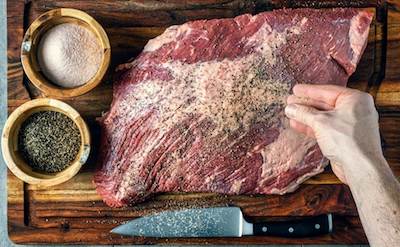
Trimming ribs before smoking is important for several reasons. One reason is to remove the membrane, a thin layer of tissue on the bone side of the ribs that some people find tough. Removing the membrane can make the ribs cook better and easier to eat. Another reason is to trim off excess fat, which can make the ribs too greasy. Trimming excess fat can also help the ribs cook better. Finally, trimming the ribs can involve shaping them into a more uniform size and shape, which can help the ribs cook evenly if you are cooking multiple racks.
- Remove the membrane: The membrane, or silver skin, is a thin layer of connective tissue that covers the bone side of the ribs. Some people find it tough and prefer to remove it before cooking. To remove the membrane, slide a knife under it to loosen it and then use a paper towel to grip it and pull it off.
- Trim excess fat: Fat is an important flavor component in ribs, but too much fat can cause the ribs to become greasy. Trim off any excess fat from the meat side of the ribs, leaving a thin layer to add flavor.
- Shape the ribs: Trimming the ribs can also involve shaping them into a more uniform size and shape. This can be helpful if you’re cooking multiple racks of ribs and want them to cook evenly. To shape the ribs, use a sharp knife to remove any stray pieces of meat or bone.
- Season the ribs: After trimming the ribs, it’s a good idea to season them with a dry rub or marinade to add flavor. Rub the seasoning evenly over both sides of the ribs, being sure to coat all of the exposed meat.
Applying The Rub: Season Like A Pro
To season ribs with a rub before smoking, you can make your own rub by mixing together different herbs and spices. Apply the rub evenly to both sides of the ribs and let it sit in the refrigerator for a few hours or overnight. Before smoking the ribs, make sure to preheat the smoker to the desired temperature. This will help the ribs cook evenly and taste their best. You can use your hands or a basting brush to apply the rub.
Aaron Franklins Rib Rub Recipe
This rub recipe yields about 2 cups of rub, which is enough to season several racks of ribs. You can adjust the amounts of the ingredients to suit your own taste preferences. Keep in mind that this is just one possible recipe, and there are many other rub recipes out there that you can try as well.
Simple All-Round Homemade Rub Recipe
Standard Barbecue Rub
I found this great rub recipe through How To BBQ Right. I use this recipe and alter it slightly depending on what I'm cooking. Made by the guys at Townsend Spice & Supply: https://townsendspice.com/
Ingredients
- - ½ Cup Paprika
- - ½ Cup Salt
- - ½ Cup Sugar
- - ½ Cup Granulated Garlic
- - ¼ Cup Granulated Onion
- - ¼ Cup Chili
- - ¼ Cup Cumin
- - 2 Tablespoons Black Pepper
- - 2 Tablespoons Dry Mustard
- - 1 Tablespoon Cayenne Pepper
Instructions
- Combine all the spices together in a large mixing bowl
- Store rub in rub shakers
Use A Binder So the Rub Sticks
Applying rub to the ribs is an essential step when preparing ribs for smoking. The rub adds flavor and helps to form a bark on the outer layer of the meat. Some pitmasters use a binder, such as yellow mustard or olive oil, while others do not think it is necessary. The binder, also known as a slather, helps the rub adhere to the meat and contributes to the creation of the bark. Different binders can affect the size of the smoke ring, the texture of the bark, and enhance the flavor of the rub.
When the ribs are smoked for a long period of time, it is unlikely that the taste of the binder will be noticeable. The flavors of the smoke and rub will dominate the flavor, so any remaining taste from the binder will wash away. Studies have shown that participants in taste tests of smoked meat with different binders focused more on the texture of the bark and the enhanced flavor of the rub, rather than the taste of the slather.
The type of binder used can also impact the firmness of the bark. Mustard, in particular, has been shown to produce a softer bark compared to olive oil and no binder. Wrapping the ribs in foil can also soften the bark due to the steam created. To remedy this, some pitmasters place the ribs back on the grill for a short time before slicing to firm up the bark if it has become soggy from the foil wrapping. Ultimately, the choice of binder should be based on the desired outcome for the bark and the flavors desired in the finished product.
How To Test Ribs For Tenderness: Tips From The Pros
There are several ways to test the tenderness of ribs, and different BBQ experts have their own methods. Here is a summary of some common techniques:
- Aaron Franklin, owner of Franklin BBQ in Austin, Texas, recommends the “bend test.” To perform this test, gently pick up the ribs with a pair of tongs and see if they start to break or bend when you apply a little pressure. If the ribs bend easily without breaking, they are likely done.
- Meathead Goldwyn, BBQ expert and founder of AmazingRibs.com, suggests using a toothpick or a sharp knife to probe the ribs. If the toothpick or knife easily slips into the meat without resistance, the ribs are done.
- Malcolm Reed, founder of HowToBBQRight.com, recommends the “push test.” To perform this test, gently push down on the top of the ribs with your thumb. If the meat yields easily and feels tender, the ribs are done.
- Harry Soo, BBQ champion and owner of SlapYoDaddyBBQ.com, suggests using the “bounce test.” To perform this test, gently bounce the ribs on the counter. If they bounce back with a slight give, the ribs are done. If they are too hard, they need more time. If they feel too soft and mushy, they are overcooked.
Baby Back Ribs
Baby back ribs come from the top of the rib cage and are known for their tender meat between the bones, similar to rib eye quality. These ribs usually contain eight to thirteen bones, depending on how they are cut. When smoking baby backs, it’s best to avoid using strong-flavored woods like hickory or mesquite. Instead, opt for fruit wood or pecan for a more subtle flavor.
One popular method for smoking baby back ribs is the 2-2-1 method. This involves smoking the ribs for 2 hours, wrapping them in foil for an additional 2 hours, and then finishing them off by unwrapping them and applying sauce for the final hour.
To smoke baby back ribs, follow these steps:
| Step | Description |
|---|---|
| 1 | Remove the membrane from the ribs. |
| 2 | Apply a binder, such as mustard or olive oil, to help the rub stick to the meat. |
| 3 | Coat the ribs with your desired rub and allow it to absorb for a few hours. |
| 4 | Preheat your smoker to around 230°F and add a few chunks of wood suitable for pork, like cherry wood. |
| 5 | Place the ribs in the smoker and baste them with a mop sauce every hour. |
| 6 | At the 2-hour mark, remove the ribs and wrap them in foil. Add more dry rub if desired, then place the ribs back in the smoker as quickly as possible. |
| 7 | Cook the ribs for an additional 1.5 to 2 hours, then test for tenderness. The meat should be almost falling off the bone when the ribs are done. |
| 8 | Remove the ribs from the foil and let them rest for 20-30 minutes before serving. |
2. Spare Ribs
Spare ribs are taken from the pork belly and have less meat than baby back ribs, but more fat and bone cartilage. They are often cut into riblets and are larger and meatier than baby back ribs. It’s important to remove the membrane from the ribs before cooking. These ribs come from the lower portion of the pig, near the belly, while baby back ribs come from the upper portion of the pig, closer to the spine.
How to Smoke Spare Ribs – 10 Steps
To slow-cook spare ribs, follow these easy steps to get perfectly tender and flavorful ribs every time. First, bring your smoker up to a temperature of between 250 to 275 degrees Fahrenheit and throw in a few chunks of wood that blend well with pork. Once the smoker has reached the target temperature, add the ribs to the grill, meat side down. After 2 hours, spritz the ribs with apple cider vinegar or apple juice and apply your sauce of choice, making sure it doesn’t have too much sugar. Grill the ribs for another 15-20 minutes until the sauce sets to the meat, then remove the ribs and place them in foil. Sauce and spritz the other side of the ribs, then wrap them in foil and place them back in the pit for another 2 hours. After this time, check the ribs to make sure they have a nice bark and are tender. Allow the ribs to rest for 20-30 minutes to reabsorb the meat juices before serving.
| Step | Description |
|---|---|
| 1 | Bring your smoker up between 250 to 275 °F. |
| 2 | Throw in a few chunks of wood that blends well with pork. |
| 3 | Add the ribs to the grill once your smoker has reached target temperature. Place ribs meat side down. |
| 4 | After 2-hours, spritz the ribs with apple cider vinegar or apple juice. |
| 5 | Apply your sauce of choice. Make sure the sauce you choose doesn’t have much sugar or it will burn. Spritz again. |
| 6 | Put ribs back on the grill for 15–20-minutes until the sauce sets to the meat. |
| 7 | Remove ribs and place in foil. Sauce and spritz on the other side of the ribs. |
| 8 | Wrap the ribs in foil and place back in the pit for a further 2-hours. |
| 9 | Check the ribs after 2-hours. The ribs should have a nice bark and feel tender. Use the bend test by bending the tip of the ribs. If the meat breaks through, this is a sign the ribs are done. Poke the middle part of the ribs with a toothpick (it should feel like butter). |
| 10 | Allow to rest for 20 to 30-minutes to reabsorb the meat juices. |
3. St. Louis Ribs
St. Louis Style Ribs are taken from the pork belly and cut specifically with the rib tips and cartilage removed. St. Louis Ribs are normally served with thick barbecue sauce.
How to Smoke St. Louis Ribs – 13 Steps
| Step | Description |
|---|---|
| 1 | Trim the spare ribs to the St. Louis cut ribs. |
| 2 | Apply a binder to the ribs so that the rub will stick. This can be mustard, olive oil, or apple cider vinegar. |
| 3 | Add salt and your favorite pork rub. |
| 4 | Fire up your smoker and bring the temperature up to about 250°F. |
| 5 | Throw in some apple or cherry wood. |
| 6 | Place ribs in the smoker and apply a mop sauce after 1 hour (or spray with apple cider vinegar or apple juice). |
| 7 | Smoke the ribs for 2-hours. |
| 8 | Wrap the ribs in foil at around the two-hour mark. Baste the ribs before wrapping. |
| 9 | Finish the ribs in the pit for another hour wrapped in foil. |
| 10 | Check for tenderness by using the bend test. Or use an instant probe thermometer and remove once the internal temperature reaches 202°F. |
| 11 | Remove the St. Louis ribs from the pit and unwrap the foil. |
| 12 | Apply a glaze and more rub and put back on the grill for 15 minutes (optional). |
| 13 | Let the ribs rest for 20-minutes. |
4. Kansas City Style Ribs
Kansas is famous for its ribs. Spare ribs from the pork belly are the traditional way of preparing this style and are usually served with a tomato sauce. They cut the ribs similar to St. Louis ribs, except the Kansas Ribs are served with a sweet tomato sauce.
How to Smoke Kansas City Spare Ribs – 11 Steps
| Step | Description |
|---|---|
| 1 | Remove the membrane from the ribs |
| 2 | Coat the ribs in oil or mustard as a binder |
| 3 | Apply a barbecue rub and let rest for a few hours |
| 4 | Fire up the smoker and bring the temperature up to 250°F |
| 5 | Throw two or three wood chunks (such as cherry or hickory) |
| 6 | Place the ribs on the grill once the temperature has reached 250°F |
| 7 | Spritz the ribs every hour with apple juice or apple cider vinegar |
| 8 | Check the ribs at the 4 hour mark and do the tenderness test |
| 9 | Remove the ribs and apply the traditional Kansas City sweet tomato sauce |
| 10 | Place the ribs back onto the grill for about 15–20 minutes to caramelize the sauce |
| 11 | Remove the ribs and apply more sauce and rest for 20-minutes before serving |
5. Rib Tips
Rib tips are made of cartilage and found at the lower part of the spareribs. Rib tips have a generous amount have pork belly meat between each rib. If you prepare St. Louis Ribs yourself, you can make rib tips from the leftover trimmings. Cut them into roughly 2-inch pieces.
How to Smoke Rib Tips – 6 Steps
| Step | Description |
|---|---|
| 1 | Season the rib tips with your favorite seasonings and barbecue rub |
| 2 | Light your smoker and hold the temperature between 250 and 275°F |
| 3 | Throw some wood on the coals and get some good smoke happening |
| 4 | Smoke the rib tips for 3-hours |
| 5 | Remove the rib tips from the smoker and apply your favorite rib sauce |
| 6 | Place the rib tips back into the smoker for one more hour |
6. Riblets
Riblets are taken from a full rack of ribs and cut down the middle, then sliced into individual ribs. Riblets are a great finger food, and a popular appetizer.
7. Country Style Ribs
Country Ribs are meatier than most pork ribs and look more like a small pork forequarter chop. Country Style Ribs are removed from the pork shoulder and the front of the baby back ribs. To prepare these ribs, season with salt and your favorite pork rub and give it a few hours to work its way into the meat. Country Style Ribs are quick and easy to smoke. Since they are mostly meat rather than bone, they are like a pork belly strip. Set your smoker to a low-and-slow temperature in the 225°F to 230°F range and cook until the meat reaches a safe internal temperature of 140°F.
8. Button Ribs
Sometimes called button bones button are a small strip of meat and bone attached to the back of pork ribs. Sometimes button ribs are sold as riblets, but they are not part of the ribcage. If you come across button ribs at your butcher, they are worth buying and are delicious if you smoke them as you would riblets.
9. Beef Ribs
Beef Ribs in 10 Steps
| Step | Instructions |
|---|---|
| 1 | Apply a binder (such as hot sauce or oil) to the ribs to help the rub stick. Leave the membrane attached on beef ribs. |
| 2 | Season the ribs with salt, pepper, garlic, and herbs. If using a rub, make sure it’s sugar-free. |
| 3 | Fire up your smoker to 250°F and add a few chunks of wood (such as pecan). Lay the ribs bone side down on the grill and close the lid. |
| 4 | Smoke the ribs for the first three hours. |
| 5 | Wrap the ribs in foil and spritz with apple juice or apply a garlic butter sauce (optional). Place the ribs back in the pit for another 1.5 hours. |
| 6 | Check to see if the ribs are ready by poking through the bark. They should be soft like butter and the meat should almost fall away. |
| 7 | Let the meat rest for 30 minutes before serving. |
10. Rib Roast
A whole standing rib roast is a fancy dish that will impress your dinner guests like no other smoked meat. A rib roast is a whole rib-eye with the bone intact. For presentation, the meat around on the rib bone is cut off the bone to look like a French cut. There are usually a few strings wrapped around the roast to hold it together so it doesn’t fall apart when cooking.
Rib roast in a tender, lean cut of meat so it doesn’t require a long time in the smoker and is normally served medium rare. As always with low and slow cooking, use a good thermometer and cook to internal meat temperature rather than time. If you want a nice crispy bark, make sure you give the rib roast a nice covering of seasoning and spices.
How to Smoke Rib Roast
- Coat the roast in olive oil.
- Tie some kitchen twine around the roast to hold it together.
- Season the meat with salt, pepper and a sprinkle a beef rub onto the roast. You may also sprinkle on some fresh herbs to enhance the flavors.
- Fire up your smoker to about 275°F.
- Throw on a few chunks of wood that blend well with beef such as hickory, oak or pecan.
- Place the rib roast on the grill and smoke until the internal meat temperature reaches 130°F for medium rare or 150°F for well done.
- Allow the rib roast to rest for at least 30-minutes before slicing.
Hanging Ribs in a Smoker
Another option when smoking ribs is using a hanging rack. The advantage of this method is the smoke can surround all sides of the ribs. However, if the meat becomes too tender, the ribs may fall off the rack. Make sure you use big S hooks. To avoid the ribs falling, use a bacon hanger, which is a metal bar with 3 or 4 hooks. Make sure you stick the hooks directly under the bones.
Hanging Ribs in an Ugly Drum Smoker
A drum smoker is the best way to smoke ribs because of the depth of the drum. For this method, you will need a hanging ring in your UDS and some decent meat hooks. Make sure you get the hook in under the bone and don’t stick the hook in the first bone. Try to use the 3rd bone to help hold the weight. If you’re smoking multiple slabs, make sure you space out all the ribs so none are touching. To ensure the ribs cook evenly, rotate the rib hanger every half an hour. After 2-hours, remove the ribs and wrap them in foil. Lay the ribs on the grill for another hour.
Smoking Racks
If you’re short on grill space in your smoker, consider using a rib rack. The best thing about a rib rack is you can smoke multiple slabs of ribs in one cook. One disadvantage of rib racks is they will cook unevenly. The racks on the outside of the smoker will probably cook faster and a lot of the meat juices are lost. Here is an example of a rib rack sold on Amazon.
Best Wood for Smoking Ribs
Certain woods work well with beef and other woods blend with pork. Wood choice mostly comes down to personal choice.
- Cherry
- Hickory
- Oak
- Pecan
Smoking Ribs in an Electric Smoker
Electric smokers are a convenient way of having smoked meat on days where you wouldn’t normally have the time to smoke. You can use the same methods used on charcoal smokers when smoking ribs in an electric. The 3-2-1 method of foil wrapping and spritzing work the same on an electric.
Smoke Tubes
Electric smokers have their critics, mainly because they aren’t able to produce as much smoke as charcoal smokers. The way around this problem is to add a smoking tube to your electric smoker. You can use a smoking tube along with your chip tray. Fill the smoke tube with wood pellets and let them smolder. This will boost your the amount of smoke and infuse the ribs with more of that wonderful smoke flavor. Check Amazon for the latest price of smoking tubes here.
Tips for Smoking Ribs
If you want to master smoking the perfect ribs, it will take practice. There are multiple factors that will determine how good your ribs will turn out. It depends on the wood, the sauce, the cooking temperature, the rub, the smoker, the foiling, the mop sauce. It also helps to have good quality meat. The ribs will turn out different on a rack or if you hang them. The way you like your ribs comes down to preference. As always, experiment and take notes until you come up with the right method that works for you.
If you are interested in smoking ribs on specific smokers, I have written in-depth articles. If you own a Weber Kettle, check out How To Smoke Ribs on a Kettle Grill. If you have a Traeger, you might be interested in How To Smoke Ribs on a Pellet Grill.
Related: How To Smoke Pork Belly Burnt Ends
My Favorite Meat Smoking Tools
Thanks for checking out this article. I hope you learned a few things. Here are some of my favorite tools I use when smoking brisket that may be useful to you. These are affiliate links, so if you decide to purchase any of these products, I’ll earn a commission. But in all honesty, these are the tools I recommend to my family and friends who are just starting out.
Meat Thermometer: There are dozens of fancy thermometers on the market, but I still use my trusty TP20. For around $50, I have a high-quality meat thermometer with two probes, and can track the temperature of my smoker with one probe, and my meat with the other probe. The ThermoPro TP20 is an Amazon Best Seller because it’s the easiest thermometer to operate, is durable, highly accurate, and comes with pre-programmed meat settings.
Instant Read Thermometer: Arguably, the second most important tool you need is a fast and accurate instant-read thermometer. These tools play an important role in the latter stages of the cook when the meat needs regular checking in multiple areas. I use the ThermoPro TP19 because it can do everything a ThermaPen can do, but for a fraction of the cost. You can check out the TP19 on Amazon here.
Wireless Thermometer: The latest thermometers on the market have no wires and can be controlled by wi-fi via your phone. Airprobe 3 is the best of this technology.
Butcher Paper: Wrapping brisket in butcher paper has become a huge trend in barbeque thanks to Aaron Franklin. Wrapping your brisket in paper will give you a nice brisket bark. However, you can’t just use any old paper, it has to be unwaxed, food grade paper. You can find it on Amazon here.
Advanced Thermometer and Automatic Temperature Controller: Once you’re ready to take things seriously, the FireBoard 2 Drive is a six-channel Bluetooth/Wi-Fi thermometer that can monitor up to 6 pieces of meat, control and graph your cook sessions on your smartphone, and attaches to an an automatic blower that will convert your charcoal smoker to a set-and-forget. This is one of the most advanced meat thermometers on the market. You can check it out on the FireBoard website here.
Meat Thermometers – Your Most Important Tool
The Beginner’s Guide To Meat Thermometers
The Best Meat Thermometers Under $50 (We List the Top 8 Choices)
The Best Thermometers for Smoking Meat
Best Wi-Fi Meat Thermometers (We Review the 5 Top Models)
Best Instant-Read Thermometers for Smoking (Top 6 Picks)
What Are Automatic Barbeque Temperature Controllers? The Complete Buyers Guide