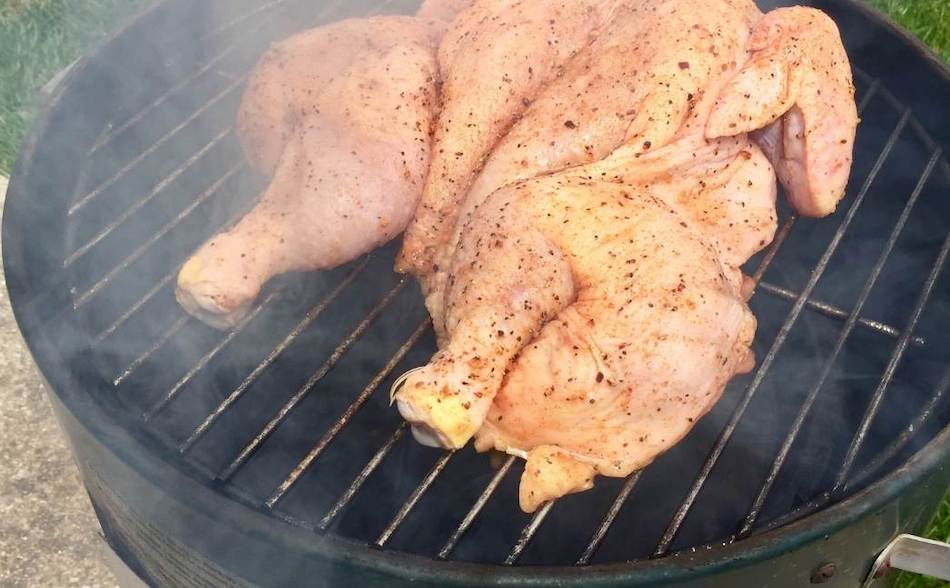
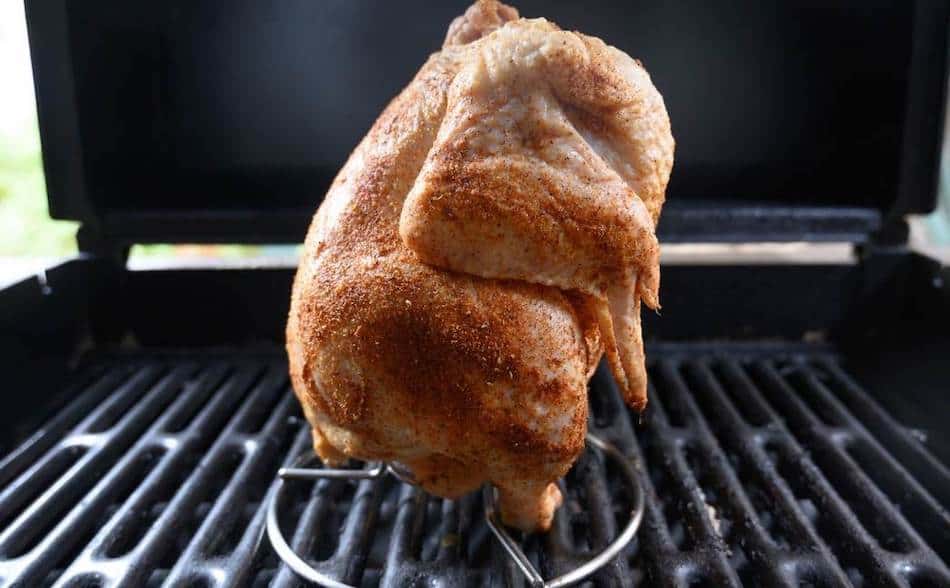
Smoked chicken is one of the quickest, easiest and cheapest meats to smoke in your Weber Smoky Mountain. I wanted to find out how to get the most tender, juicy, crispy chicken on my WSM, so I did some research and found out how the barbecue gurus smoke the chicken on charcoal smokers.
Set the temperature of your Weber Smoky Mountain between 225°F to 250°F. This temperature range will help the chicken remain moist and tender, plus it will allow the chicken enough time to absorb smoke flavor. For a crispy chicken skin, increase the temperature of the WSM to 325°F in the last 20 minutes of the cook. It will take around 1.5 to 2 hours to cook, but verify the meat temperature with an instant-read thermometer. Remove the chicken once the breasts have reached 165°F and the thighs are at 175°F. Prior to cooking, season the chicken with a salt, pepper and a barbeque rub. Place two or three chunks of a mild smoking wood into the WSM firebox on top of hot charcoal.
| Step | Description |
|---|---|
| 1 | Set the temperature of the WSM between 225°F and 250°F. |
| 2 | Increase the temperature to 325°F in the last 20 minutes of cooking for crispy skin. |
| 3 | Cook the chicken for 1.5 to 2 hours, or until the breasts reach 165°F and the thighs reach 175°F. |
| 4 | Season the chicken with salt, pepper, and a barbecue rub before cooking. |
| 5 | Add two or three chunks of mild smoking wood to the firebox on top of hot charcoal. |
| 6 | Properly prep the chicken by removing excess fat and patting it dry. |
| 7 | Consider using a brine to add flavor and moisture to the chicken. |
| 8 | Place the chicken on the smoker skin-side up, with the legs facing towards the center. |
| 9 | Baste the chicken with a marinade or barbecue sauce during the last 20-30 minutes of cooking for extra flavor. |
| 10 | Use a thermometer to ensure the chicken is cooked to the proper temperature (165°F). |
| 11 | Allow the chicken to rest for at least 10-15 minutes after cooking. |
Chicken On A Weber Smokey Mountain
This step-by-step guide will ensure you get a tender, juicy chicken with crispy skin every time.
Ingredients
- Whole chicken
- barbecue rub
- Salt and pepper
- barbecue sauce (glaze)
Instructions
- Light some charcoal in the chimney starter, then once lit, place the hot coals in the middle of the crater of the WSM fire bowl.
- Place two or three chunks of smoking wood on the fire.
- Adjust the vents of your WSM until the temperature comes up to between 225°F and 250°F.
- Dry the chicken skin as much as possible, to ensure you get a crispy skin.
- *Optional - Spatchcock the chicken for a quicker and more even cook.
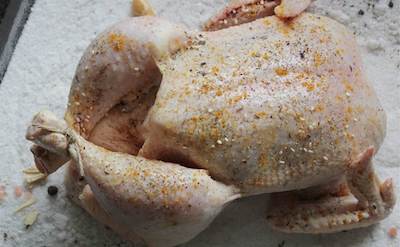
- Season the chicken with salt, pepper, and your favourite barbecue rub.
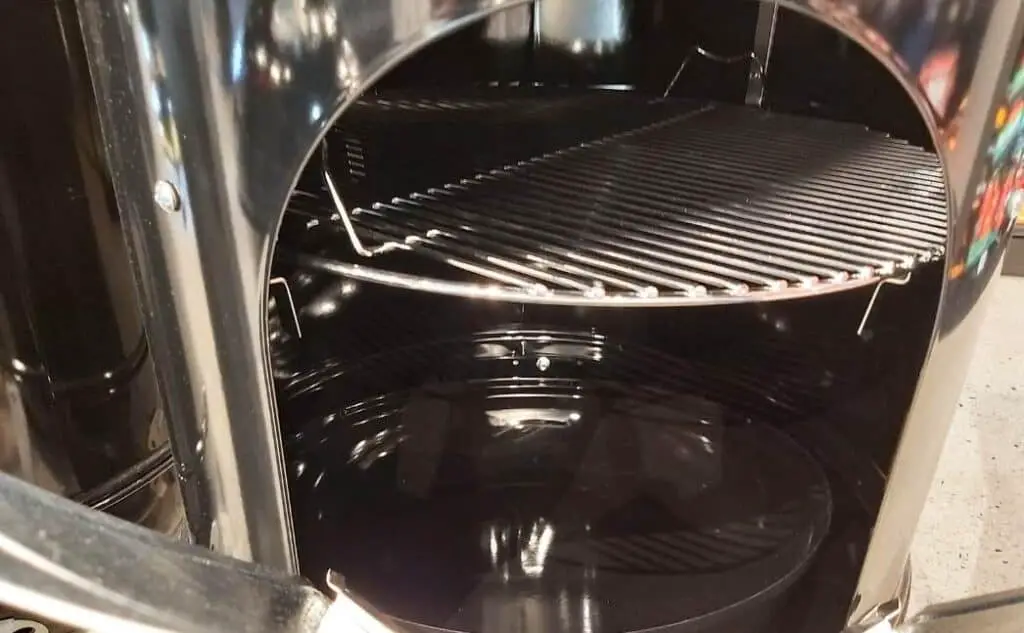
- Place the chicken on the top rack of the Weber Smoky Mountain.
- Insert a thermometer probe into the chicken to monitor the internal meat temperature.
- Once the chicken reaches about 140°F, increase the temperature of the WSM to 325°F.
- Remove the chicken once the thighs are at 175°F and the breast is at 165°F.
- *Optional - Apply barbecue sauce to the chicken for the last 10 minutes of the cook.
If you want to keep it simple, follow the steps above, but hold your WSM at 275°F to 300°F for the entire cook.
Nutrition Information:
Amount Per Serving: Calories: 57
The Best Temperature To Smoke Chicken On A WSM
- Smoked chicken should be tender, juicy, and full of flavor
- Cooking at lower temperatures will result in tender, juicy, and flavorful chicken but with a soft and rubbery skin
- Cooking at higher temperatures will result in crispy skin but less moist and flavorful chicken
- Most people smoke chicken at 275-300°F to get a crispy skin
- A better strategy is to start at a lower temperature (225-250°F) and increase the temperature towards the end of the cook (325°F) to crisp up the skin
- Place the chicken on the upper rack of the WSM and check the temperature with an instant-read thermometer
- Increase the temperature when the chicken breast reaches 140-150°F, but do not leave the chicken at the high temperature for too long to avoid drying it out
The perfect smoked chicken is tender, juicy, and full of smoke flavor. However, it’s difficult to get all these three things right when smoking chicken. Cooking the chicken at a lower temperature will insure it is tender, juicy, and full of flavor, but the skin will be soft and rubbery. If you smoke the chicken at a higher temperature, you’ll get a nice crispy skin, but the chicken may not be as moist and juicy and may have less flavor.
Most people will smoke chicken at a slightly higher temperature because it’s difficult to get a crispy skin cooking at lower temps. The most common temperature for you will see for chicken is usually between 275°F to 300°F.
I find a better strategy is to start low and higher. That way, the chicken will have more time to absorb smoke in your WSM, and in the last part of the cook, you can crisp up the skin by increasing the temperature. To do this, start out your chicken in the lower range between 225°F and 250°F. Place your chicken on the grill, on the upper rack of your WSM. After a few hours, probe the chicken with an instant-read thermometer. If the chicken breast is around 140°F to 150°F, then increase the temperature of the WSM to around 325°F. Do not leave the chicken at this high temperature for too long, otherwise it will dry out. You only want to allow enough time to finish the chicken skin.
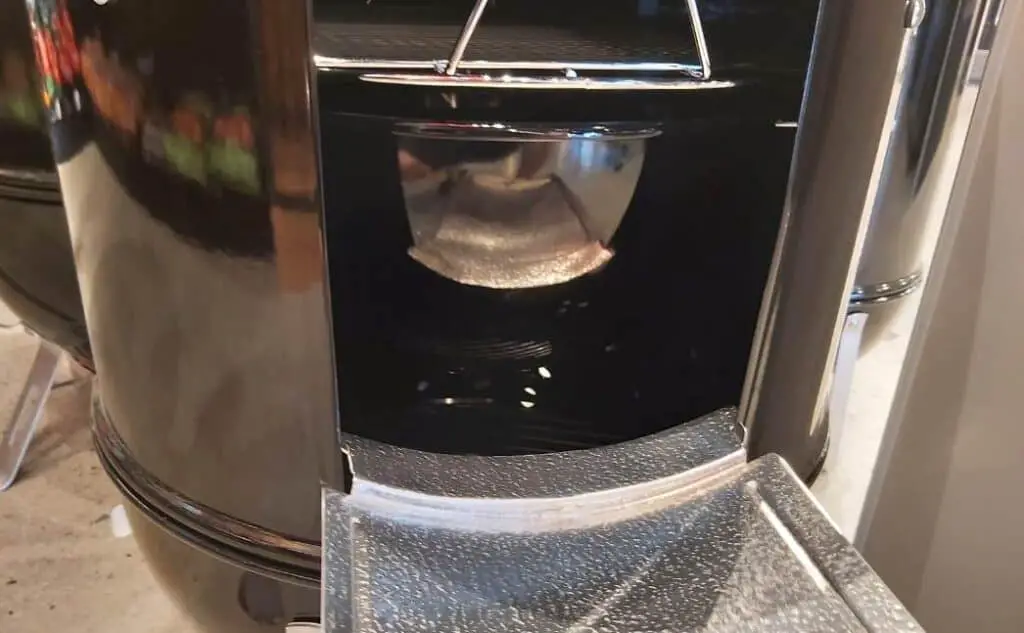
Lighting The WSM
- Fill the charcoal basket with lump charcoal, leaving a depression in the middle
- Use a charcoal chimney to light the charcoal, filling it with charcoal and lighting a fire using newspaper or a fire starter
- Allow the charcoal to burn for about 20 minutes until fully lit and covered in grey ash
- Carefully dump the hot coals into the middle depression of the WSM using tongs or a shovel
- Add wood chips or chunks for flavor and place the cooking grate on top
- Proceed to smoke or cook food according to desired recipe
To start the fire in the WSM, you will need to first fill the charcoal basket with lump charcoal, which is a type of natural wood charcoal that is not made with any additives or chemicals. When filling the basket, it is important to leave a crater or depression in the middle, as this will help to create a more even distribution of heat and allow for proper airflow.
Next, you will need to use a charcoal chimney to light the charcoal. A charcoal chimney is a metal cylinder with a handle and a grate on the bottom, and is used to hold and light the charcoal. To use it, simply fill the chimney with charcoal, place it on the ground or a stable surface, and light a fire using newspaper or a fire starter.
Allow the charcoal to burn for about 20 minutes, or until it is fully lit and covered in a layer of grey ash.
Once the charcoal is fully lit, use a pair of tongs or a shovel to carefully dump the hot coals into the middle crater of the WSM. Be careful not to burn yourself or cause any accidents. After the coals have been added to the WSM, you can then add any wood chips or chunks for flavor, and place the cooking grate on top.
How Much Charcoal Do You Need?
- Use the right amount of charcoal and control the temperature in order to achieve the best results when cooking in a WSM
- For a short cook, use enough charcoal to be able to increase the temperature for the final part of the cook
- Use lump charcoal, which can be reused, and build a solid fire
- Use the vents on the WSM to adjust the temperature as needed
- It is better to have more charcoal than not enough, but using too much can cause the fire to burn too hot and result in poorly cooked or burnt food
- Pay attention to the position of the vents in order to control the airflow and oxygen that reaches the coals, which affects the temperature of the fire
- Keep the vents open during the initial stages of the cook and close them slightly towards the end to increase the temperature and achieve a crispy finish
In order to achieve the best results when smoking or cooking food in a WSM (Weber Smokey Mountain), it is important to use the right amount of charcoal and to control the temperature of the fire.
For a short cook, you will not need a large amount of charcoal, but you should have enough so that you can increase the temperature for the final part of the cook. This will allow you to achieve a crispy, caramelized skin on your chicken, or any other food you are cooking. The advantage of using lump charcoal is that it can be reused, so you don’t need to worry too much about getting exact quantities. Simply build a solid fire and use the vents on your WSM to adjust the temperature as needed.
It is always better to have more charcoal than not enough, as this will give you more control over the temperature and allow you to make any necessary adjustments. However, it is important to keep in mind that using too much charcoal can cause the fire to burn too hot, which can result in a poorly cooked or burnt food.
To properly control the temperature of the fire, you will need to pay attention to the position of the vents on your WSM. The vents allow you to control the airflow and the amount of oxygen that reaches the coals, which in turn affects the temperature of the fire.
By opening or closing the vents, you can increase or decrease the temperature of the fire as needed. It is generally recommended to keep the vents open during the initial stages of the cook, and to close them slightly towards the end in order to increase the temperature and achieve a crispy, caramelized finish.
The Best Wood For Chicken
Generally, we use mild smoking wood when cooking chicken, but you can use whatever you have on hand. Just be careful not to use too much hickory on chicken, because it can over smoke meat. Mix-and-match your wood chunks, combining apple, cherry, hickory, pecan, or any of your other favorite smoking woods. For long smokes, it is better to bury the wood underneath the charcoal, but for hot and fast cooks like chicken, I prefer to throw the wood on top of the hot coals so we get the smoke immediately.
Here are some expert opinions on the flavors of different smoking woods:
| Wood | Flavor | Best Paired With | Expert |
|---|---|---|---|
| Apple | Mild, sweet, fruity | Poultry, pork, beef | Meathead Goldwyn |
| Cherry | Slightly sweet, fruity | Pork, poultry, beef | Myron Mixon |
| Peach | Sweet, fruity | Pork, poultry, beef | Travis Cook |
| Pecan | Mild, nutty, slightly sweet | Poultry, pork, beef | Brad Barrett |
| Maple | Mild, slightly sweet | Pork, poultry, beef | Moe Cason |
| Oak | Bold, smoky | Beef, lamb, game meats | Jamie Purviance |
| Mesquite | Strong, smoky | Beef, lamb, game meats | Chris Lilly |
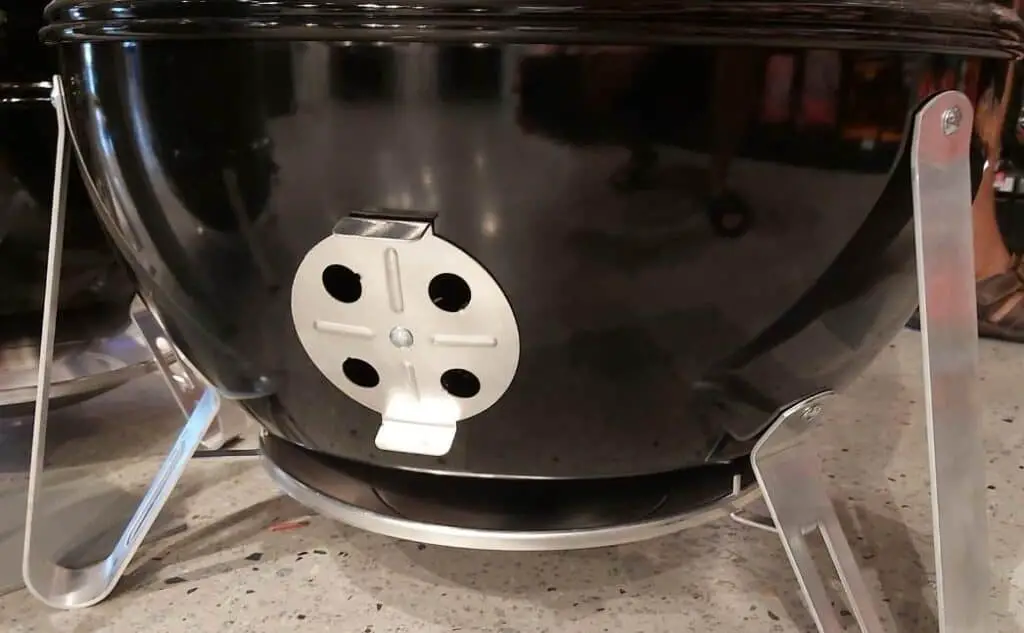
WSM Vent Adjustments
To properly light your Weber Smokey Mountain smoker, follow these steps:
- Open all three of the bottom vents and the top vent. This will allow enough air to flow through the smoker and ignite the charcoal.
- Place your lit charcoal in the charcoal chamber of the smoker and let it heat up for about 10-15 minutes.
- Once the charcoal is hot and the internal temperature of the smoker has reached your desired cooking temperature (usually around 225°F), close off the bottom vent to about 1/4 open. This will help to regulate the airflow and maintain a consistent temperature inside the smoker.
- If you find that the temperature is too high or too low, you can adjust the airflow by opening or closing the bottom vents. You may need to close off two of the three bottom vents to maintain a 225°F temperature range.
- It is important to monitor the temperature throughout the cooking process and adjust the vents as needed to maintain a consistent temperature. This will help ensure that your food is cooked to perfection.
Should You Use A Water Pan?
A water pan can be used when smoking chicken to help keep the meat moist and prevent it from drying out during the long cooking process. The water pan is placed in the smoker along with the meat, and as the water evaporates, it helps to regulate the temperature and humidity inside the smoker. This can help to prevent the chicken from becoming overcooked or dried out.
However, some people find that using a water pan can make the skin on the chicken rubbery and less crispy. This is because the moisture in the water pan can steam the skin, causing it to become soft and less crispy.
In this particular cook, the chicken is being finished at a higher temperature, which should help to crisp up the skin and prevent it from becoming rubbery. If you are not planning on finishing the chicken at a high temperature, it may be best to omit the water pan to prevent the skin from becoming rubbery.
Total Cook Time – How Long Will It Take?
One of the best things about smoked chicken is that it can be cooked relatively quickly compared to other types of smoked meats. Depending on the size of the chicken and the desired cooking temperature, it is typically possible to smoke a whole chicken within 1.5 to 2 hours. This is because chicken is a lean meat that does not require as much time to cook as other, fattier cuts of meat.
However, it is important to note that cooking the chicken on a low and slow setting (at a lower temperature for a longer period of time) is not recommended because it can result in a soft and rubbery skin. This is because the low heat and long cooking time can cause the moisture in the chicken to steam the skin, resulting in a soft and less crispy texture.
To ensure that your smoked chicken turns out perfectly, it is best to cook it at a higher temperature (around 225-250°F) for 2-3 hours, or until the internal temperature of the chicken reaches 165°F. This will allow the chicken to absorb smoke flavor while also ensuring that the skin becomes crispy and flavorful. It is also important to make sure that you have a good amount of smoke rolling before you add the chicken to the grill to give it maximum flavor.
Chicken Done Temperature
The ideal done temperature for chicken is 165°F in the breast and 175°F in the thigh. Make sure you are using an accurate instant-read thermometer to check chicken, otherwise you won’t get the best results or even worse, you’ll make yourself and your family sick. Chicken is full of salmonella, so you want to make sure it’s completely cooked. When inserting the instant-read thermometer, don’t go too close to the bone or you’ll get a false reading. Only use quality tools for the job. If you want to know more about thermometers, check out my Thermometer Guide.
Applying The Rub And Seasoning
When preparing the chicken, you can go as simple or as complicated as you want. You can apply a simple salt and pepper seasoning. I’ll cover the bird with your favorite barbecue rub. I make my rub, because I like to control the salt content. However, if you don’t want to make your own at home, there are some great products on the market. WSM guru and barbecue champion Harry Soo makes his own line of rubs and has a store on Amazon. Harry makes an outstanding chicken rub that has won him multiple barbecue competitions. Check out Harry’s rubs here.

How to Get Tender Juicy Chicken
Cooking chicken to the right temperature is important in order to ensure that it is tender and juicy. If the temperature is too high, the chicken can dry out and become tough and overcooked. Similarly, if the chicken is cooked for too long, it can also lose moisture and become dry.
To prevent your chicken from drying out, it is important to maintain a consistent cooking temperature between 225°F and 275°F. This temperature range will allow the chicken to cook slowly and evenly, allowing it to retain its moisture and become tender and juicy.
It is also important to note that once the temperature of the chicken exceeds 300°F, it is at risk of drying out. This is because the high heat can cause the moisture in the chicken to evaporate quickly, resulting in a dry and overcooked piece of meat.
To ensure that your chicken turns out perfectly, it is important to monitor the temperature throughout the cooking process and make adjustments as needed to maintain a consistent temperature. This will help to ensure that your chicken is tender, juicy, and full of flavor.
How to Get Crispy Chicken Skin
To get crispy skin on your smoked chicken, make sure to dry the bird thoroughly before cooking and avoid using wet brines. Smoking the chicken at a lower temperature, around 225°F, will result in soft skin.
To achieve crispy skin, it is recommended to cook the chicken at higher temperatures, closer to 300°F. To do this, you can start by cooking the chicken at a lower temperature and then increasing the heat towards the end of the cook. This will help to crisp up the skin without drying out the meat.
You can also spray the chicken with cooking oil every 30 minutes during the cook to help brown the skin and keep it crispy. Water pans can sometimes make the skin rubbery, so it is best to avoid using them if you want crispy skin. Humid conditions can also affect the chicken skin by adding moisture to the smoker, so it is important to take this into consideration when smoking chicken.
Why Are My Chicken Wings Soft? – 10 Ways To Get Crispy Chicken Skin
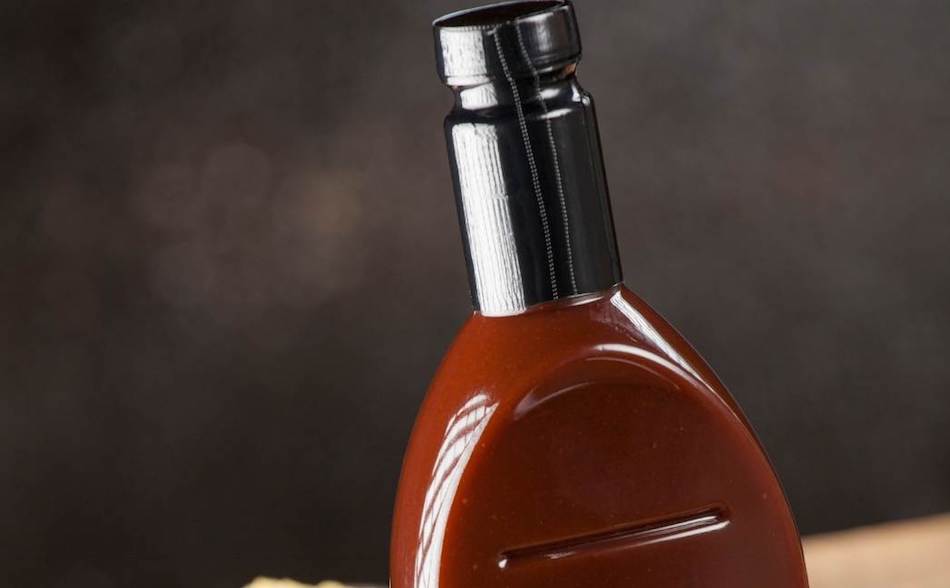
Apply a Glaze to Smoked Chicken
To take your smoked chicken to the next level, consider applying a glaze at the end of the cook. A glaze is a thin, sweet and flavorful coating that is applied to the surface of the chicken during the final stages of cooking. It can add a delicious and unique flavor to the chicken and help to create a beautiful, caramelized exterior.
To apply a glaze to your smoked chicken, simply brush the chicken with your favorite barbeque sauce during the last 10 minutes of cooking. You can use any type of sauce that you like, from sweet and tangy to spicy and savory. Once the chicken is coated with the sauce, let it cook for an additional 10 minutes to allow the glaze to set and caramelize.
This simple technique can take your smoked chicken from good to great and add an extra layer of flavor and texture to your dish. Try experimenting with different sauces and glazes to find the combination that you like best!
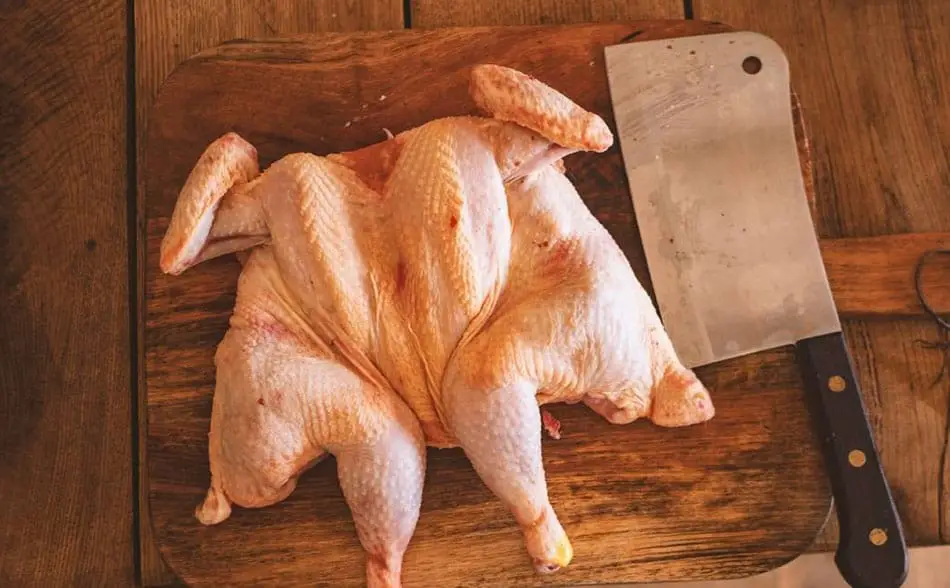
Spatchcock the Bird for an Even Cook
Spatchcocking, or butterflying, a chicken is a cooking technique where the chicken is split open and flattened, allowing it to cook more evenly and quickly. To spatchcock a chicken, you will need to remove the backbone of the bird using a pair of kitchen shears or a sharp knife. Once the backbone is removed, you can flatten the chicken by pressing down on the breastbone.
There are several benefits to spatchcocking a chicken. One of the main benefits is that it allows the chicken to cook more evenly and quickly. Because the chicken is flattened, all parts of the bird are exposed to the heat of the grill or smoker, which can help to reduce the cooking time. Spatchcocking also allows the skin to get nice and crispy, which can be especially appealing if you enjoy crispy skin on your chicken.
In addition to the faster cooking time, spatchcocking a chicken can also help to prevent the bird from drying out. By flattening the chicken, you can expose more of the surface area of the meat to the heat, which can help to keep it moist as it cooks. This can be especially helpful when cooking lean cuts of meat like chicken breasts, which have a tendency to dry out if overcooked.
“Smoked Chicken Done Temp – Safe Internal Temperatures”
Beer Can Chicken: The Most Fun Way to Smoke a Bird
Cooking a chicken on a beer can, also known as “beer can chicken,” is a cooking technique where a partially-filled can of beer is placed inside the cavity of a chicken before the chicken is grilled or smoked. The beer vaporizes inside the chicken and helps to keep it moist and flavorful as it cooks.
The chicken is placed on a grill or in a smoker with the beer can in the cavity, standing upright, so that the chicken is “sitting” on the can. The technique is often used to produce a flavorful and moist bird, and it can be a fun and unusual way to cook chicken.
It is important to use caution when grilling or smoking beer can chicken, as the high heat of the grill or smoker can cause the beer can to become very hot and potentially explode. It is also important to make sure the chicken is cooked to a safe internal temperature to prevent the risk of food poisoning.
Check out this article if you want to learn how to smoke beer can chicken on a charcoal smoker.
Chicken Pieces
Cooking chicken pieces in a WSM (water smoker) or any other type of smoker is a great way to infuse them with smoke flavor and keep them moist and tender. Cooking chicken pieces hot and fast, at a higher temperature, can help to prevent the meat from drying out. This is especially important when cooking lean cuts of meat like chicken breasts, which have a tendency to dry out if overcooked.
When cooking chicken pieces in a WSM, it is important to keep an eye on the internal temperature of the meat to ensure that it is cooked to a safe temperature. Chicken should be cooked to an internal temperature of at least 165°F to ensure that it is safe to eat. It is also a good idea to use a meat thermometer to check the internal temperature of the chicken to ensure that it is fully cooked.
In Summary
- Set the temperature of the WSM between 225°F and 250°F.
- Increase the temperature to 325°F in the last 20 minutes of cooking for crispy skin.
- Cook the chicken for 1.5 to 2 hours, or until the breasts reach 165°F and the thighs reach 175°F.
- Season the chicken with salt, pepper, and a barbecue rub before cooking.
- Add two or three chunks of mild smoking wood to the firebox on top of hot charcoal.
- Properly prep the chicken by removing excess fat and patting it dry.
- Consider using a brine to add flavor and moisture to the chicken.
- Place the chicken on the smoker skin-side up, with the legs facing towards the center.
- Baste the chicken with a marinade or barbecue sauce during the last 20-30 minutes of cooking for extra flavor.
- Use a thermometer to ensure the chicken is cooked to the proper temperature (165°F).
- Allow the chicken to rest for at least 10-15 minutes after cooking.
My Favorite Meat Smoking Tools
Thanks for checking out this article. I hope you learned a few things. Here are some of my favorite tools I use when smoking brisket that may be useful to you. These are affiliate links, so if you decide to purchase any of these products, I’ll earn a commission. But in all honesty, these are the tools I recommend to my family and friends who are just starting out.
Meat Thermometer: There are dozens of fancy thermometers on the market, but I still use my trusty TP20. For around $50, I have a high-quality meat thermometer with two probes, and can track the temperature of my smoker with one probe, and my meat with the other probe. The ThermoPro TP20 is an Amazon Best Seller because it’s the easiest thermometer to operate, is durable, highly accurate, and comes with pre-programmed meat settings.
Instant Read Thermometer: Arguably, the second most important tool you need is a fast and accurate instant-read thermometer. These tools play an important role in the latter stages of the cook when the meat needs regular checking in multiple areas. I use the ThermoPro TP19 because it can do everything a ThermaPen can do, but for a fraction of the cost. You can check out the TP19 on Amazon here.
Wireless Thermometer: The latest thermometers on the market have no wires and can be controlled by wi-fi via your phone. Airprobe 3 is the best of this technology.
Butcher Paper: Wrapping brisket in butcher paper has become a huge trend in barbeque thanks to Aaron Franklin. Wrapping your brisket in paper will give you a nice brisket bark. However, you can’t just use any old paper, it has to be unwaxed, food grade paper. You can find it on Amazon here.
Advanced Thermometer and Automatic Temperature Controller: Once you’re ready to take things seriously, the FireBoard 2 Drive is a six-channel Bluetooth/Wi-Fi thermometer that can monitor up to 6 pieces of meat, control and graph your cook sessions on your smartphone, and attaches to an an automatic blower that will convert your charcoal smoker to a set-and-forget. This is one of the most advanced meat thermometers on the market. You can check it out on the FireBoard website here.
Meat Thermometers – Your Most Important Tool
The Beginner’s Guide To Meat Thermometers
The Best Meat Thermometers Under $50 (We List the Top 8 Choices)
The Best Thermometers for Smoking Meat
Best Wi-Fi Meat Thermometers (We Review the 5 Top Models)
Best Instant-Read Thermometers for Smoking (Top 6 Picks)
What Are Automatic Barbeque Temperature Controllers? The Complete Buyers Guide