A whole smoked chicken is quick-and-easy on a kettle grill. There are several methods for smoking a whole bird, but the kettle grill is one of the best ways. In this article, we will explore the basics of smoking a whole chicken on a kettle grill, including the tools and techniques you will need to get started. I’ll also show you some tips and tricks to ensure that your smoked chicken turns out moist, flavorful, and delicious.
To smoke a whole chicken on a Weber Kettle grill, set up the grill for indirect cooking by placing the charcoal on one side and the chicken on the other, with a drip pan underneath. Pre-light 30 briquettes and place them on the unlit briquettes, and then open the top and bottom vents to 1/4 and add two chunks of smoking wood. Cook the chicken until it reaches an internal temperature of 165°F in the breast and 175°F in the thigh, spraying it with olive oil every 30 minutes to keep it moist. Use an instant-read thermometer to accurately measure the temperature, and aim for a grill temperature of around 300°F for the best results. It should take around 2 hours to smoke a whole chicken. Follow food safety guidelines and cook the chicken to the recommended internal temperature to ensure it is safe to eat.
Key Points
- The best temperature for smoking chicken on a Weber Kettle grill is 300°F, but temperatures between 275°F and 350°F can also be suitable.
- Set up the kettle grill for indirect cooking by placing the charcoal on one side and the chicken on the other, with a drip pan underneath.
- To maintain a temperature of 300°F, you will need around 100 charcoal briquettes (30 pre-lit and the rest unlit).
- Use the top vent to make adjustments to the temperature, allowing 10 minutes between adjustments.
- Add smoking wood under the charcoal briquettes to infuse smoke flavor into the chicken.
- Coat the chicken in a barbecue rub and olive oil to help the rub stick.
- Spray the chicken with olive oil every 30 minutes to keep it moist.
- Cook the chicken until it reaches an internal temperature of 165°F in the breast and 175°F in the thigh.
- Use an instant-read thermometer to accurately measure the temperature.
- It should take around 2 hours to smoke a whole chicken.
- If you want crispy skin, keep the temperature above 275°F.
- Follow food safety guidelines and cook the chicken to the recommended internal temperature of 165°F in the breast and 175°F in the thigh.
Whole Chicken On A Weber Kettle: Step-by-Step
| Key Point | Description |
|---|---|
| Best temperature | 300°F, but temperatures between 275°F and 350°F can also be suitable |
| Grill setup | Indirect cooking with the charcoal on one side and the chicken on the other, with a drip pan underneath |
| Charcoal | 100 briquettes (30 pre-lit and the rest unlit) |
| Vent adjustments | Use the top vent, allowing 10 minutes between adjustments |
| Smoking wood | Add two chunks under the charcoal briquettes |
| BBQ rub | Coat the chicken in a barbecue rub and olive oil to help it stick |
| Moisture | Spray the chicken with olive oil every 30 minutes |
| Internal temperature | Cook the chicken until it reaches an internal temperature of 165°F in the breast and 175°F in the thigh |
| Cooking time | Approximately 2 hours |
| Food safety | Follow guidelines and cook the chicken to the recommended internal temperature to ensure it is safe to eat |
The Best Temperature To Cook Chicken
If you want crispy chicken skin, it is important to cook the chicken at a high enough temperature to properly crisp the skin. According to some sources, the optimal temperature for getting crispy chicken skin is in the 300°F range. However, it is important to be careful not to go above 350°F, as this can cause the chicken to dry out.
In general, smoking meats is usually done at a lower temperature, in the 225°F to 250°F range. However, chicken is an exception to this rule and requires a higher cooking temperature in order to crisp the skin. It is important to keep an eye on the temperature of the chicken while it is cooking, as cooking it at a too low of a temperature can result in soft and rubbery skin.
Chicken Done Temperature
Cooking chicken to the correct internal temperature is important for food safety and flavor. Raw chicken can contain harmful bacteria that can cause food poisoning if not cooked to a high enough temperature, and the USDA recommends cooking chicken to an internal temperature of at least 165° F to ensure it is safe to eat.
While the breast meat should be cooked to a temperature of 165° F, some pitmasters prefer to cook the thigh and leg meat to 175° F. This is because these cuts contain more fat and blood vessels, which can make them more flavorful and tender when cooked to a higher temperature. However, if the breast meat is cooked to a temperature above 165° F, it can become dry and less flavorful. It is important to keep in mind that cooking chicken to a higher temperature does not necessarily make it safer to eat, as the bacteria that can cause illness are usually present on the surface of the meat rather than in the interior.
To ensure that your chicken is cooked to the correct internal temperature, it is best to use a food thermometer. Insert the thermometer into the thickest part of the meat, avoiding bone, and check the temperature. If the temperature of the breast meat is at least 165° F and the temperature of the thigh meat is at least 175° F, the chicken is safe to eat and should be fully cooked. If the temperature is lower, continue cooking the chicken until it reaches the appropriate temperature.
The Indirect Setup – Hot-Zone, Cool-Zone
Setup your kettle grill for indirect cooking by placing the briquettes to one side of your kettle grill, and a drip pan on the other side. When smoking chicken, we don’t want to cook it over a direct flame. In order to infuse smoke flavor into the meat, the chicken needs time on the grill. The ‘cool-zone’ or indirect side of the grill will allow the chicken to cook slowly while absorbing smoke flavor. Here is a great video on how to set up your kettle for indirect cooking.
Use A Good Thermometer
Using an accurate instant-read thermometer is an important tool for ensuring that your chicken is cooked to the correct internal temperature. When cooking chicken, it is essential to ensure that the meat reaches a high enough temperature to kill any harmful bacteria that may be present, as raw chicken can contain bacteria that can cause food poisoning if the meat is not cooked to a high enough temperature.
However, not all thermometers are created equal, and it is important to choose a high-quality, accurate thermometer to ensure that you are getting accurate readings. Cheap, low-quality thermometers can often give inaccurate readings, which can lead to under- or over-cooked chicken. This is not only frustrating, but it can also be potentially dangerous if the chicken is not cooked to a high enough temperature to kill harmful bacteria.
To ensure that you are using an accurate thermometer, it is a good idea to look for a thermometer that has been tested and calibrated to ensure accuracy. You can also check reviews and ratings from other users to get an idea of the reliability and accuracy of a particular thermometer. By using an accurate thermometer, you can be confident that your chicken is cooked to the correct internal temperature, ensuring both safety and flavor. Check out my thermometer guide for more information.
How To Light Your Kettle Grill
- To maintain 300⁰F over 2-3 hours, you will require about 100 briquettes (30 pre-lit and the rest unlit).
- Place the unlit briquettes to one side of your kettle grill.
- In a charcoal starter, place 30 briquettes and light them using a fire starter.
- Wait for the charcoals to ignite. This usually takes about 15 to 20 minutes.
- When fully lit, pour the lit briquettes on top of the unlit coals.
Vent Adjustments
- Adjust the top and bottom vent so they are open about 1/4. This should be enough for the temperature to reach 300° F.
- It will take about 20 minutes for the Weber kettle to come up to the 300° range.
- When making vent adjustments, only use the top vent. Leave the bottom vent alone.
- Only make one vent adjustment at a time and allow 10 minutes between adjustments.
- Every 1/4 adjustment of the top vent should raise the temperature about 15° F. So if you’ve got the top vent set to 1/4, but then raise it to half, it should raise the temperature by about 15° F. Obviously this is just an estimate, and there are many variables such as the wind, humidity, etc.
Overshoot The Temperature
It’s always a good idea to overshoot the temperature on the grill before adding the chicken. The temperature will drop once you’ve placed the chicken on the grill. The meat will suck out a lot of heat. If your target temperature is 300° F, aim for around 320° F when starting up. After you’ve added the chicken, allow 10 minutes for the temperature to drop. Then, make the minor adjustments using the vents.
Smoking Wood
According to several well-known pitmasters, the best wood flavors for chicken include apple, cherry, and other mild fruit woods. These woods are less intense in flavor and will not overpower the delicate flavor of the chicken. Some pitmasters, such as Harry Soo, Malcolm Reed, Meathead Goldwyn, and Aaron Franklin, also recommend using hickory wood for smoking chicken, but in moderation as it can have a strong flavor that can overpower the chicken if used in excess.
e careful using mesquite wood, as it can overpower chicken. In general, it is best to use a combination of milder fruit woods and a small amount of hickory to add depth and complexity to the flavor of the chicken.
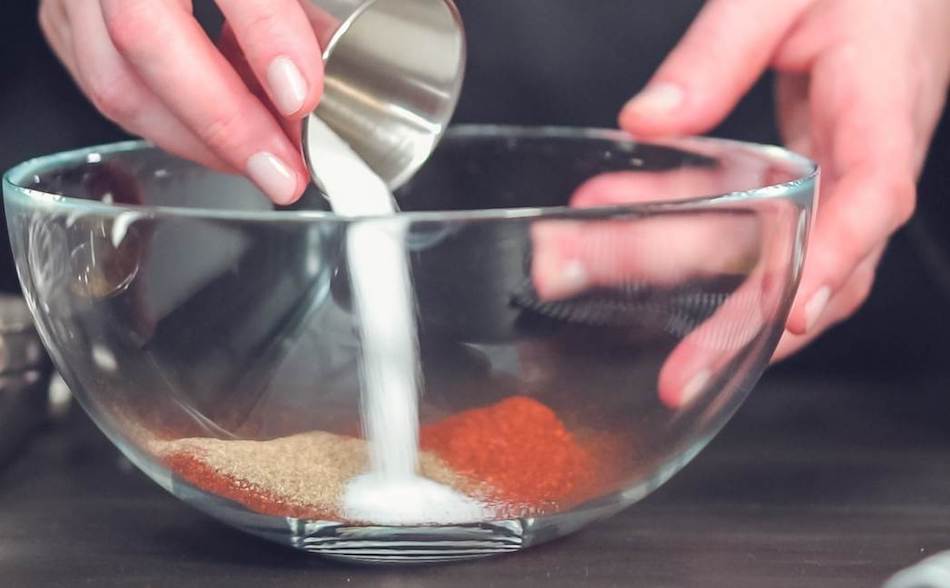
The Rub and Seasoning
Prior to smoking, season the chicken with your favorite barbecue rub. If you want a good homemade dry rub recipe, check out this post I wrote a while back. Otherwise, use a store-bought rub or keep things simple with an all-purpose seasoning or salt and pepper. I like to add a little paprika because it gives the bird some color.
A Texas-style rub (similar to what Aaron Franklin would use) is simply a 50/50 mix of coarse black pepper and kosher salt. Franklin uses a 16-mesh cafe grind black pepper and Morton’s kosher salt. When smoking poultry, Franklin usually mixes in some paprika, granulated onion, and garlic powder.
If you would rather use a pre-made rub, I highly recommend Killer Hogs or Slap Yo Daddy because they are made by champion barbecue pitmasters.
Binder
To ensure that the seasoning, or rub, sticks to your chicken and creates an even, consistent coating, or bark, it can be helpful to apply a thin layer of olive oil to the surface of the chicken before seasoning. This will help the rub to adhere to the chicken and create a more even and consistent coating. However, it is important to keep in mind that chicken can be quite moist, especially if it has been brined or marinated prior to cooking. In this case, the seasoning may stick to the chicken without the need for additional oil, so you may not need to apply oil in order to get a good bark.
Dry the Chicken
If a crispy chicken skin is important to you, then it’s important to dry the surface of the chicken before applying the rub or seasoning. This can help to prevent the skin from turning out soft and rubbery, as the dry surface will allow the seasoning to stick more effectively and create a crispier bark.
To dry the chicken, you can use a paper towel to gently blot the surface of the chicken, paying particular attention to the skin. You can also place the chicken on an airing rack for a short period of time to allow the skin to dry out. This will help to remove any excess moisture from the surface of the chicken, which can help to create a crispier skin when the chicken is cooked.
Careful not to over-dry the chicken, as this can cause the skin to become tough and chewy. A little bit of moisture on the surface of the chicken is okay, as it will help to keep the meat moist and flavorful as it cooks. However, too much moisture can prevent the seasoning from sticking and result in a soft and rubbery skin.
Brining
Some people will soak their chicken in a wet brine prior to cooking. This will add extra flavor and moisture to the chicken. The salt in the brine will help the chicken retain moisture during the long cook, especially in the breasts which have a tendency to dry out. The only problem with a wet brine is it will cause the skin to turn out soft and rubbery. To make a wet brine, mix 1 cup or salt and 1 cup of sugar into a large container of water and leave in the refrigerator overnight.
A dry brine is much easier to manage. All you need to do for this method is sprinkle some kosher salt onto the bird prior to cooking. You can leave it overnight in the fridge, or just a couple of hours beforehand.
Spatchcocking
If you want your chicken to cook more evenly, consider spatchcocking the bird prior to cooking. A spatchcock chicken will cook more evenly, and faster. Chicken has an awkward shape with a hollow cavity, so it’s difficult to get an even cook. Spatchcock is simply butterflying the chicken, and it looks spectacular on the dinner table.
- To spatchcock a bird, flip it over with the breast facing down.
- Take a knife or some kitchen shears, and cut alongside the backbone.
- Remove the backbone.
- Flip the bird around, so the breasts are facing upwards.
- Push down on the breasts as if you are doing CPR. You should hear a crack.You should have a nice sleep butterfly chicken ready for the grill.
Water Pan or Drip Tray
Place an aluminium pan on one side of the kettle—the opposite side to the coals. A pan will catch the fat drippings and save you a lot of cleanup afterwards. You can either leave the pan empty, or fill it with water.
A water pan has pros and cons when smoking chicken. Adding water will create steam, which will help keep the meat nice and moist. I avoid using a water pan when smoking chicken because I try to do everything I can to get a crispy skin on the chicken.
A water pan is always an option—it just depends what you are cooking. Water creates steam in the cooking chamber, which isn’t the best thing for chicken if you want a crispy skin.
How Long Does it Take?
It should take about 2 hours to roast or smoke a chicken in a Weber kettle. Obviously, it depends on the size and the temperature. If you have a standard size chicken and keep the temperature at 300° F, it will take around about 2 hours.
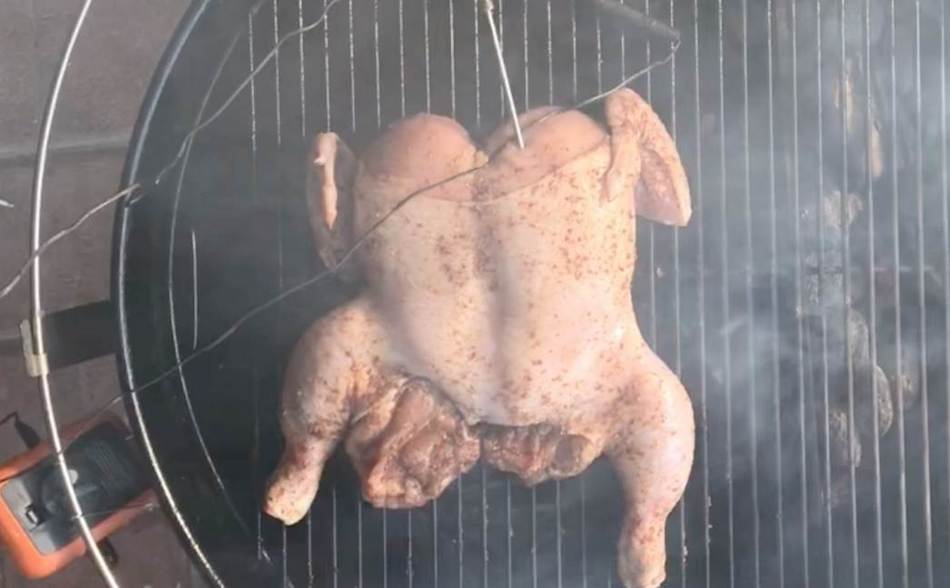
What Direction? How To Put Chicken On The Grill
If you are cooking the chicken whole, place the breasts facing upwards. Face the legs and the thighs towards the fire. The thighs and the legs contain a lot of fat and blood vessels, so they can absorb more heat. The breast can dry out easily because it contains very little fat, so it needs to be protected from too much heat.
Do You Flip The Chicken?
When smoking chicken on a kettle grill, it is generally recommended to flip the chicken after about 1 hour of cooking. This is optional, and you can choose to flip the chicken more or less frequently based on your personal preference and the specific recipe you are using. Flipping the chicken can help to ensure that it cooks evenly on all sides, and can also help to prevent the skin from burning or drying out.
If you are using a spatchcocked chicken, or a chicken that has been butterflied and flattened, it can be especially helpful to flip the chicken in order to ensure even cooking. Spatchcocked chicken tends to cook more quickly and evenly than a whole chicken, as the increased surface area allows the heat to reach the meat more effectively. However, it is important to be careful when flipping the chicken, as the skin can be delicate and may tear or break if handled too roughly.
The Smoke Ring
The smoke ring is a distinctive pink or red band that can sometimes be seen on the surface of meat that has been cooked using a wood-fired grill or smoker. This ring is caused by a chemical reaction that occurs when the meat is exposed to smoke, which preserves some of the pink pigment on the outer layer of the meat.
While the smoke ring is often prized by pitmasters and barbecue enthusiasts for its appearance and flavor, it can be deceiving to the untrained eye and give the appearance of raw meat. It is important to remember that the presence of a smoke ring does not necessarily indicate that the meat is undercooked, as the ring is simply a result of the chemical reaction on the surface of the meat.
To ensure that your chicken is fully cooked and safe to eat, it is important to use a food thermometer to check the internal temperature of the meat. The USDA recommends cooking chicken to an internal temperature of at least 165° F to ensure that it is safe to eat. If the chicken has reached this temperature, it is fully cooked and safe to eat, regardless of the presence or absence of a smoke ring.
The Snake Method for Chicken
While the snake method can be effective for cooking certain types of meat, such as brisket or pork butt, it is not well-suited for cooking chicken, which typically requires a higher cooking temperature in order to achieve a crispy skin and fully cooked, juicy meat. For chicken, it is generally recommended to cook at a temperature in the 300°F range, which is higher than the temperature typically used for the snake method.
If you are trying to cook chicken using the snake method, you may find that the skin does not become crispy and the meat does not reach the desired level of doneness. Instead, it is generally best to cook chicken using direct or indirect heat, depending on the specific recipe you are using, and to monitor the temperature of the chicken using a food thermometer to ensure that it is cooked to the correct internal temperature.
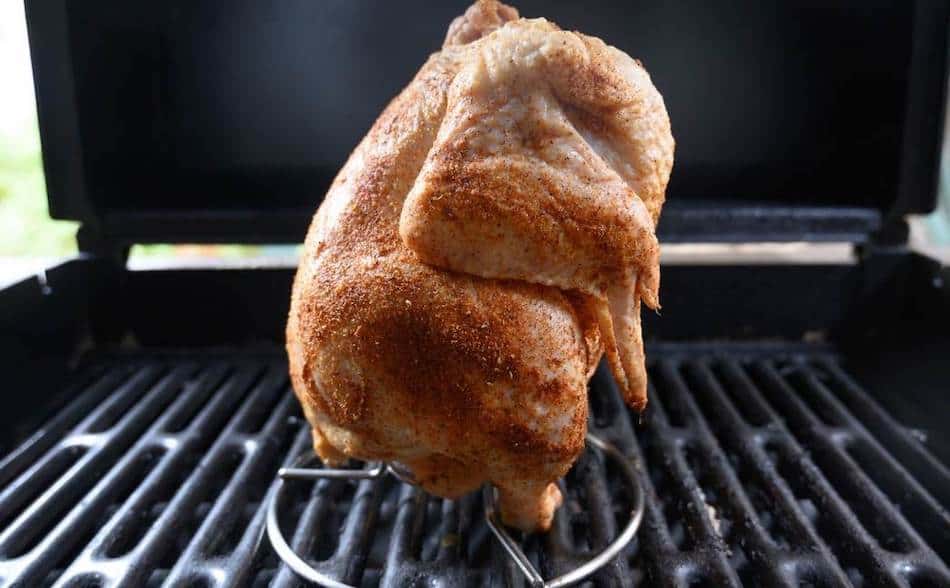
Beer Can Chicken
Another way to cook chicken on a Weber Kettle is the classic beer can chicken recipe. Beer can chicken is kind of gimmicky, but it does work and it is fun. It’s easier to place the can inside a chicken throne which you can buy relatively cheap on Amazon or at your hardware store.
- For this method, follow the same techniques mentioned above, however don’t spatchcock the bird, leave it as a while piece.
- Take a beer can and empty 1/4
- Stick the beer can into the chicken cavity, and place it on the grill so the bird is sitting up vertically. This will allow smoke and heat to cook the chicken evenly and produce steam.
“Beer Can Chicken On A Weber Kettle – An In-Depth Guide”
How To Get Crispy Skin On Chicken
If you really want to get crispy skin on your chicken:
- Cook above 275° F
- Don’t brine the chicken
- Pat the skin dry with a paper towel.
- Don’t tent or foil the chicken, as this will create steam and soften the skin.
- Use an olive oil spray and give it a coating before and during the cook. The oil will aid with the browning of the chicken.
Whole Chicken on a Weber Kettle

Tender, juicy barbecue chicken slow smoked over charcoal.
Ingredients
- Whole chicken
- Barbecue rub
- 100 charcoal briquettes
Instructions
- For a more even cook, spatchcock the chicken. Otherwise, cook the bird whole.
- Cover the chicken with a barbecue rub. Apply some olive oil to the chicken to help the rub stick.
- Setup your kettle grill for indirect cooking by placing the briquettes to one side of your kettle grill, and a drip pan on the other side.
- To maintain 300⁰F over 2-3 hours, you will require about 100 briquettes.
- Take 30 briquettes and pre-light them in a charcoal starter. Wait for the charcoals to ignite. This usually takes about 15 to 20 minutes.
- Place the remainder of unlit briquettes to one side of your kettle grill.
- When the coals in the charcoal starter are fully lit, pour the lit briquettes on top of the unlit coals.
- Adjust the top and bottom vent so they are open about 1/4. This should be enough for the temperature to reach 300° F. Wait 20 minutes for the kettle to come up to the 300°F.
- Once the temperature is stable, only use the top vent to make further adjustments.
- Place 2 or 3 chunks of smoking wood under the charcoal briquettes.
- Lay the chicken on the indirect side of the kettle grill (away from the coals).
- Spray the chicken with olive oil every 30 minutes.
- Cook the chicken until it reads 165°F in the breast and 175°F in the thighs.
- Use a good instant-read thermometer to measure the temperature.
- It should take around 2 hours to smoke a whole chicken.
Nutrition Information:
Serving Size:
60Amount Per Serving: Calories: 57
My Favorite Meat Smoking Tools
Thanks for checking out this article. I hope you learned a few things. Here are some of my favorite tools I use when smoking brisket that may be useful to you. These are affiliate links, so if you decide to purchase any of these products, I’ll earn a commission. But in all honesty, these are the tools I recommend to my family and friends who are just starting out.
Meat Thermometer: There are dozens of fancy thermometers on the market, but I still use my trusty TP20. For around $50, I have a high-quality meat thermometer with two probes, and can track the temperature of my smoker with one probe, and my meat with the other probe. The ThermoPro TP20 is an Amazon Best Seller because it’s the easiest thermometer to operate, is durable, highly accurate, and comes with pre-programmed meat settings.
Instant Read Thermometer: Arguably, the second most important tool you need is a fast and accurate instant-read thermometer. These tools play an important role in the latter stages of the cook when the meat needs regular checking in multiple areas. I use the ThermoPro TP19 because it can do everything a ThermaPen can do, but for a fraction of the cost. You can check out the TP19 on Amazon here.
Wireless Thermometer: The latest thermometers on the market have no wires and can be controlled by wi-fi via your phone. Airprobe 3 is the best of this technology.
Butcher Paper: Wrapping brisket in butcher paper has become a huge trend in barbeque thanks to Aaron Franklin. Wrapping your brisket in paper will give you a nice brisket bark. However, you can’t just use any old paper, it has to be unwaxed, food grade paper. You can find it on Amazon here.
Advanced Thermometer and Automatic Temperature Controller: Once you’re ready to take things seriously, the FireBoard 2 Drive is a six-channel Bluetooth/Wi-Fi thermometer that can monitor up to 6 pieces of meat, control and graph your cook sessions on your smartphone, and attaches to an an automatic blower that will convert your charcoal smoker to a set-and-forget. This is one of the most advanced meat thermometers on the market. You can check it out on the FireBoard website here.