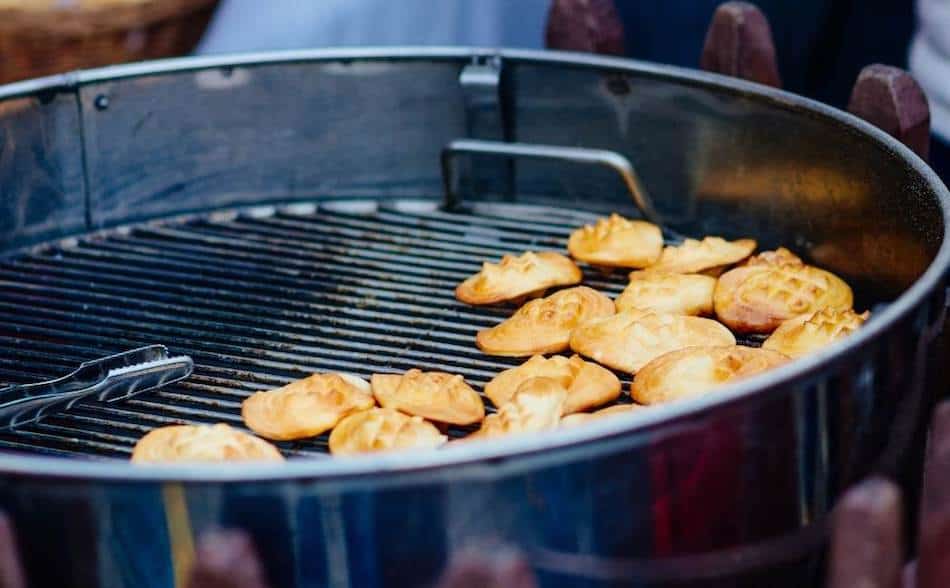
When it comes to smoking cheese, it’s easy to be tempted by the pre-smoked options available at the supermarket. However, nothing compares to the taste and texture of homemade smoked cheese. Using your own smoker, you can create a wide range of flavors and textures that cannot be found in artificially smoked cheese. With these tips and techniques, you’ll be able to smoke cheese at home like a pro.
Smoking cheese at home is a simple process that involves keeping the temperature of the smoker below 90°F to prevent the cheese from melting. Techniques for maintaining a low temperature include using ice water trays on the top and bottom racks of the smoker and smoking cheese in colder months or using an ice tray. To enhance the flavor, it is recommended to use hickory, apple, or cherry wood and to vacuum seal and age the cheese for at least 3 weeks. Hard cheeses should be smoked below 90°F, while soft cheeses should be smoked under 60°F. By following these tips and experimenting with different types of cheese and wood, a variety of delicious smoked cheeses can be created at home.
Key Points
- Keep the temperature below 90°F to prevent cheese from melting
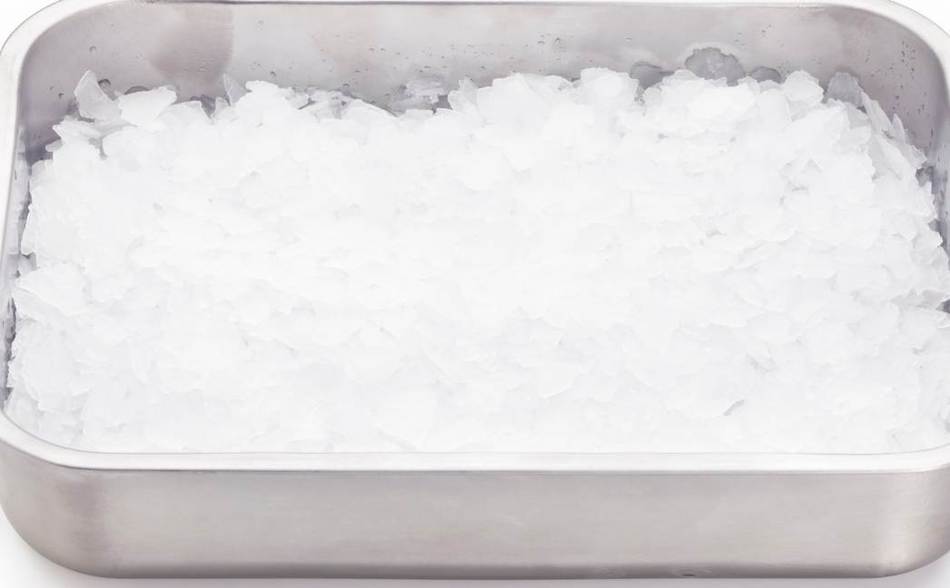
- Use ice to lower temperature in smoker
- Smoke cheese in colder months or use an ice tray to maintain low temperature
- Vacuum seal and age cheese for at least 3 weeks to enhance smoke flavor
- Smoke hard cheeses below 90°F and soft cheeses under 60°F
- Use hickory, apple, or cherry wood for best flavor
- Experiment with different types of cheese and wood to find desired flavor
- Store smoked cheese in vacuum sealed bags in the refrigerator
Everything You Need to Smoke Cheese at Home
Here is a list of the tools needed to smoke cheese at home:
- Smoker (preferably with a low temperature setting)
- Wood chips or pellets (such as oak, hickory, or mesquite)
- Digital meat thermometer
- Ice trays or jugs of ice water
- Cheese melting dome (for soft cheeses)
- Vacuum seal bags for storing the finished product
Smoking cheese at home in a smoker is a fun and delicious way to add some extra flavor to your favorite cheese varieties. Whether you’re a seasoned pro or a beginner, smoking cheese is a rewarding hobby that can be easily done with the right tools and techniques.
First and foremost, you’ll need a smoker. There are many different types of smokers on the market, ranging from simple barrel smokers to more advanced electric models. Whichever type you choose, make sure it has a low temperature setting that can maintain a temperature below 90°F. This is essential to prevent the cheese from melting.
In addition to the smoker, you’ll also need some wood chips or pellets to add flavor to the cheese. Popular options include oak, hickory, and mesquite. Just be careful when using mesquite, as it can have a strong and overpowering flavor if used in excess.
Other tools you’ll need include a digital meat thermometer, ice trays or jugs of ice water, a cheese melting dome (for soft cheeses), and vacuum seal bags for storing the finished product.
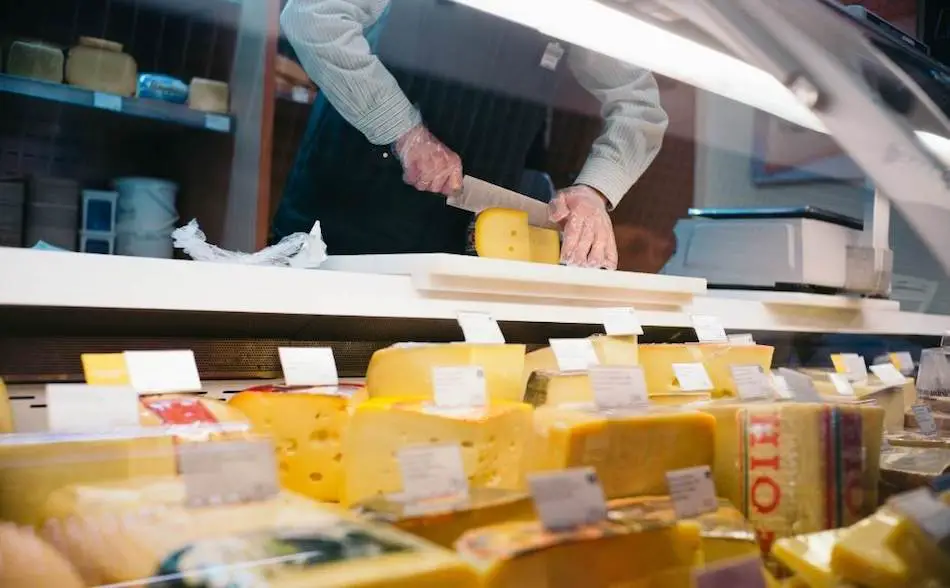
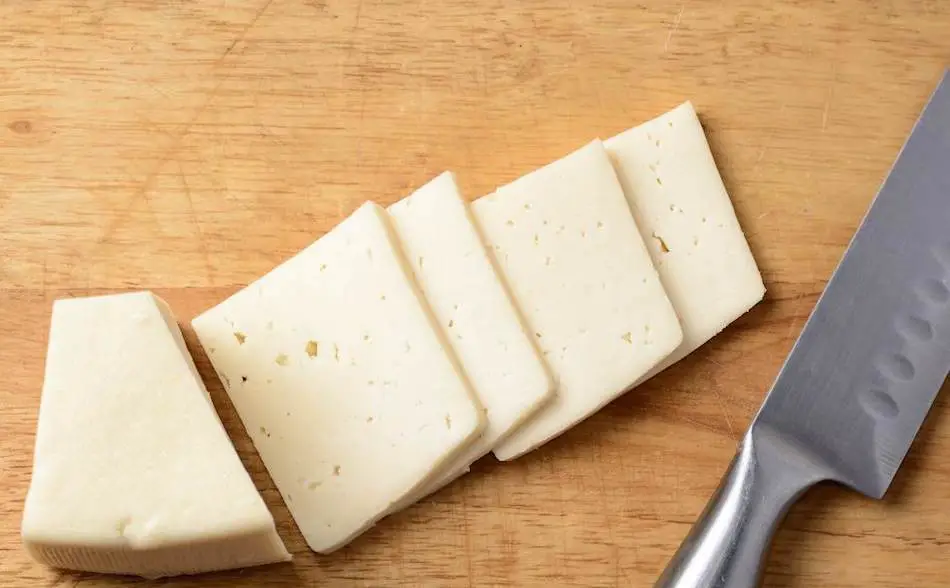
Before you start smoking, it’s important to properly prepare the cheese. Harder cheeses, such as cheddar or gruyère, can be left as is, but it’s a good idea to trim any excess fat from the surface. This will help prevent the cheese from becoming greasy. For softer cheeses, such as cream cheese or blue cheese, consider using a cheese melting dome to help hold their shape during the smoking process.
Once the cheese is prepared and the smoker is heated up, it’s time to start smoking. Place the cheese on the middle rack of the smoker, and use the ice trays or jugs of ice water to keep the temperature low. Check the temperature regularly with the meat thermometer to ensure it stays below 90°F.
The exact smoking time will depend on the type of cheese and your personal preference. As a general rule, smoking cheese for 2 to 4 hours is generally optimal. Soft cheeses may only need 40 minutes to 1 hour, while harder cheeses can handle longer smoking times up to 2 hours or even longer. Just be careful not to over-smoke the cheese, as it can result in a bitter taste.
Once the cheese is finished smoking, remove it from the smoker and allow it to cool. Then, vacuum seal the cheese and store it in the refrigerator for at least 3 weeks to allow the flavor to fully develop.
Check out my “Complete Guide To Thermometers”
1. Maintaining the Proper Temperature for Smoking Cheese
The most important thing to know about smoking cheese is that it is essential to keep the temperature below 90°F to prevent the cheese from melting. If the temperature rises above 90°F, the cheese will begin to melt. Many common smokers have a higher temperature range, even on the lowest setting, making it difficult to smoke cheese. However, there are ways to cool the smoker and maintain a temperature close to 90°F.
AirProbe3 Review – The Best Smart Thermometer To Rival MEATER
2. Cooling Your Smoker to Prevent Cheese Melting
One way to lower the temperature of the smoker to a sub-90°F range is to fill trays with ice water and place them on the top and bottom racks, then place the cheese on the middle rack. Another option is to continuously swap out two jugs of ice water placed in the smoker.
3. Utilizing Cold Weather to Smoke Cheese
If your smoker has a hard time reaching a temperature below 90°F, consider smoking cheese in the colder months when the smoker naturally runs cooler. In winter, smokers often burn through extra fuel to maintain a normal cooking temperature, as the metal of the smoker is cold and lowers the ambient temperature inside the cooking chamber. also, the cooler air drawn in by the smoker can significantly reduce the temperature. If your smoker has a low setting between 100°F and 150°F, it may hold a temperature below 100°F on a cold morning, but it is still recommended to use ice trays to be safe.
Smokers burn through a ton of extra fuel in winter — just to maintain a normal cooking temperature. This occurs because the metal of the smoker is so cold, it lowers the ambient temperature inside the cooking chamber and takes a while to warm up.
In summer, your smoker may have a temperature range between 180°F and 400°F, whereas in winter, that range may drop and sit between 100°F to 300°F. So if you’re keen to smoke cheese, save it for the colder months. It will make the process much easier.
4. Exploring Different Types of Cheese to Smoke
There are many possibilities for smoking different types of cheese at home. Depending on the type of cheese you are using, you may need to adjust your smoking technique and time. Harder, aged cheeses such as cheddar or gouda can be smoked for longer periods of time at lower temperatures, while softer, fresher cheeses such as feta or brie should be smoked for shorter periods of time at higher temperatures to avoid melting.
Also, you can experiment with different types of wood chips to add different flavors to the cheese. For example, hickory wood chips can add a strong, smoky flavor to the cheese, while apple wood chips can add a sweeter, fruity flavor. It is important to keep in mind that smoking cheese can be a bit of a trial and error process, so it is helpful to start with small batches and make adjustments as needed.
Cheese | Description |
|---|---|
| Scamorza | A cow’s milk cheese from Italy, with a texture similar to mozzarella. |
| Cheddar | A hard, cow’s milk cheese from England, with a sharp and tangy flavor. |
| Swiss | A cow’s milk cheese from Switzerland, known for its distinctive holes and nutty flavor. |
| Havarti | A semi-soft cow’s milk cheese from Denmark, with a buttery flavor. |
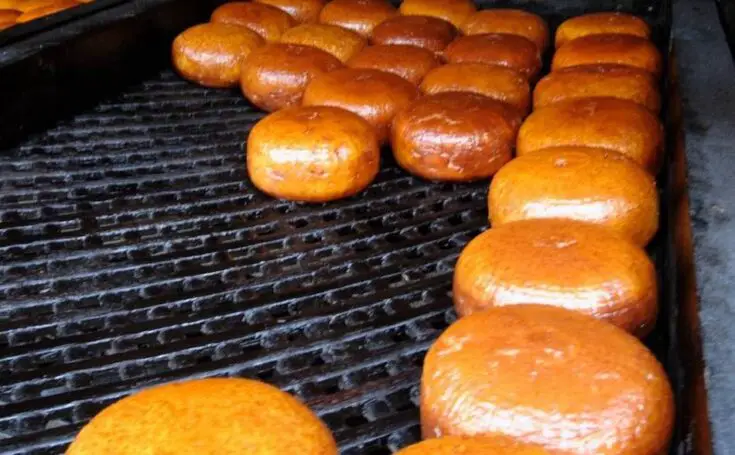
| Oscypek | A sheep’s milk cheese from Poland, traditionally smoked over a fire. |
| Gruyère | A cow’s milk cheese from Switzerland, with a rich and nutty flavor. |
| Mozarella | A cow’s milk cheese from Italy, with a soft and creamy texture. |
| Colby | A cow’s milk cheese from the United States, with a mild and creamy flavor. |
| Provolone | A cow’s milk cheese from Italy, with a sharp and tangy flavor. |
| Monterey Jack | A cow’s milk cheese from the United States, with a mild and slightly sweet flavor. |
| Sulguni | A cow’s milk cheese from Georgia, with a tangy and slightly salty flavor. |
| Rauchkäse | A cow’s milk cheese from Germany, made using traditional smoking techniques. |
| Gouda | A cow’s milk cheese from the Netherlands, with a smooth and creamy texture. |
| Muenster | A cow’s milk cheese from Germany, with a mild and slightly tangy flavor. |
| Fontina | A cow’s milk cheese from Italy, with a rich and nutty flavor. |
| Fynsk rygeost | A cow’s milk cheese from Denmark, made with traditional smoking methods. |
5. Aging and Storing Smoked Cheese
One of the most important things to know after you have smoked the cheese is it needs to be vacuum sealed, then aged for 3 weeks—or longer. This will allow the cheese to darken and absorb more smoke flavor. Storing cheese for a few weeks after smoking allows the flavor to fully develop and intensify.
During this aging process, the cheese absorbs more of the smoke flavor and the taste becomes more pronounced. Additionally, the texture of the cheese may change as it ages, becoming firmer and more crumbly. Allowing the cheese to age also allows it to develop a darker color, which is a characteristic of traditionally smoked cheeses.
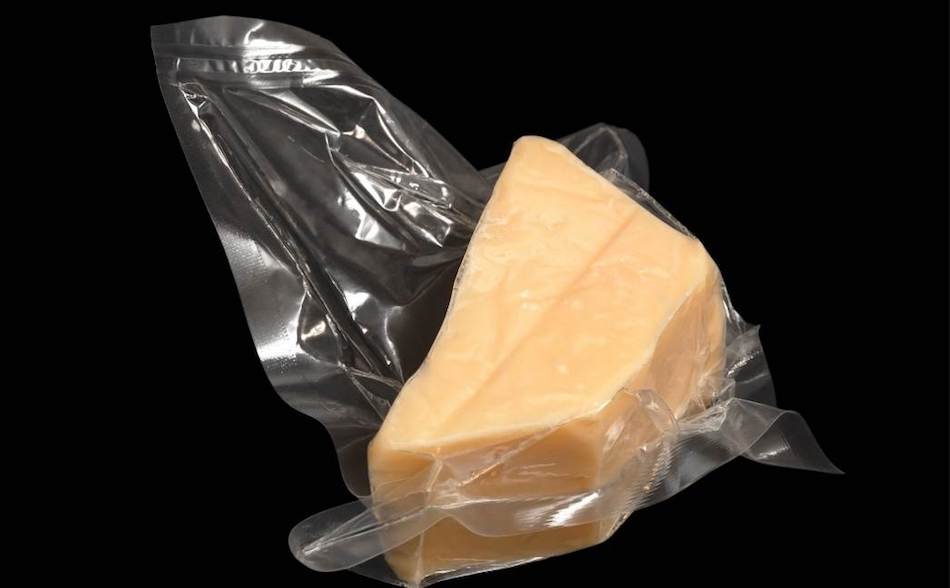
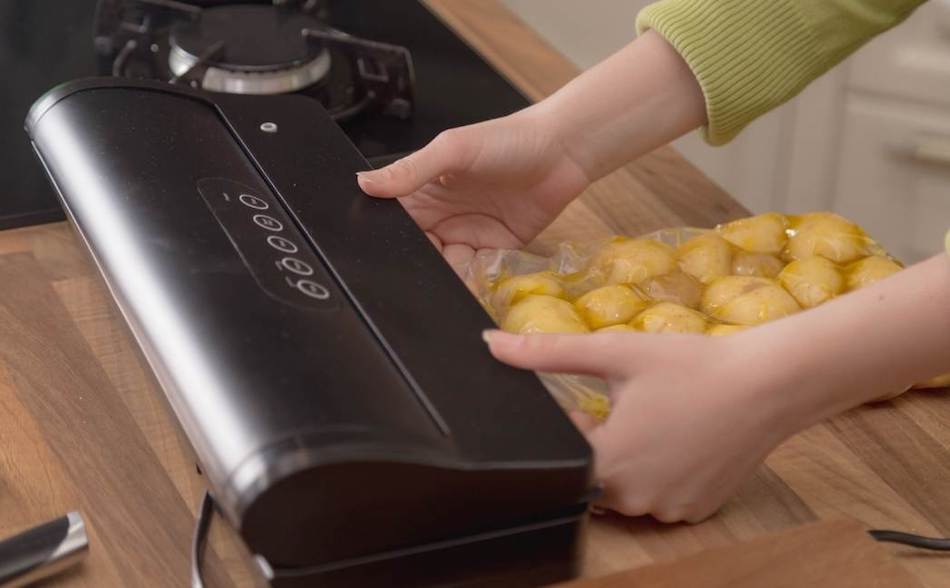
The best way to store smoked cheese is with food saver vacuum sealed bags. A vacuum sealing machine is a handy appliance if you do a lot of meat smoking, and is the best way to restore brisket or pork leftovers. You can get a cheap $50 Geryon vac sealer, or decent vacuum sealer like the The Foodsaver V4440 , an Amazon best seller. Vac sealers are a great investment if you have lots of leftover barbecue. Also, Sous-vide barbeque is a popular trend right now, but you need a vacuum sealer to use this cooking method. Learn more by checking out an article I wrote recently: Sous-Vide BBQ.
6. Temperature Recommendations for Smoking Hard and Soft Cheeses
Obviously the harder cheeses will be able to withstand higher temperatures in the 70°F to 90°F range, but all your soft cheeses will melt if exposed to temperatures above 60°F. Soft cheeses like the cream cheese or the blue cheese variety will melt easily, so keep the temperature in the 40°F range, and they don’t need as long in the smoker. Hard cheese can handle 2 hours in the smoker, even longer. A soft cheese doesn’t need any longer than 1 hour.
| Cheese Type | Temperature Range | Smoking Time |
|---|---|---|
| Hard Cheese | 70°F to 90°F | 2 hours or longer |
| Soft Cheese | 40°F | 1 hour or less |
7. Enhancing the Flavor of Smoked Cheese with Wood Chips or Pellets
There are many different types of wood that can be used to smoke cheese, and each one will impart a unique flavor to the finished product. Some popular choices for smoking cheese include hickory, apple, cherry, pecan, maple, and alder.
Hickory is known for its strong, smoky flavor, and is often used for smoking meats like ribs and pork shoulder. It can also be used to smoke cheese, but it should be used sparingly as it can be overpowering.
Apple and cherry wood are both milder woods that lend a sweet, fruity flavor to the cheese. They are great choices for smoking softer cheeses like brie or camembert.
Pecan wood has a nutty, slightly sweet flavor that pairs well with a variety of different cheeses. It is a good choice for those who want to add a subtle wood flavor to their cheese without overpowering it.
Maple wood has a mild, sweet flavor that can add a unique twist to your smoked cheese. It is best used in combination with other woods, as it can be a little subtle on its own.
Alder wood is another mild wood that is often used for smoking salmon and other seafood. It has a slightly sweet, woodsy flavor that pairs well with a variety of cheeses, particularly soft, creamy varieties.
As always, the best wood for smoking cheese will depend on your personal preferences and the type of cheese you are smoking. It is always a good idea to experiment with different woods and find the ones that work best for you. So, it is always better to take expert advise before using any wood for smoking cheese.
Be careful using strong woods such as Mesquite, because it will overpower the cheese and make it taste bitter. Oak can also be too powerful for cheese, so it should be used sparingly.
| Wood | Flavor | Intensity | Description |
| Apple | Sweet | Mild | Apple is a mild flavoured wood, safe to use on just about anything. |
| Hickory | Strong smoke flavor | Strong | Common wood used for smoking cheese. Can overpower if the cheese is left for too long. Works well when mixed with milder fruit wood. |
| Cherry | Sweet | Mild | Cherry is a great wood to mix with other woods. Will give the cheese a darker colour. |
| Mesquite | Strong, sometimes bitter flavor. | Extremely strong | Not suitable for smoking cheese. Used for short and fast smokes only. Will make cheese taste bitter if not used carefully. |
| Oak | Strong smoke flavor | Strong | Oak has a nice smoke flavor, but is best mixed with a milder fruit wood. |
| Alder | Mild smoke flavor | Moderate | Alder is a popular choice for smoking cheese. Not always available in stores. |
| Pecan | Nutty flavor | Mild | Pecan produces a nice smoke flavor that blends well with cheese. |
8. How Many Hours Do You Need to Smoke Cheese?
Smoking cheese for 2 to 4 hours is generally the optimal time for achieving the best flavor. The exact timing will depend on the type of cheese being used and personal preference. Soft cheeses, such as cream cheese or blue cheese, may only need 40 minutes to 1 hour in the smoker to achieve the desired flavor. Harder cheeses, on the other hand, will benefit from longer smoking times, potentially up to 2 hours or even longer. It is important to avoid over-smoking the cheese, as this can result in a bitter taste. It is best to keep an eye on the cheese as it smokes, and remove it from the smoker when the desired flavor and color have been achieved.
| Cheese Type | Optimal Smoking Time |
|---|---|
| Soft Cheese | 40 minutes to 1 hour |
| Hard Cheese | 2 to 4 hours |
9. Using a Smoke Generator to Enhance Cheese Flavor
Probably the easiest way to smoke cheese is by placing a smoking tube inside your smoker. There are a number of tubes on the market, but the original A-MAZ-N smoking tube is the best of the bunch. Also the smoke generator is another popular product.
Using one of these genius tools will allow you to cold smoke cheese without having to turn on your smoker, and you won’t have to stress about temperature control and melting the cheese. A smoking tube will also allow you to leave the cheese in the smoker for longer, which will give the cheese more smoke flavor.
How To Use A Smoking Tube To Smoke Cheese:
1. Cut the cheese into cubes.
2. Place the cheese onto an airing rack to make handling and transferring easier. Leave a gap between each piece of cheese so smoke can penetrate all areas of the cheese.
3. Fill the smoking tube with wood pellets
4. Light one end of the tube.
5. Blow air onto the pellets until it smokes. You want the pellets smouldering, not burning.
6. Place the smoking tube at the bottom of your smoker. If your smoker has place setter or heat deflector, put it into place.
7. Place the airing rack directly onto the grill, or place each piece of cheese on the rack.
8. Flip the cheese every 30 minutes.
9. Let the cheese smoke for 4 hours
10. Remove and vacuum seal.
10. Smoking Cheese in Small Batches for Best Quality
When smoking cheese, it is important to cut it into small cubes in order to maximize the surface area that will come into contact with the smoke. This will ensure that the smoke flavor is evenly distributed throughout the cheese, rather than just being concentrated on the outer layer. Additionally, flipping the cheese every 20-30 minutes during the smoking process will help to further distribute the smoke flavor and ensure that it permeates the entire surface of the cheese.
11. Monitoring the Temperature with a Thermometer
Accurate temperature control is crucial when smoking cheese, and using a high-quality thermometer is essential in order to ensure that the temperature remains within the optimal range. The internal thermometer that comes with many smokers is often inaccurate, so it is recommended to invest in a separate, more reliable thermometer. There are many options available, and it is a good idea to research and compare different models to find one that suits your needs and budget. Check out my Thermometer Guide.
12. Electric Smokers Are The Best For Smoking Cheese
Electric smokers, such as the Masterbuilt Electric Smoker, are often the best choice for cold smoking cheese due to their ability to maintain low temperatures. On a normal day, these smokers can typically be set as low as 100°F, but in the colder months, the temperature may be able to drop even lower, making it easier to achieve the optimal temperature for smoking cheese.
The Masterbuilt Electric Smoker also has a cold smoking attachment, which is specifically designed for this purpose. However, it is important to keep in mind that electric smokers may still struggle to maintain a temperature below 90°F in the warmer months, and it may be necessary to use techniques such as placing an ice tray on the rack in order to achieve the desired temperature.
13. Avoid Using Gas Smokers For Smoking Cheese
Gas smokers are generally the most difficult type of smoker to use for cold smoking cheese, as they tend to have a minimum temperature of around 250°F. While it is still possible to smoke cheese in a gas smoker, it may be necessary to use techniques such as placing ice trays on the racks or leaving the door slightly ajar in order to bring the temperature down to a more suitable level.
It is also possible to smoke cheese in a gas smoker by not igniting the smoker at all and using a smoking tube instead. In any case, it is important to carefully monitor the temperature using a reliable thermometer in order to ensure that the cheese is not exposed to temperatures that are too high, as this can cause it to melt.
14. Add More Flavor By Using a Charcoal Smoker
Charcoal smokers work well for cold smoking, as long as you can keep the fire under control. It doesn’t matter what type of pit you have, whether it be a kettle grill, bullet smoker, kamado or drum smoker, as long as the temperature remains under 100⁰F, you can smoke cheese.
The advantage of charcoal smokers is you can control the fire until it reaches the 90°F. However, before smoking cheese, make sure you have good control over your charcoal smoker and a Once you have adjusted the vents to the point where the temperature has stabilised, leave the vents alone and avoid opening the lid as much as possible. Constantly opening the lid will de-stabilise your smoker. Opening the lid will suck all the heat out of the cooking chamber, plus it will give the fire a huge shot of oxygen. This may send the temperature soaring, melting the cheese.
Using a decent thermometer to track the temperature is absolutely critical with charcoal smoker. Never trust the in-built factory thermometer, they are notoriously inaccurate. A basic duel-probe thermometer like the TP20 is ideal because it can be used when you’re smoking meat.
Tips When Using a Charcoal Smoker To Smoke Cheese:
- Using charcoal briquettes, build a small single row snake, perhaps 10 briquettes long.
- Form the head of the snake with 3 or 4 lit briquettes.
- Sprinkle wood pellets or wood chips on top and underneath the briquettes
- Each briquette should produce 25°F of heat. Keep enough lit to maintain 90°F or lower.
15. Use Your Pellet Grill To Smoke Cheese
Smoking cheese on a pellet grill ( like a Traeger or Pit Boss) is difficult, because these grills usually have a low setting around 180°, or 150°F if you’re lucky. As mentioned above, any temperature above 90°F will melt cheese, so pellet grills aren’t a good option. However, it’s not impossible.
Tips For Smoking Cheese on a Pellet Grill:
- Try filling a metal container with ice and see if you can get the temperature below 100⁰F.
- If you have a vertical pellet grill, place trays of ice above and below the cheese.
- If you live in a cold climate, save your cheese smoking for those cold winter mornings when your pellet smoker will easily hold at 90⁰F on the low setting.
- Try to leave the lid/door open slightly and see if this can reduce the temperature to 90°F.
- Use a smoking tube inside the cooking chamber of the pellet grill rather than firing up the grill. Simply load wood pellets into the tube and let it smoulder. It takes about 4 hours to smoke cheese using this method.
Smoking cheese at home is a fun and rewarding hobby that can add some extra flavor to your favorite cheese varieties. With the right tools and techniques, anyone can do it. So why not give it a try and see what amazing flavors you can create?
Home Smoked Cheese
Ingredients
- Half a dozen blocks of your favorite cheese or a variety of different cheeses.
- Ice water trays
- A mild smoking wood such as apple, cherry or pecan
Instructions
1. Cut the cheese into small pieces. Smaller pieces work better because it allows the smoked flavor will only penetrate the outer surface of the cheese.
2. Set the temperature of your smoker to 60°F to 90°F (or the lowest the smoker will go).
3. If your smoker will only go as low as 100°F, place ice water trays on the top and bottom shelf of your smoker. Place the cheese on the middle rack. Keep adding icy water to the pans.
4. Use a mild wood such as apple, cherry, pecan, maple or alder. Be careful using hickory, as it may be too overpowering.
5. Turn the cheese every 30-minutes.
6. Smoke the cheese for about 3-hours.
7. Wrap the cheese and refrigerate for a day or two before eating. If you can, vacuum package the cheese and let it age in the refrigerator for 2 or 3 weeks before using.
Nutrition Information:
Amount Per Serving: Calories: 90Total Fat: 7gProtein: 6g
My Favorite Meat Smoking Tools
Thanks for checking out this article. I hope you learned a few things. Here are some of my favorite tools I use when smoking brisket that may be useful to you. These are affiliate links, so if you decide to purchase any of these products, I’ll earn a commission. But in all honesty, these are the tools I recommend to my family and friends who are just starting out.
Meat Thermometer: There are dozens of fancy thermometers on the market, but I still use my trusty TP20. For around $50, I have a high-quality meat thermometer with two probes, and can track the temperature of my smoker with one probe, and my meat with the other probe. The ThermoPro TP20 is an Amazon Best Seller because it’s the easiest thermometer to operate, is durable, highly accurate, and comes with pre-programmed meat settings.
Instant Read Thermometer: Arguably, the second most important tool you need is a fast and accurate instant-read thermometer. These tools play an important role in the latter stages of the cook when the meat needs regular checking in multiple areas. I use the ThermoPro TP19 because it can do everything a ThermaPen can do, but for a fraction of the cost. You can check out the TP19 on Amazon here.
Wireless Thermometer: The latest thermometers on the market have no wires and can be controlled by wi-fi via your phone. Airprobe 3 is the best of this technology.
Butcher Paper: Wrapping brisket in butcher paper has become a huge trend in barbeque thanks to Aaron Franklin. Wrapping your brisket in paper will give you a nice brisket bark. However, you can’t just use any old paper, it has to be unwaxed, food grade paper. You can find it on Amazon here.
Advanced Thermometer and Automatic Temperature Controller: Once you’re ready to take things seriously, the FireBoard 2 Drive is a six-channel Bluetooth/Wi-Fi thermometer that can monitor up to 6 pieces of meat, control and graph your cook sessions on your smartphone, and attaches to an an automatic blower that will convert your charcoal smoker to a set-and-forget. This is one of the most advanced meat thermometers on the market. You can check it out on the FireBoard website here.
Related Articles:
Smoking Meat in Winter: 19 Cold Weather Tips For Pitmasters
Are Electric Smokers Good? The Pros & Cons (Plus 6 Models)