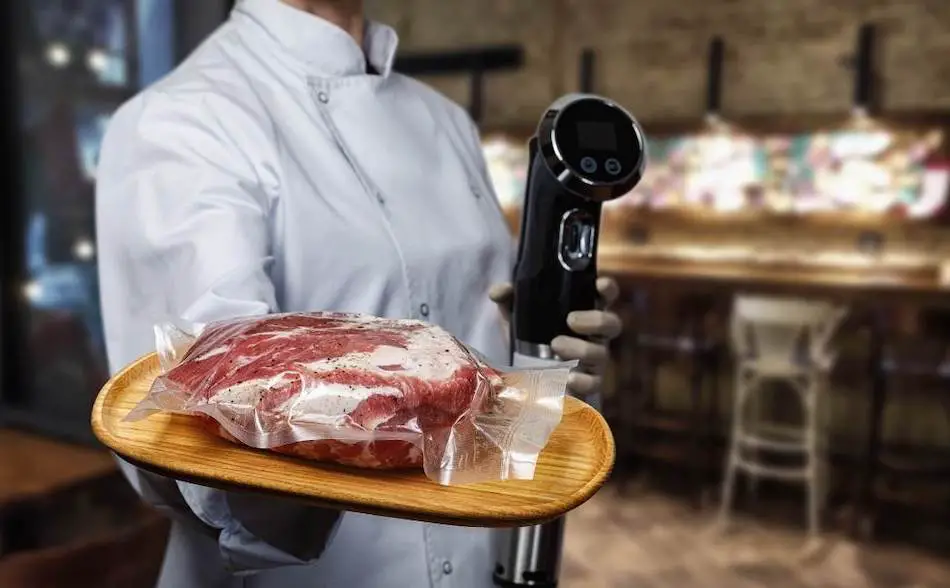
When it comes to cooking, barbeque or just dining out, I love food fusion. The blending of the French sous-vide cooking method with traditional barbeque is one such fusion—and it works amazingly. Experimentation makes barbeque enjoyable, so I tried smoking pork butt (pork shoulder) part in the smoker, and part in a sous-vide bath. Not only is this a great way to cook pork, sous-vide is also the best way to restore smoked leftovers.
There are several ways to sous-vide smoked pork butt. You can partially smoke the pork in a smoker, then finish using the sous-vide method, or vice versa. Alternatively, cook the pork shoulder in the smoker as normal, then once done, vacuum seal the meat and refrigerate. When you are ready to eat, sous-vide the pork and bring the meat back up to serving temperature.
Key Points
- Fusion of French sous-vide cooking method and traditional barbeque can be achieved by partially smoking pork shoulder in a smoker and finishing in a sous-vide bath, or vice versa.
- Sous-vide cooking is a way to cook meat to perfection by maintaining a stable temperature at a low heat for many hours.
- Sous-vide involves putting food in a bag, removing the air, and cooking it slowly in a warm water bath for several hours or days.
- The standard sous-vide temperature for pork shoulder is between 160°F to 175°F, and cooking time can range from 12 to 30 hours depending on desired tenderness.
- There are three ways to cook sous-vide pork shoulder: fully cook in the smoker, then reheat using sous-vide method; partially smoke, then finish in sous-vide bath; or partially sous-vide, then finish in the smoker.
Why Sous-Vide?
Pronounced “sue-veed”, sous-vide cooking is a way to cook your meat to perfection. This cooking method requires precise temperature control, which is important so your meat doesn’t dry out. The worst thing you can do for your meat is expose it to high temperatures for a prolonged period. Maintaining a stable temperature at a low heat for many hours is the secret to the perfect low and slow cooked meat.
What is Sous-Vide Cooking?
Sous-vide is just a fancy French word that simply means “under vacuum”. Basically, you put the food in a bag, suck all the air out, then cook it slowly in a warm water bath for several hours—-or days. Sous-vide cooking is common in fancy restaurants, but sous-vide barbecue is a trend that is really taken off in the past few years.
The Two Methods
| Method | Description |
|---|---|
| Partially smoke pork shoulder in a smoker, then finish using sous-vide method | Cook pork shoulder in a smoker for a period of time, then finish cooking using the sous-vide method in a water bath |
| Partially sous-vide pork shoulder, then finish in a smoker | Cook pork shoulder in a sous-vide water bath for a period of time, then finish cooking in a smoker |
How To Cook Smoked Sous-Vide Pork Shoulder
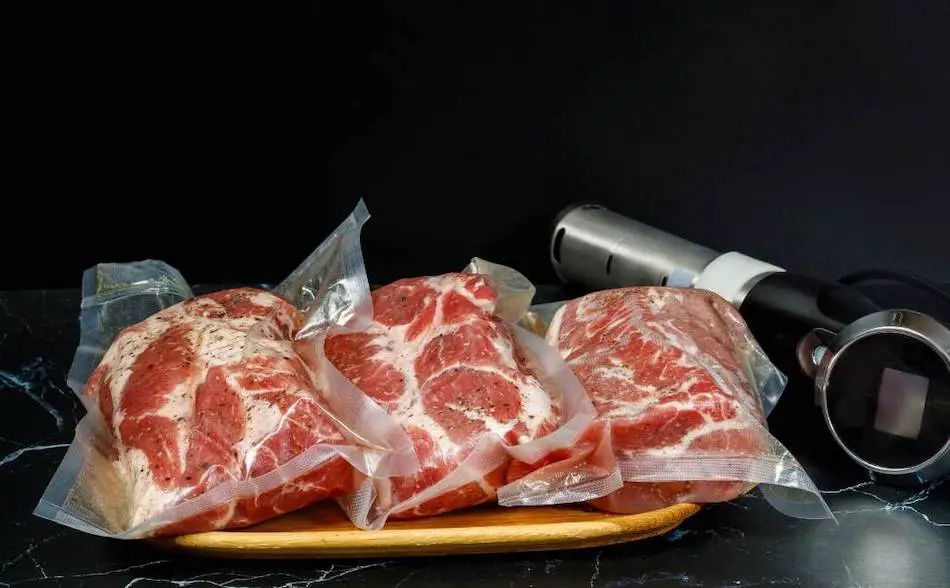
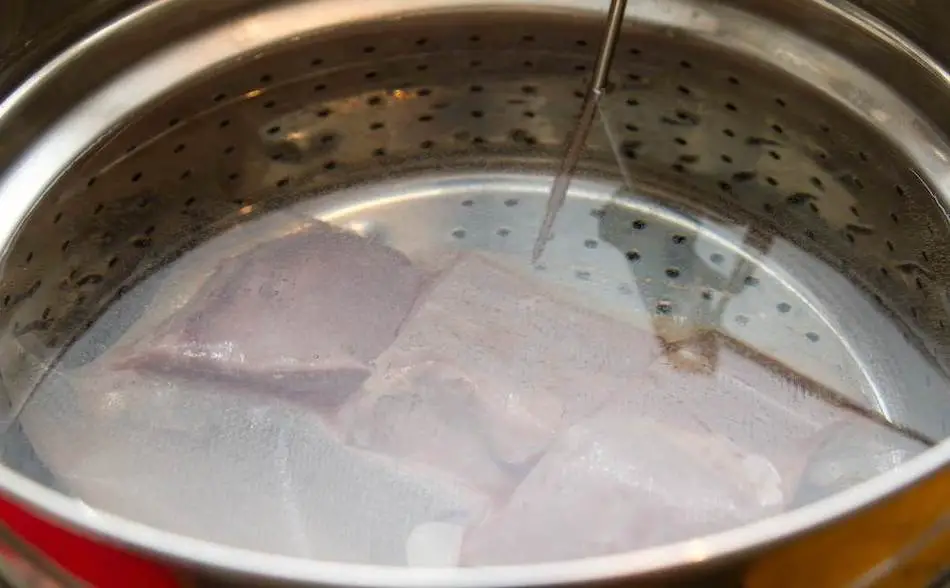
A vacuum sealer and a sous-vide machine is the easiest way to cook food using the sous-vide method. However, there is a way to sous-vide without buying specialized equipment. All you need is some plastic zip-lock bags, a pot of water, and your meat thermometer. Later in this article, I’ll show you both sous-vide methods; with or without proper sous-vide equipment.
Sous-Vide Temperature and Time
The standard sous-vide temperature for pork shoulder is between 160°F to 175°F. You can let the raw pork butt swim in this temperature anywhere from 12 to 30 hours, depending on how you like your pork. If you want nice, firm slices, then remove the meat after 12 hours. If you want fall apart tender pulled pork, then cook it for longer.
Smoked Sous-Vide Pork — Can It Be Done?
Sous-Vide pork butt can be cooked several ways:
- Partially smoke the pork shoulder, then finish using the sous-vide method.
- Partially sous-vide the pork, then finish in the smoker.
- Fully cook the pork butt in the smoker, then reheat using the sous-vide method.
| Parameter | Value |
|---|---|
| Standard sous-vide temperature | 160°F to 175°F |
| Cooking time | 12 to 30 hours depending on desired tenderness |
| Methods | Fully cook in smoker and reheat using sous-vide; partially smoke, then finish in sous-vide; or partially sous-vide, then finish in smoker |
How To Sous-Vide Smoked Pork Shoulder (Pork Butt)
If you already know how to smoke pork butt on a smoker, then the easiest way is to sous-vide the pork first, then finish in the smoker. A more complicated way of doing things is the reverse—partially smoke the butt first, then finish in a sous-vide bath.
The first way is to smoke a pork butt as you normally would; letting it sit in the smoker for several hours, absorbing smoke, and developing a nice crispy crust. Then, instead of wrapping the pork butt, vacuum seal the meat in a vacuum sealed bag and place it in a sous-vide bath until done.
Method 1: Smoke, Then Sous-Vide
This method is probably the most difficult to figure out, but if you can, the pork will taste way better than the reverse method. By smoking the pork butt first, you will achieve a far better flavor and bark on the pork. However, the hard part is getting the sous-vide pork butt to the ideal done temperature, which is the advantage of the reverse sous-vide method.
Smoked Pork Butt, Finished Sous-Vide
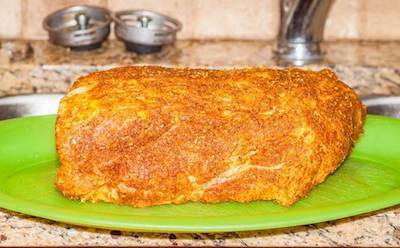
Ingredients
- Pork butt
- Pork rub
- Yellow mustard or olive oil
Instructions
Apply the rub. For the rub, use a barbecue rub that blends well with pork. I usually use sweet rubs with pork, and you will find most pork rub recipes contain brown sugar. Check out my article on rubs for the exact recipe. You can go simple as a salt and pepper rub with pork butt, and sometimes it’s good just to keep things simple.
Apply a binder. This step is optional, but if you want the rub to stick, apply some yellow mustard or olive oil to the meat prior to applying the seasoning.
Fire up your smoker. The first step is to smoke your pork butt in the smoker. To do this, set your smoker at about 250° F to 275°F.
Thow on some smoking wood. For the wood, apple, cherry, or pecan, work well with pork. Hickory is fine to be mixed in with the other woods, but it may overpower the pork, so use it with caution.
Smoke the pork. Place the pork in the smoker and let it sit on the grill for about 3 hours before checking. That first few hours you want to leave your pork. Just let it sit there and absorb smoke.
Develop the bark. The goal during this first phase of the cook is to develop the bark on the exterior of the pork, which should take 3 or 4 hours, maybe longer. Bark is a combination of smoke, dehydrated meat, and the rub.
Spritz the pork. After about 3 hours, begin spritzing the pork every 30-minutes with a spray bottle containing either apple juice, apple cider vinegar or beer. Don’t spritz too early or the rub will run off the meat. If you touch the rub with your hand or with your finger, and the rub sticks, that means the bark is not yet set. Once the bark is crispy and the rub doesn’t stick to your finger, then it is just about ready to be spritzed. You’ll also notice cracks emerging in the bark, and this is a sign that it is just about ready.
Remove the pork from the smoker. After about 4 or 5 hours in the smoker, the bark should be set and the internal temperature of the pork butt should have reached about 150°F to 160° F.
Seal the pork butt. Once you have removed the pork from the smoker, place the meat in a vacuum sealed bag and suck the air out of the bag using a vacuum sealing machine. If you don’t have a vacuum sealer, place the meat in an extra large zip-lock bag. Leave the seal open, then slowly lower the bag into a water container or pot. Once the water pressure has sucked all the air from the bag, close the zip-lock seal. *Optional: If you have a thermometer probe with no wires (similar to The MeatStick), you can insert it into the meat, then seal the bag. You won’t be able to seal the bags using other thermometers that have wires. A thermometer will allow you to track the internal temperature of the meat.
Sous-vide the pork butt. The last step using this method is to finish the pork in a sous-vide bath. Place the meat in your sous-vide machine and cook until the meat reaches an internal meat temperature of 200°F.
Set the temperature of the water bath. If using a sous-vide machine, set the temperature to 160°F. If you don’t have a sous-vide machine, fill a pot of water and place on the stove. Clip your meat thermometer onto the side of the pot and adjust the stove until the temperature stabilizes between 160°F and 175°F.
Done Temp. Cook the pork shoulder until it reaches an internal temperature of 200°F.
Insert a thermometer. The tricky part using this method is there is no way of knowing the internal temperature without piercing the vacuum sealed bag with an instant-read thermometer. If you have a Meater wire-free thermometer, you could insert the thermometer into the meat, then vacuum seal the bag. That way, the bag will seal and it won’t puncture the bag. Your only other option is trial to know when your pork butt is done is by trial and error.
Method 2: Sous-Vide, Then Smoke
- The barbeque rub. As with the above method, apply a pork rub, or a simple seasoning of a 50/50 mix of kosher salt and coarse black pepper.
- Vacuum seal the pork. Vacuum seal the pork using either a vacuum sealer of the zip-lock method described above.
- Sous-vide bath. Set the temperature of your sous-vide bath to 160°F.
- Let the pork butt soak. Place the pork in the sous-vide bath overnight (8 to 10 hours). Unfortunately, you’re going to have to experiment with different times to get the best results. Use a waterproof thermometer like MeatStick for more precise cooking temperatures.
- Finish in the smoker. The next morning, fire up your smoker, but keep the temperature low at 225°F. You want time at low temps so the pork can absorb smoke.
- Add more rub. Remove the pork from the plastic bag and apply some more rub or seasoning. Use a binder of olive oil if you want the rub to stick better.
- Get some smoke rolling. Don’t place the pork butt in the smoker until you have some nice smoke rolling. Use a smoking wood that blends well with pork.
- Insert thermometer. Insert an instant-read thermometer into the pork shoulder to track the internal temperature.
- Spritz. Spray the pork butt every 30 minutes. This will slow down the cooking so the meat has more time in the smoker. Wetting the meat also attracts more smoke to the meat.
- Cook till done. Cook the pork until the internal temperature reaches 200°F.
- Rest or hold. Allow 30 minutes to an hour to rest the pork butt before slicing or shredding. Resting will give the meat time to reabsorb moisture. Otherwise, place the meat in a dry cooker where it will remain hot for several hours.
Method 3: Smoke Pork Butt, Then Reheat Sous-Vide
The sous-vide method is the best way of restoring your smoked meat back to its original goodness. This is the closest you will get to what it tasted like after removing it from the smoker.
- Smoke the pork butt as normal. Follow the method mentioned in method number 1 (above). Otherwise, check out one of my detailed step-by-step guides on smoking pork butt where I walk you through the entire process. I’ve written a pork butt guide for different smokers. To check out the articles, click on the type of smoker you have and the link will take you to the guide. Smoked Pork Butt Guides for: Electric Smoker, Pellet Grill, Kettle Grill, WSM.
- Cool, the vacuum seal. Once the smoked pork has fully cooked in the smoker, then had time to cool, vacuum seal the whole roast and store in the refrigerator until you are ready to use. You can keep the vacuum sealed pork in the refrigerator for 2 weeks, or several months in the freezer.
- Set the water temperature. Set the water temperature of your sous-vide bath to 150°F.
- Sous-vide the pork butt. When you’re ready to reheat your pork butt, defrost for a few days in the refrigerator (if frozen). Place the bag containing the pork into the water bath.
- Slowly reheat the pork. It should take about 1 hour and 30 minutes to bring the pork butt back up to serving temperature (150°F).
- Remove and slice. Insert an instant-read thermometer into the pork to verify the internal temp. Once the meat is 150°F, remove it from the bath, then slice or shred the pork.
About the Pork Butt – How To Choose A Good Shoulder Roast
A pork butt is pork shoulder. Sometimes called a Boston butt, the pork butt isn’t actually the rump of the pork. This is a delicious part of the animal, because it contains a lot of fat and connective tissue. As you would be aware, meat with lots of fat and connective tissue is absolutely delicious if cooked low and slow. Tough cuts of meat cannot be cooked fast, otherwise they will be too chewy. However, when cooked at a low temperature, the fat and connective tissue renders and forms a delicious gelatin like substance. The fat makes the meat juicy stop leaner cuts such as the pork leg will dry out if you cook them too long. The key is to cook tough cuts between 225° F and 250°F.
Pork butt is harder to mess up than other roasting meats. If your temperature fluctuates too much while smoking a brisket, it will dry out. Pork butts can handle higher temperatures because it contains a lot of fat, which keeps it moist and prevents it from drying out. To guarantee a juicy pork butt, consider applying salt to the pork before cooking. We can do this the night before or a few hours before smoking. The salt will help the pork retain moisture during the cook. By applying the salt prior to smoking will allow the salt time to penetrate the meat. Apply the rub about 30 minutes before smoking. You want to allow the spices time to work their way into the meat as well.
Sous-Vide Equipment
Owning specialized sous-vide equipment is going to make life much easier if you’re interested in this cooking method, or applying it to barbeque. The two most important appliances you will need is a vacuum sealer and a sous-vide bath.
| Equipment | Description |
|---|---|
| Vacuum sealer and sous-vide machine | Easiest method for sous-vide cooking |
| Plastic zip-lock bags, pot of water, and meat thermometer | No specialized equipment needed |
Sous-Vide Machines – Immersion Circulators and Water Ovens
There are two types of sou-vide machines; water ovens and immersion circulators. Water ovens are quite large, and take up a lot of space. Immersion circulators are by far the best machines for sous-vide cooking because they are compact, and can fit in a variety of water containers. Prices range between just over $100 up to about $300, which is quite reasonable considering you are getting a cooking device that can do a lot of things.
The Best Sous-Vide Immersion Circulators
America’s Test Kitchen put all the most popular sous-vide immersion circulators through rigorous testing and found the Breville Joule and the Anova Precision Cooker to be the best all-around sous-vide immersion circulators. The testers lined up all the most popular immersion circulators on the market and tested for temperature accuracy, usability, heating speed, and water span.
Different immersion circulators have varying degrees of technology incorporated into the sous vide machine. The Joule is Wi-Fi only and needs an app to control. This is the only downside to the Joule because if you aren’t a fan of technology, you might find this machine extremely frustrating. Apart from the high-tech controls, the Joule immersion circulator tested number one in most testing categories.
The Anova Precision Cooker has the best of both worlds; push buttons or Wi-Fi technology. The other thing I liked about the Anova are the bundles. You can bundle a vacuum packaging machine, a sous- vide immersion circulator and a purpose-built sous-vide container. You can get a complete combo for around $200 where you get an Anova vacuum packaging machine and the immersion circulator. Check out the All-In-One Vacuum and Sous-Vide Combo here.
The Breville Joule – The Number One Sous-Vide Immersion Circulator
When tested alongside other circulators, the Joule came out on top in most categories. Here’s 6 reasons the Joule is the best immersion circulator on the market:
1. It is the best temperature accuracy.
2. It has the largest water span.
3. It is the most compact.
4. It heats the water bath fast.
5. Has Wi-Fi capability and is app controlled.
6. Gentle water churning.
Why The Joule Immersion Circulator is the Best Sous-Vide Machine
Accuracy. Sous-vide cooking is all about precision and accuracy, down to the degree. The Joule is the most accurate of all sous-vide immersion circulators on the market, and is accurate to within 0.2°, which is very impressive. That means when you set the temperature of the water to 150°F on the Joule, the water temperature will be 149.8°F, or 150.2°F. So when you compare that to other circulators, they might be off 1 or 2 degrees, which is no small matter when accuracy is key.
Compact. The other thing that sets the Joule apart is the size. While other circulators are quite bulky, the jewel is very compact. Size is important for a couple of reasons; First, it takes up less space in the water bath, which gives you more room for food. Second, it’s always good to have an appliance that doesn’t take up much room in your kitchen.
Water span. The other advantage of the Joule over the other immersion circulators is the water level range. Evaporation occurs while sous vide cooking, and water levels will drop a few inches over the cook duration. Most sous-vide machines on the market will allow three inches above or below the circulator. The Joule allows for 6 inches, giving it a much larger water span so you don’t have to worry about water levels.
Wi-Fi & App Technology. The Joule is Wi-Fi enabled and uses a companion app you need to download and pair with the machine. Some apps aren’t user friendly, but the Joule app is intuitive and easy to use. The cool thing about the app is you can control the appliance while you are out and about. You can adjust temperatures, turn it on or off, or check the water levels. That means you can start dinner while you’re at work, or monitor the temperature of the sous-vide machine even though you’re across town.
Does The Joule Have And Cons?
The only fault of the Joule is you can only control it through the app. This isn’t really a problem, but if you don’t like technology, then you might find the Joule frustrating. If you’re fine with high-tech devices, then you’ll find the app extremely convenient. However, some people just want a simple push button without having to pair the appliance with a device.
Where To Buy The Joule
You can buy the Breville Joule Immersion Circulator on Amazon. Check the latest price here.
Anova – Another Great Sous-Vide Machine
The Anova is an extremely popular sous-vide machine and is considered one of the best on the market. Although this came in second place on America’s Test Kitchen, the advantage of the Anova is it embraces technology but also allows the user to bypass the tech and control with regular push buttons.
The Anova tested well in all categories, and has lots of buying options. You can get a purpose-built sous-vide container designed specifically for the Anova immersion circulator, or a combo with a sous-vide device, the container, and a vacuum sealing machine so you’ve got all your sous-vide tools in one package. Check out the combo here.
Vacuum Sealers
A vacuum packaging machine will suck all the air out of the bag, which will preserve your food your smoked meat for much longer. You can get a vacuum packaging machine for about $100 on Amazon. Check the latest price here.
My Favorite Meat Smoking Tools
Remote Digital Thermometer: A remote “leave in” thermometer is probably the most important tool you will need for low and slow cooking. My first thermometer was the ThermoPro TP20, and I still use it regularly to this day.
For around $50, you get a high-quality meat thermometer with two probes so you can track the temperature of your pit with one probe and your meat with the other probe. The TP20 is an Amazon Best Seller because it’s the easiest thermometer to operate, is durable, highly accurate, and comes with pre-programmed meat settings. Check the latest price on Amazon here.
Instant Read Thermometer: Arguably, the second most important tool you need is a fast and accurate instant-read thermometer. These tools play an important role in the latter stages of the cook when the meat needs regular checking in multiple areas.
I use the TP19 by ThermoPro because it gives a reading within 2- 3 seconds and is highly accurate. Everyone agrees the ThermoPen is the Michael Jordan of thermometers, but it’s so expensive. The TP19 can do everything the ThermoPen can do, except for a fraction of the price. If you can afford the ThermoPen, then go for it. I think it’s worth every cent. But if you don’t want to fork out $100 for a thermometer, then check out the TP19 on Amazon here.
Wi-Fi Thermometer: I love the Signals Wi-Fi thermometer because I can use my phone to monitor the temperature of my smoker and multiple briskets while I’m at the beach or at the store. This is defiantly the thermometer to buy when you’re ready to level-up. Signals is made by Thermoworks, a company known for making the best thermometers on the market. Check out Signals here.
