If you do a lot of low-and-slow barbecue, you would probably know how pre-brining meat can have great results. However, brining isn’t always necessary. So what about when smoking ribs? I wanted to find out what happens if yo pre-brine ribs, so I asked the experts.
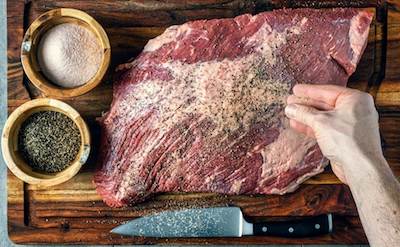
Brining has several benefits of most low-and-slow barbecue meats. Dry brining ribs will help the meat retain moisture during the cook, as well as add flavor. A dry brine is as simple as adding salt to the ribs prior to cooking. Leave the salt to absorb into the meat for an hour, then apply your barbecue rub. During the cook, the salt will help the ribs retain moisture. If you dry brine, be sure that your barbecue rub doesn’t contain much salt, otherwise your ribs will be too salty.
Ribs don’t need hours soaking in a wet brine as you would some meat. However, adding salt to ribs prior to cooking (dry brining) is common practice. I’ve watched dozens of world-class barbecue experts smoking ribs, and they will usually add salt with the rub, or before.
Key Points
- Brining has several benefits for low-and-slow barbecue meats, such as helping the meat retain moisture and adding flavor
- Dry brining ribs is as simple as adding salt to the ribs prior to cooking, and leaving it to absorb for an hour before applying a barbecue rub
- Ribs don’t need hours soaking in a wet brine, but adding salt to ribs prior to cooking (dry brining) is a common practice among barbecue experts
- Brining ribs isn’t absolutely necessary, but it’s more important when smoking larger cuts of meat such as brisket or pork butt
- Brining ribs will help retain moisture and add flavor to the meat
- Dry brining is the best option for ribs, as it involves rubbing salt into the meat and leaving it for 2 to 24 hours prior to cooking
- Wet brining is not suitable for ribs, as it can make the meat soggy
- Be careful not to “double-salt” the ribs by using a dry rub that already contains a lot of salt
- Consider making your own dry rub to have complete control over the salt content.
- Ribs only need 1 hour in a dry brine.
Is Brining Ribs Necessary? Here’s What the Experts Say
Brining ribs isn’t absolutely necessary and is more important when smoking large cuts of meat such as brisket or pork butt. Ribs are a much smaller cut of meat, but it’s still contains a lot of gristle and connective tissue, and will receive some benefit from salting.
As with cooking any meat in a smoker, ribs are at risk of drying out. If you cannot maintain control of your smoker, the ribs will dry out. Or, if you leave the ribs cooking for too long, they will dry out. Salting the ribs will help you retain moisture.
Meathead Goldwyn, a barbecue expert and author, suggests using a dry brining technique when preparing ribs. According to Goldwyn, the rule of thumb is to use 1/4 teaspoon of kosher salt per pound of meat, taking into account that ribs are about 50% bone. He recommends eyeballing the amount of salt, sprinkling the same amount you would sprinkle if the ribs were served unsalted.
This method, called dry brining, is a technique popularized by the late Chef Judy Rodgers of San Francisco’s Zuni Cafe, which Meathead Goldwyn advocates as it is different from wet brining, where the food is submerged in a salt water solution of 5 to 10% salinity. He also suggests to give the salt 1 to 2 hours to be absorbed. He suggests that since discovering dry brining, he almost never uses wet brining anymore. To read more from Goldwyn on dry brining, check out this article.
Unlocking the Flavor Potential: The Benefits of Brining Ribs
Not only will salting your ribs help the meat retain moisture, it will also add an enormous amount of flavor to the ribs. Salt will penetrate through the thin layer of meat, which is unlike larger cuts such as brisket, where it is nearly impossible to get flavor deep into the center of the meat unless you inject.
Wet vs Dry Brining: Which Method is Best for Ribs?
You can either wet or dry brine meat. A wet brine involves soaking meat in a liquid solution containing salt and other ingredients. A dry brine is where you rub salt into the meat, and leave it for 2 to 24 hours prior to cooking.
When brining ribs, a dry brine is definitely the best option. All you need to do is sprinkle salt onto the rubs about1 hour before applying the rub. The salt will make the surface of the meat nice and sticky—which will help the rub bind to the meat. When the rub sticks well, you have fewer patches on the bark.
Wet Brining Ribs: Is it the Right Choice for Your BBQ?
A wet brine, which involves soaking meat in a liquid solution containing salt and other ingredients, is not always the best option when it comes to preparing ribs. Wet brining works well with poultry and fish, such as turkey or salmon, as the meat is able to absorb the flavors and retain moisture effectively. However, when it comes to ribs, the meat is already relatively thin and the process of wet brining can cause it to become too moist and soggy.
Dry brining, on the other hand, is a more suitable method for preparing ribs. This technique involves rubbing salt into the meat and leaving it for 1-2 hours prior to cooking. The salt helps to retain moisture and infuse flavor into the meat without causing it to become soggy. Dry brining is a popular technique among pitmasters and is seen as a more efficient and effective method for preparing ribs.
The Secret to Perfectly Seasoned Ribs
Another way to dry brine ribs is to apply a dry rub a few hours before cooking. This technique is known as pre-seasoning or pre-rubbing. Some pitmasters will apply a layer of salt and pepper before sprinkling on the barbecue rub. This allows the salt to penetrate the meat and start the dry brining process before cooking.
However, if your rub already contains a significant amount of salt, you can simply apply the rub a few hours before cooking and the salt in the rub will be enough to brine the ribs.
This method is a great way to infuse the ribs with flavor and moisture, while also allowing the pitmaster to have more control over the seasoning. It’s an easy technique that can be done even a day before cooking, and it allows the pitmaster to have more control over the seasoning. Also, it makes sure that the rub adheres properly to the meat, giving it a better flavor and appearance.
Avoiding the Pitfall of Over-Salting: A Guide to Brining Ribs
When brining meat, it’s important to be mindful of the amount of salt used in order to avoid “double-salting” the meat. This can happen easily without realizing, especially when using store-bought dry rubs that often contain a high amount of salt. Additionally, when using a mop sauce during the cooking process, it’s important to check the salt content as well, as some mop sauces can also be high in salt.
If you’re dry brining your ribs and then applying a salty rub, the ribs will end up being “double-salted” which can cause the meat to be too salty to enjoy. To avoid this, it is recommended to check the label of dry rubs and mop sauces, and choose ones with lower salt content or make your own dry rub with your desired amount of salt. You can also use a meat thermometer to check the internal temperature of the meat to ensure that the meat is cooked through and juicy, but not over-salted.
Creating Your Own Rub: Control the Salt Content and Experiment with Flavors
When purchasing dry rubs from stores, it’s important to check the label for the salt content, as many store-bought dry rubs can be high in salt. While there is nothing wrong with using these rubs on ribs, it’s important to be mindful of the amount of salt added to the meat in order to prevent “double-salting” the meat.
An alternative to store-bought dry rubs is to make your own. Homemade dry rubs offer the advantage of having complete control over the salt content. Additionally, you can experiment with different combinations of ingredients and seasonings to create your own unique flavor profiles.
Making your own rubs also allows you to make large batches which can be stored and used later. If you’re interested in making your own dry rub, you can find many recipes online, or you can experiment and make your own recipe.
Standard Barbecue Rub
I found this great rub recipe through How To BBQ Right. I use this recipe and alter it slightly depending on what I'm cooking. Made by the guys at Townsend Spice & Supply: https://townsendspice.com/
Ingredients
- - ½ Cup Paprika
- - ½ Cup Salt
- - ½ Cup Sugar
- - ½ Cup Granulated Garlic
- - ¼ Cup Granulated Onion
- - ¼ Cup Chili
- - ¼ Cup Cumin
- - 2 Tablespoons Black Pepper
- - 2 Tablespoons Dry Mustard
- - 1 Tablespoon Cayenne Pepper
Instructions
- Combine all the spices together in a large mixing bowl
- Store rub in rub shakers
Brining Ribs 101: How Long Should You Leave them in the Salt Mix
When it comes to brining ribs, the length of time required is significantly less than other cuts of meats. Unlike larger cuts such as brisket or pork butt, ribs only need to be left in a dry brine for 1 hour. This is because ribs are a thinner cut of meat and the salt is able to penetrate the meat quickly.
It’s important to note that dry brining is different from wet brining, where the meat is submerged in a salt water solution for a longer period of time. For ribs, dry brining is the preferred method as it helps the meat retain moisture and adds flavor without making the meat soggy.
When dry brining ribs, it’s important to use a high-quality salt, such as kosher salt or sea salt, and to add the salt 1 to 2 hours before cooking. This will give the salt enough time to be absorbed by the meat, resulting in juicy and flavorful ribs. Overall, ribs are a relatively small cut of meat, so they don’t require hours in the brine like other meats.
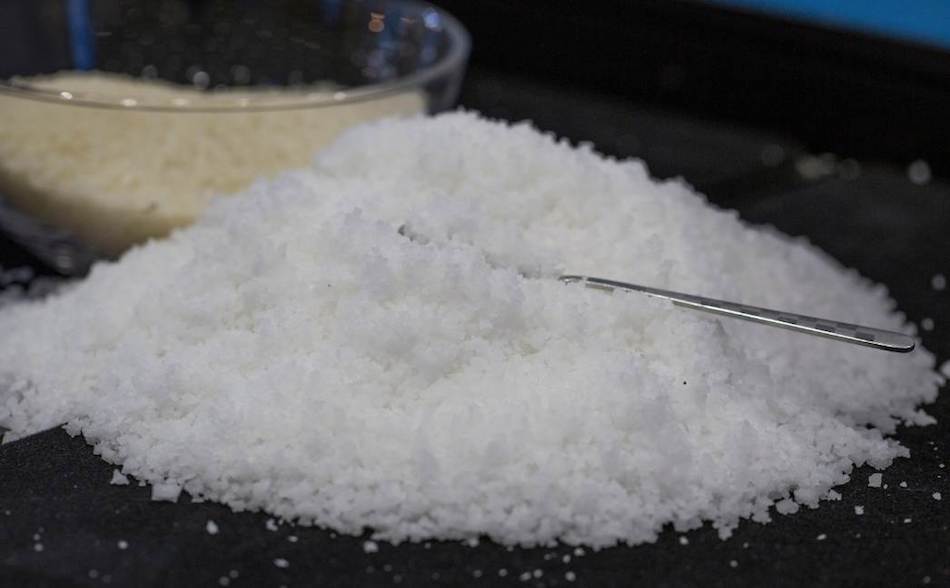
The Salt Debate: Which Type is Best for Brining Ribs?
Kosher salt is the preferred salt for barbecue pit masters, otherwise you can use sea salt, or rock salt. Try to avoid using regular table salt because it contains iodine and other additives to prevent caking. Morton’s Kosher Salt is probably the most common brand, and you can buy it on Amazon if your grocery store doesn’t sell it.
There are so many salts on the market, and they aren’t all equal. Never used curing salts color because they contain preservatives. Curing salts should be reserved for making bacon and ham—not salting ribs.
Does Brining Help Retain Moisture in Ribs? The Science Explained
Meat can lose a lot of moisture when cooked for several hours. Ribs will need about 6 or 7 hours in the smoker — which is a long time for a thin cut of meat. If you brine the ribs prior to cooking, the salt will help the ribs reabsorb some of the moisture.
One way to prevent this is by brining the ribs prior to cooking. The salt in the brine helps the ribs reabsorb some of the moisture that would otherwise be lost during the cooking process. This helps to ensure that the ribs are tender, juicy, and flavorful.
Smoker Temperature Control and Brining: The Key to Perfectly Moist Ribs
When it comes to smoking ribs, controlling the temperature in your smoker is crucial. The ideal temperature range for smoking ribs is 225-250°F (107-121°C). Cooking ribs at a lower temperature for a longer period of time allows the meat to break down the connective tissue and become tender.
In addition to salting, wrapping the ribs can also help to trap moisture and create a steaming effect, resulting in tender and juicy ribs. Wrapping the ribs in foil or butcher paper after a certain period of smoking will help to keep the meat from drying out. Some pitmasters prefer to smoke their ribs unwrapped to develop a bark, but wrapping will make an enormous difference in terms of the tenderness and juiciness of the ribs.
Another tip for maintaining the moisture in ribs is using a mop sauce. A mop sauce is a liquid that is applied to the meat during the cooking process. This will help to keep the meat moist and add another layer of flavor.
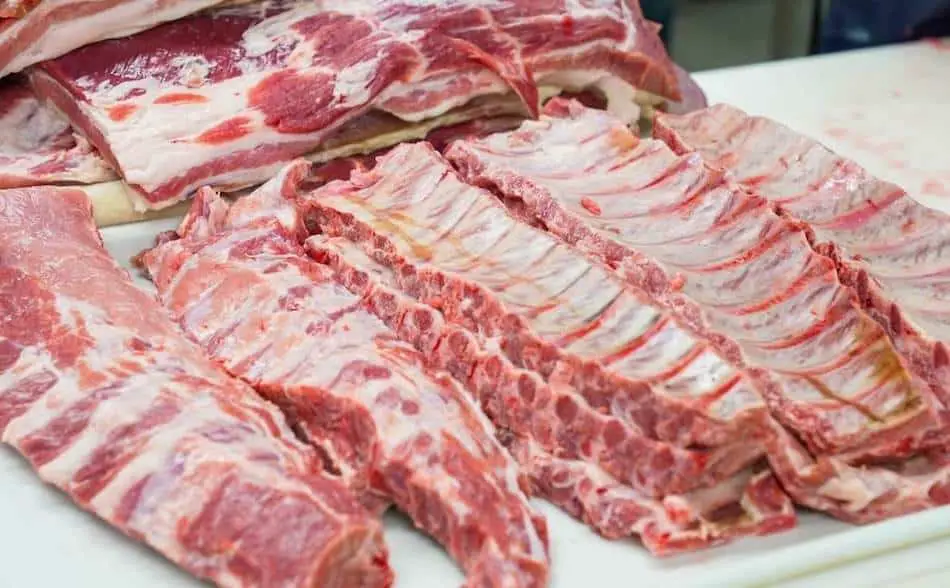
Buy Ribs With Fat
When shopping for ribs, buy a rack with some fat and marbling if possible. Fatty ribs are less likely to dry out, and will help lubricate the meat while cooking. Also, fat will add an enormous amount of flavor.
Lean cuts of meat dry out easily, which is why baby back ribs are harder to manage when compared to spare ribs. Baby backs are taken from the loin, which contains lean, tender meat. Spare ribs on the other hand are from the pork belly, and an area of the pork that contains a lot of fat.
Keep The Temperature Low
When smoking ribs, it’s important to keep the temperature in the low-and-slow range—between 225° F into 275° F. Once you go outside of this cooking range, the ribs will be at risk of drying out.
Whatever you do, don’t expose the ribs to high temperatures for a long period. Keep good control of your smoker and use a good wireless thermometer that will alert you if the smoker goes outside a safe range.
Spritz Your Ribs
Spritzing your ribs is a great way to keep them moist and juicy. The ribs will lose a lot of moisture during the cook. As meat cooks, it will sweat, and moisture will accumulate on the surface of the meat and then drip off. By spritzing the ribs, you help replace some of that lost moisture.
Spritzing also helps slow down the cooking process, which is important when smoking something for a long time. Spare ribs need time for the fat and gristle to break down, in order to become tender. Spritzing will buy you time.
Use a Quality Thermometer
A quality meat thermometer will be your best friend when smoking ribs. A thermometer is important to help you keep track of your smoker so that you do not exceed the target temperature of 275° F. If you lose control of your smoker, your ribs are going to dry out.
There are dozens of thermometers available online, but just be careful because many of them are inaccurate. For the moment isn’t accurate, then what’s the point?
I use the TP20, a $60 meat thermometer that I bought on Amazon. My thermometer will alert me the moment my smoker goes above the temperature parameters that I’ve set. It has two probes, one for the meat and one that clips to the grill. That way, I know what’s going on inside my meat, which is especially important when cooking to internal temperature rather than time.
Instant-Read Thermometer
Using an instant-read thermometer is an essential tool for smoking ribs. It is especially important in the final stages of cooking, when you need to measure the temperature of different parts of the meat. With an instant-read thermometer, you can get an accurate temperature reading within just a few seconds.
This can help you ensure that your ribs are cooked to perfection and that they are safe to eat. It’s also important to have a thermometer that is accurate, and easy to read, and has a fast response time. This way you can monitor the temperature of the meat without having to open the smoker door, which can cause a change in temperature.
Investing in a good instant-read thermometer is a must for any pitmaster who wants to make perfect ribs every time.I used to TP19, a high-quality thermometer that only cost me $30 on Amazon. For more information, check out our Thermometer Guide.
How To Smoke Ribs
If you’re interested in smoking ribs, check out these articles:
The Complete Guide To Smoking Ribs
Competition Style Ribs On A Pellet Smoker
My Favorite Meat Smoking Tools
Thanks for checking out this article. I hope you learned a few things. Here are some of my favorite tools I use when smoking brisket that may be useful to you. These are affiliate links, so if you decide to purchase any of these products, I’ll earn a commission. But in all honesty, these are the tools I recommend to my family and friends who are just starting out.
Meat Thermometer: There are dozens of fancy thermometers on the market, but I still use my trusty TP20. For around $50, I have a high-quality meat thermometer with two probes, and can track the temperature of my smoker with one probe, and my meat with the other probe. The ThermoPro TP20 is an Amazon Best Seller because it’s the easiest thermometer to operate, is durable, highly accurate, and comes with pre-programmed meat settings.
Instant Read Thermometer: Arguably, the second most important tool you need is a fast and accurate instant-read thermometer. These tools play an important role in the latter stages of the cook when the meat needs regular checking in multiple areas. I use the ThermoPro TP19 because it can do everything a ThermaPen can do, but for a fraction of the cost. You can check out the TP19 on Amazon here.
Wireless Thermometer: The latest thermometers on the market have no wires and can be controlled by wi-fi via your phone. Airprobe 3 is the best of this technology.
Butcher Paper: Wrapping brisket in butcher paper has become a huge trend in barbeque thanks to Aaron Franklin. Wrapping your brisket in paper will give you a nice brisket bark. However, you can’t just use any old paper, it has to be unwaxed, food grade paper. You can find it on Amazon here.
Advanced Thermometer and Automatic Temperature Controller: Once you’re ready to take things seriously, the FireBoard 2 Drive is a six-channel Bluetooth/Wi-Fi thermometer that can monitor up to 6 pieces of meat, control and graph your cook sessions on your smartphone, and attaches to an an automatic blower that will convert your charcoal smoker to a set-and-forget. This is one of the most advanced meat thermometers on the market. You can check it out on the FireBoard website here.