
If you’ve got a Weber or any type of kettle grill, then you can smoke a turkey. Turkey can be challenging, but if you follow a few basic rules, you can smoke a bird as good as any barbecue pitmasters. In this article, I’ll walk you through each of the steps to guarantee tender, juicy smoked turkey every time.
Smoking a Turkey on a Weber kettle is straightforward. As long as you can maintain a stable 325° F, you can have a smoke turkey in around 2 hours. Barbecue guru, Aaron Franklin, inspired this method. I love Aaron’s simple approach to barbecue. Sometimes we can complicate things and waste time on things that don’t really matter.
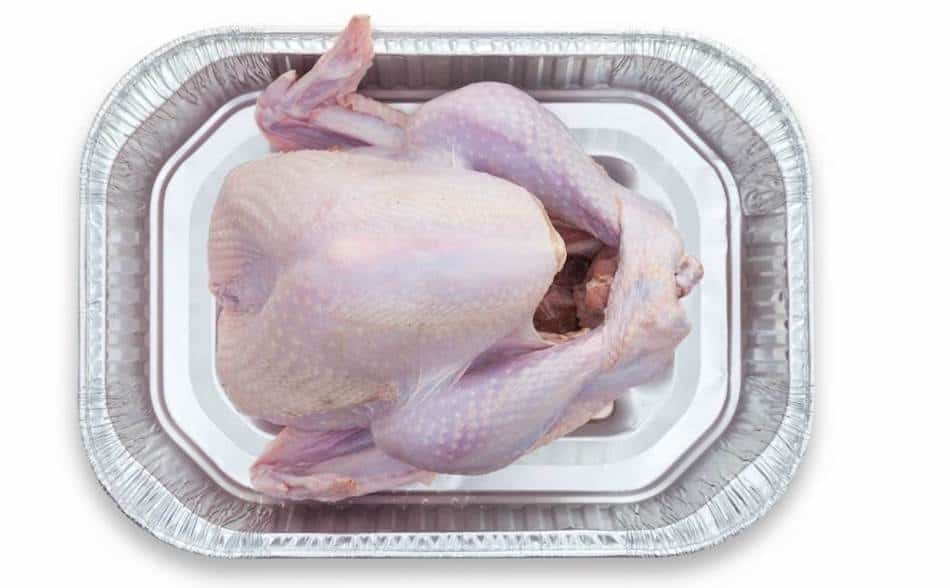
Smoked Turkey On A Weber Kettle
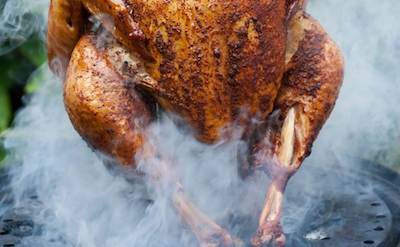
Tender, juicy smoked turkey cooked over charcoal on a kettle grill.
Ingredients
- One or two small turkeys
- Barbecue rub
- 2 gallons of cold tap water
- 1 cup of kosher salt
- 1 cup of white sugar
- 2 chunks of cherry or apple wood
- 80 charcoal briquettes
- 1 pound of butter
Instructions
- Pour part of the water into a pot.
- Mix the kosher salt and sugar into the pot of water.
- Dissolve the ingredients over a low heat.
- Empty the pot into large plastic container.
- Pour the remaining water in the container.
- Allow the brine to cool before adding the turkey.
- Place the bird in the brine and soak overnight.in the refrigerator.
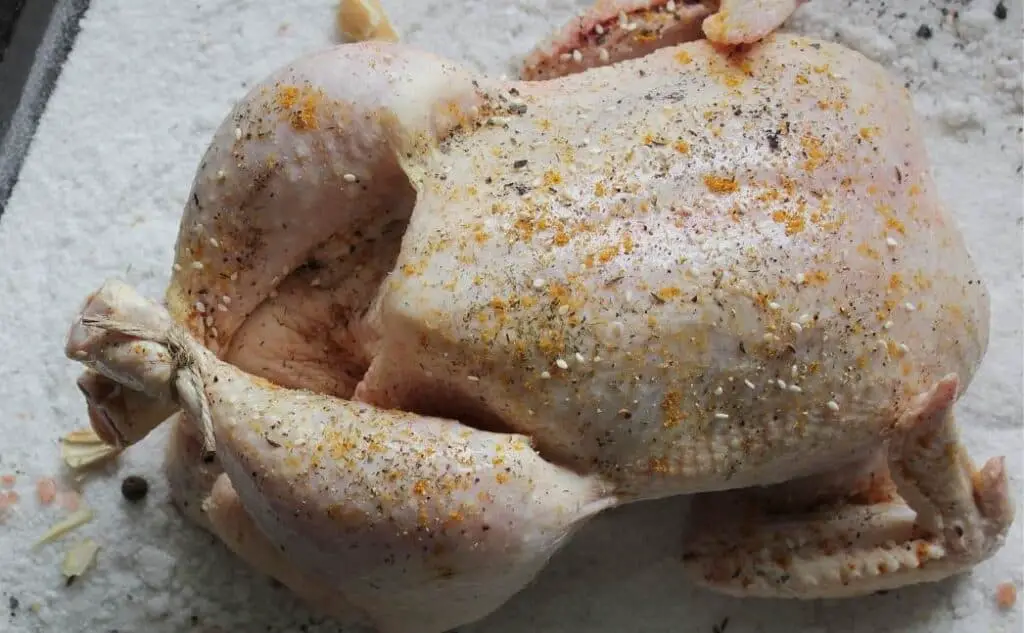
- The next day, remove the turkey from the brine and shake dry.
- Add the barbecue rub to the turkey.
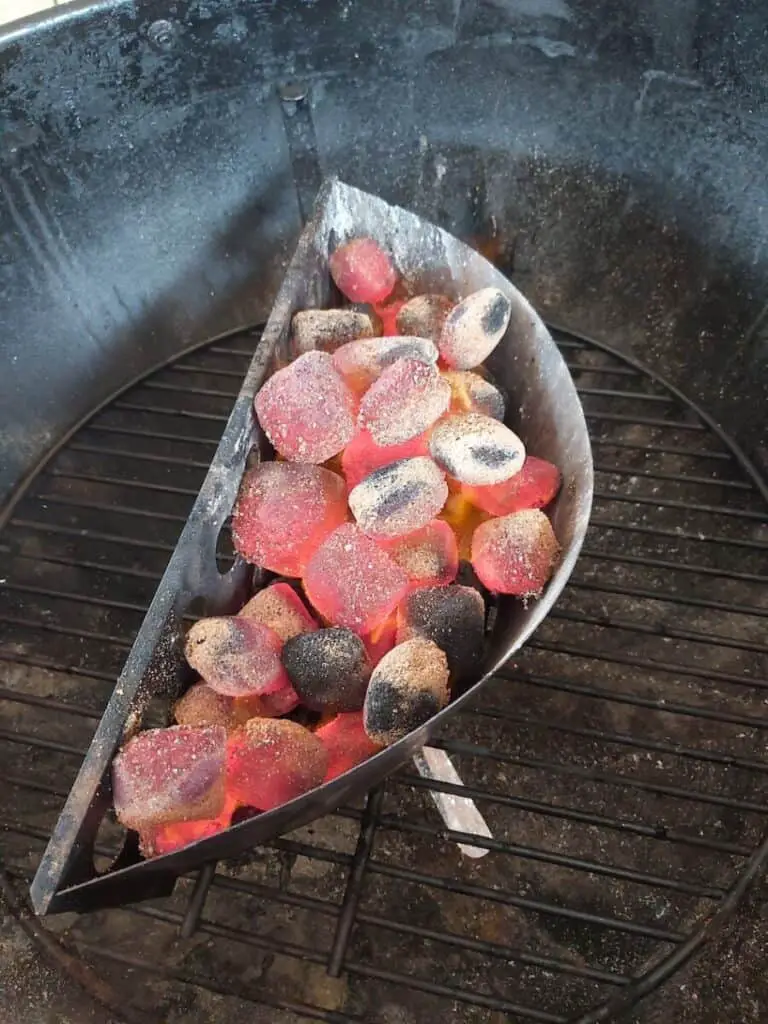
- Lay 40 charcoal briquettes in your Weber. Place them to one side of the grill.
- Light the other 40 briquettes in a charcoal starter.
- Place a water pan next to the unlit charcoal and fill with hot water.
- Once the 40 coals in the chimney are lit, pour them over the unlit coals.
- Attach a thermometer probe to the grill to monitor the temperature of your Weber.
- Close the Weber lid
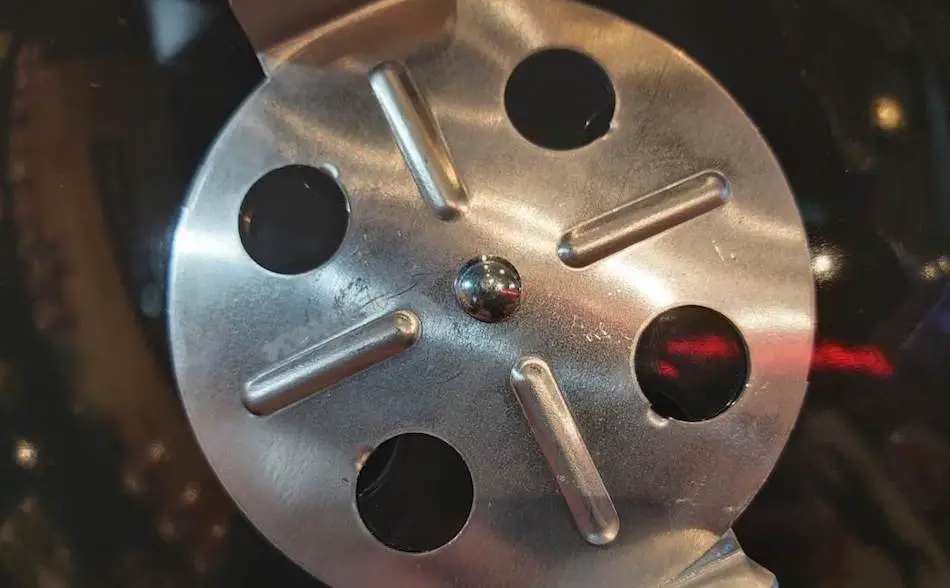
- Adjust the bottom vent to half and the top vent to half.
- Wait 20 minutes for the Weber to come up to temperature. Aim for 325°F.
- Once the Weber has reached the target temperature, throw two chunks of wood onto the fire.
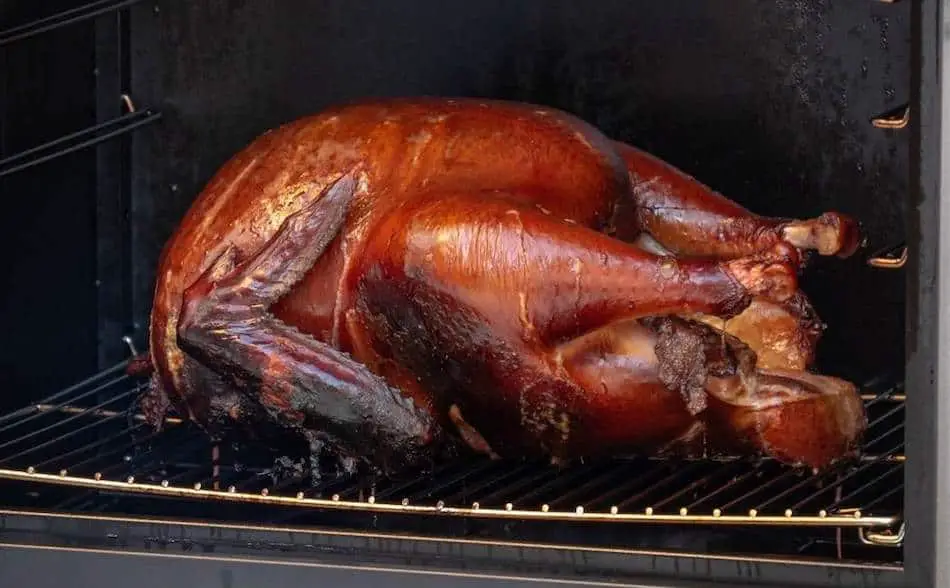
- Once a nice, clean smoke is rolling out of the vents, place the turkey on the grill. If possible, direct the breasts away from the hottest part of the smoker and put foil on the wing tips to prevent charring.
- Cook the turkey for 1.5 hours, or until the internal meat temperature is measuring around 160°F.
- Remove the turkey and place it into an aluminium pan. Place cubes of butter all around the turkey.
- Tent the turkey with aluminium foil.
- Put the lid on the Weber and cook for 1 hour. Once the turkey reaches 165°F in the breast and 175°F in the thigh, the bird is done.
- Rest the turkey for 30 minutes prior to serving.
Nutrition Information:
Serving Size:
57 gramsAmount Per Serving: Calories: 64
How Long Will It Take?
It should take between 2 and 2 1/2 hours to smoke a small turkey in a Weber kettle at 325° F. If you’re cooking an enormous bird, then it’s going to take much longer. Also, if you cook below 300°F, the turkey will take well over 3 hours.
How Will I Know It’s Done?
Turkey is done once the internal temperature reads 165° F in the breast and 170° F in the thigh. So to smoke a turkey to perfection, you will need a good thermometer to give you precise readings. Without a good thermometer, it’s all guesswork. For a wireless leave-in, I recommend the TP20. For an instant-read, the TP19 does a great job.
What’s The Best Temp For Smoking Turkey?
The ideal temperature to cook a turkey on a Weber Kettle is 325° F. This cooking temperature is enough to get a nice, crispy skin on the bird. Any lower than 300°F, you will end up with soft rubbery skin. The turkey will only need around 2 hours at 325°F, so it shouldn’t dry out.
Tips On Buying The Right Turkey
As most pitmasters will tell you, it’s easier to smoke two smaller birds rather than one enormous turkey. Large birds look impressive, but they’re too difficult to manage. Be careful not to double-brine the turkey. Read the packaging carefully because stores sometimes sell turkey pre-brined.
What’s The Best Wood For Smoking Turkey?
Turkey has a thin flesh, so be careful using strong smoking woods such as hickory or mesquite. Fruit woods like apple or cherry blend well with turkey, and won’t dominate the flavor. Cherry wood will give the bird a reddish color, which looks spectacular on the dinner table. Whenever I’m smoking meat, I usually mix-and-match woods. For example, when smoking turkey, I’ll throw on a chunk of apple and a chunk of cherry for color. For more information on smoking woods, check out this article: The Best Woods For Smoking Turkey.
Brine The Turkey
If you want the perfect smoked turkey, it will need to be soaked in a brine the day before. You can skip this step, but I wouldn’t recommend smoking a turkey without having a bath first. Turkey doesn’t have a lot of natural flavor, and can dry out easily. A brine will add much-needed moisture, plus it will give the bird a flavor boost.
To prepare the brine mixture, I use Aaron Franklin’s recipe because it’s simple and effective. For this recipe, you’ll need:
- 2 gallons of cold tap water
- 1 cup of kosher salt
- 1 cup of white sugar
Directions
- Place some of the water in a pot, then combine the kosher salt and sugar.
- Place the pot over a low heat until the ingredients have diluted and formed a concentrate.
- Take a pickling bucket or a large plastic container and pour in the concentrate.
- Take the remaining water and place it in the pickle bucket.
- Give it time to cool before soaking the bird, otherwise place ice cubes into the bucket. If you’re going to put ice cubes in the bucket, keep to the quantities of the recipe.
- Place the bird in the pickle bucket and soak it overnight.
Dry The Turkey
After the turkey has soaked in the brine overnight, on the day of cooking, remove the bird from the brine and shake off as much liquid as possible. You can also use a paper towel to dry the bird for extra crispy skin. Keep in mind that if you dry the turkey, the rub and seasoning won’t stick. For the rub to stick, you can use olive oil.
Apply The Rub
For the rub, you can either make your own or buy a pre-made rub. If you would rather use a store-bought rub, I would recommend rubs made by barbecue gurus. I guarantee these rubs will be good. Start with World BBQ Champion Harry Soo’s Rub, or YouTube BBQ star Malcolm Reed’s Killer Hogs Barbecue Rub.
If you prefer to make your own rub, there are a few options. You can keep it simple by using salt, pepper, onion powder, and garlic powder. For a more complex recipe with some spice, you might like to try this standard barbecue rub recipe. It’s a little spicy, but you can adjust this recipe to suit your taste.
Standard Barbecue Rub
I found this great rub recipe through How To BBQ Right. I use this recipe and alter it slightly depending on what I'm cooking. Made by the guys at Townsend Spice & Supply: https://townsendspice.com/
Ingredients
- - ½ Cup Paprika
- - ½ Cup Salt
- - ½ Cup Sugar
- - ½ Cup Granulated Garlic
- - ¼ Cup Granulated Onion
- - ¼ Cup Chili
- - ¼ Cup Cumin
- - 2 Tablespoons Black Pepper
- - 2 Tablespoons Dry Mustard
- - 1 Tablespoon Cayenne Pepper
Instructions
- Combine all the spices together in a large mixing bowl
- Store rub in rub shakers
Did you know there’s now a meat thermometer with no wires that can control with your phone? Check out MEATER
How To Setup A Weber Kettle For Smoking Turkey
- Place 40 charcoal unlit briquettes into your Weber kettle. Place them to one side of the grill.
- Place another 40 charcoal briquettes in a chimney starter and set it alight. Wait until the whole chimney is lit.
- Place an aluminium water pan on the opposite the charcoal briquettes.
- Place the lit 40 charcoal on top of the 40 unlit coals.
- Close the lid, adjust the bottom vents to half and the top vents to half.
- Place a thermometer probe on the grill, to measure the internal temperature of the Weber Kettle. Without a good thermometer, you’re driving blind.
- Allow 20 minutes for the temperature to come up to 325° F. Make any relevant adjustments to reach your target temperature.
- Throw a couple of chunks of smoking wood on the fire. Use cherry, apple or hickory.
- Wait for some nice, clean smoke to roll before adding the meat.
How To Put The Turkey On The Grill
When you put your turkey on the grill, face the legs towards the fire. The thighs and the legs can absorb more heat than the other side of the bird. The thighs and the legs have more blood vessels and fat, whereas the breast dries out because it’s lean. You can place some foil on the tip of the wings to prevent burning.
Do You Put Turkey In A Pan?
For the first stage of the cook, don’t pan the turkey. Just let the bird cook on the grill. After about an hour and a half, remove the turkey carefully and place it on an aluminium pan. This is the best time to add butter and tent the turkey. Make sure you cover the bird in the butter around the sides.
Do You Wrap Turkey?
After an hour and a half, wrap the turkey in a tent of aluminium foil. This will prevent the turkey from going too dark, and will help retain moisture. Fold the foil up and close it tightly and make it like a foil tent. The downside of foiling and panning is the skin won’t be as crisp. However, just before serving, you can place the bird on the grill for a few minutes to dry the skin.
Weber Setups For Smoking Turkey
Turkey is a short cook, so you will need about 80 to 100 briquettes. A standard sized turkey will only take 2 or 3 hours. Obviously that depends on the size of the bird. As always, set up your Weber kettle for indirect cooking. Place the coals one side of the grill, and the meat on the other side. This setup creates two zones; a hot zone and a cool zone. This is by far the best Weber setup for low-and-slow cooking.
Can You Use The Snake Method Or Minion Method For Smoking Turkey?
The minion method and the snake method are two common setups when cooking on kettle grills. However, these methods are more suitable for low-and-slow cooks ( 220°F to 250°). Turkey is a hot-and-fast cook (325°F to 350°F), so avoid this setup.
How Many Charcoal Briquettes Do I Need For Turkey?
To maintain a 325° F temperature on a 22-inch Weber Kettle, you will need 80 briquettes—40 pre-lit and 40 unlit. This should be enough to cook a turkey for 2-3 hours at 325°F.
Vent Adjustments
To maintain a stable 325° F temperature, you want to have the bottom vent half open and the top vent half open. Obviously depending on the conditions, you may need to make adjustments. If it’s windy, then you might need to close off the bottom to 1/4. When lighting your Weber kettle, I always like to leave the bottom in open all the way for that first 20 minutes when trying to come up to temperature. Once it approaches 300°F, wind the vent back to half. Only make one adjustment at a time when you’re tinkering with the vents. Make one change, then wait 10 minutes. Don’t make two or three changes within 10 minutes.
7 Ways To A Crispy Skin On A Turkey
- High Temps. You want to cook poultry around the 300° F range to avoid soft rubbery skin. You will not get a crispy skin if you smoke anywhere under 275° F.
- Skip the Brine For Crispy Skin. If you want really crispy skin, consider skipping the brine prior to cooking the turkey. Soaking the bird in a wet brine will give the bird lots of flavor and tenderness, but it will soften the skin. Use a dry brine instead. Rub kosher salt into the bird and let it sit overnight. This will make an enormous difference to the flavor and juiciness, plus it won’t make the skin soggy.
- Avoid tenting. Tenting or wrapping turkey is good to protect it from getting too dark, however it will create steam and soften the skin. If you want a crispy skin, don’t tent the bird.
- Don’t Pan. Don’t place the turkey in a pan otherwise the underside of the bird will become soft and soggy. Just lay the bird on the grill so that he can circulate the entire surface of the meat.
- Loose the water pan. If you want a crispy skin, consider losing the water pan. I always like a water pan because it adds a bit of moisture to the atmosphere and prevents the meat from drying out. However, if you are after crispy skin, you want to reduce the amount of moisture inside the cooking chamber. A water pan increases the humidity and softens the skin.
- Don’t spritz. Another way to avoid soft turkey skin is to not spritz or mop the bird during the cook. Wetting the skin is only going to soften it.
- Dry with a paper towel. Before smoking your bird, take a paper towel and dry as much moisture from the turkey as possible. You want to get this skin nice and dry so that when you smoke it, you’ll turn out crispy.
- Use olive oil spray. Another technique I use for smoking chicken is intermittently spraying the bird with olive oil spray. This will help with the browning process,.
How do I Avoid A Black Turkey?
Turkey has a sensitive skin, and if it’s exposed to smoke for too long, it will turn black. For some people, this isn’t very appealing. There are a couple of things you can do to minimize the darkness on your bird. If you don’t want a really dark turkey, then consider tenting the bird in foil during the last phase of the cook. To do this, place the bird in a pan and tent build a tent with aluminium foil around the turkey. This will shield the bird from any from absorbing too much smoke. The other thing you can do is to avoid using a cherry wood. Cherry will give the meat a dark mahogany color, so if you are not wanting a dark bird, choose another wood such as apple or pecan.
Why is My Smoked Turkey Tough and Dry?
Why Is My Smoked Turkey Rubbery?
How Does Aaron Franklin Smoke Turkey?
Why is My Smoked Turkey Black? 5 Ways To Avoid It
How To Smoke Turkey in a Smoker
What’s the Best Wood For Smoking Turkey?
My Favorite Meat Smoking Tools
Thanks for checking out this article. I hope you learned a few things. Here are some of my favorite tools I use when smoking brisket that may be useful to you. These are affiliate links, so if you decide to purchase any of these products, I’ll earn a commission. But in all honesty, these are the tools I recommend to my family and friends who are just starting out.
Meat Thermometer: There are dozens of fancy thermometers on the market, but I still use my trusty TP20. For around $50, I have a high-quality meat thermometer with two probes, and can track the temperature of my smoker with one probe, and my meat with the other probe. The ThermoPro TP20 is an Amazon Best Seller because it’s the easiest thermometer to operate, is durable, highly accurate, and comes with pre-programmed meat settings.
Instant Read Thermometer: Arguably, the second most important tool you need is a fast and accurate instant-read thermometer. These tools play an important role in the latter stages of the cook when the meat needs regular checking in multiple areas. I use the ThermoPro TP19 because it can do everything a ThermaPen can do, but for a fraction of the cost. You can check out the TP19 on Amazon here.
Wireless Thermometer: The latest thermometers on the market have no wires and can be controlled by wi-fi via your phone. Airprobe 3 is the best of this technology.
Butcher Paper: Wrapping brisket in butcher paper has become a huge trend in barbeque thanks to Aaron Franklin. Wrapping your brisket in paper will give you a nice brisket bark. However, you can’t just use any old paper, it has to be unwaxed, food grade paper. You can find it on Amazon here.
Advanced Thermometer and Automatic Temperature Controller: Once you’re ready to take things seriously, the FireBoard 2 Drive is a six-channel Bluetooth/Wi-Fi thermometer that can monitor up to 6 pieces of meat, control and graph your cook sessions on your smartphone, and attaches to an an automatic blower that will convert your charcoal smoker to a set-and-forget. This is one of the most advanced meat thermometers on the market. You can check it out on the FireBoard website here.